Contents
Setting Up Your Profile – Employee Details
– Emergency Contact
– Payment Details
– Split Payment Distributions
– Superannuation
– Tax File Number
Payroll System Overview
Statement of Service
Completing your Timesheet
– Nightshift Entries
– Overtime or Callouts
– Higher Duties
– Aged Care Award
– Adding Allowances (Including On-Call)
Submitting Expenses
Accessing Pay Advice (Payslips)
– Reading Your Payslip – Nursing
– Reading Your Payslip – Aged Care
Mycmr Login Portal
1. You can access the portal via my.cmr.com.au.
2. Your login details are sent via email from payroll@cmr.com.au
3. Your username is your email
4. Create your password by following the link
Tip: Please check your junk and add to safe sender list if needed
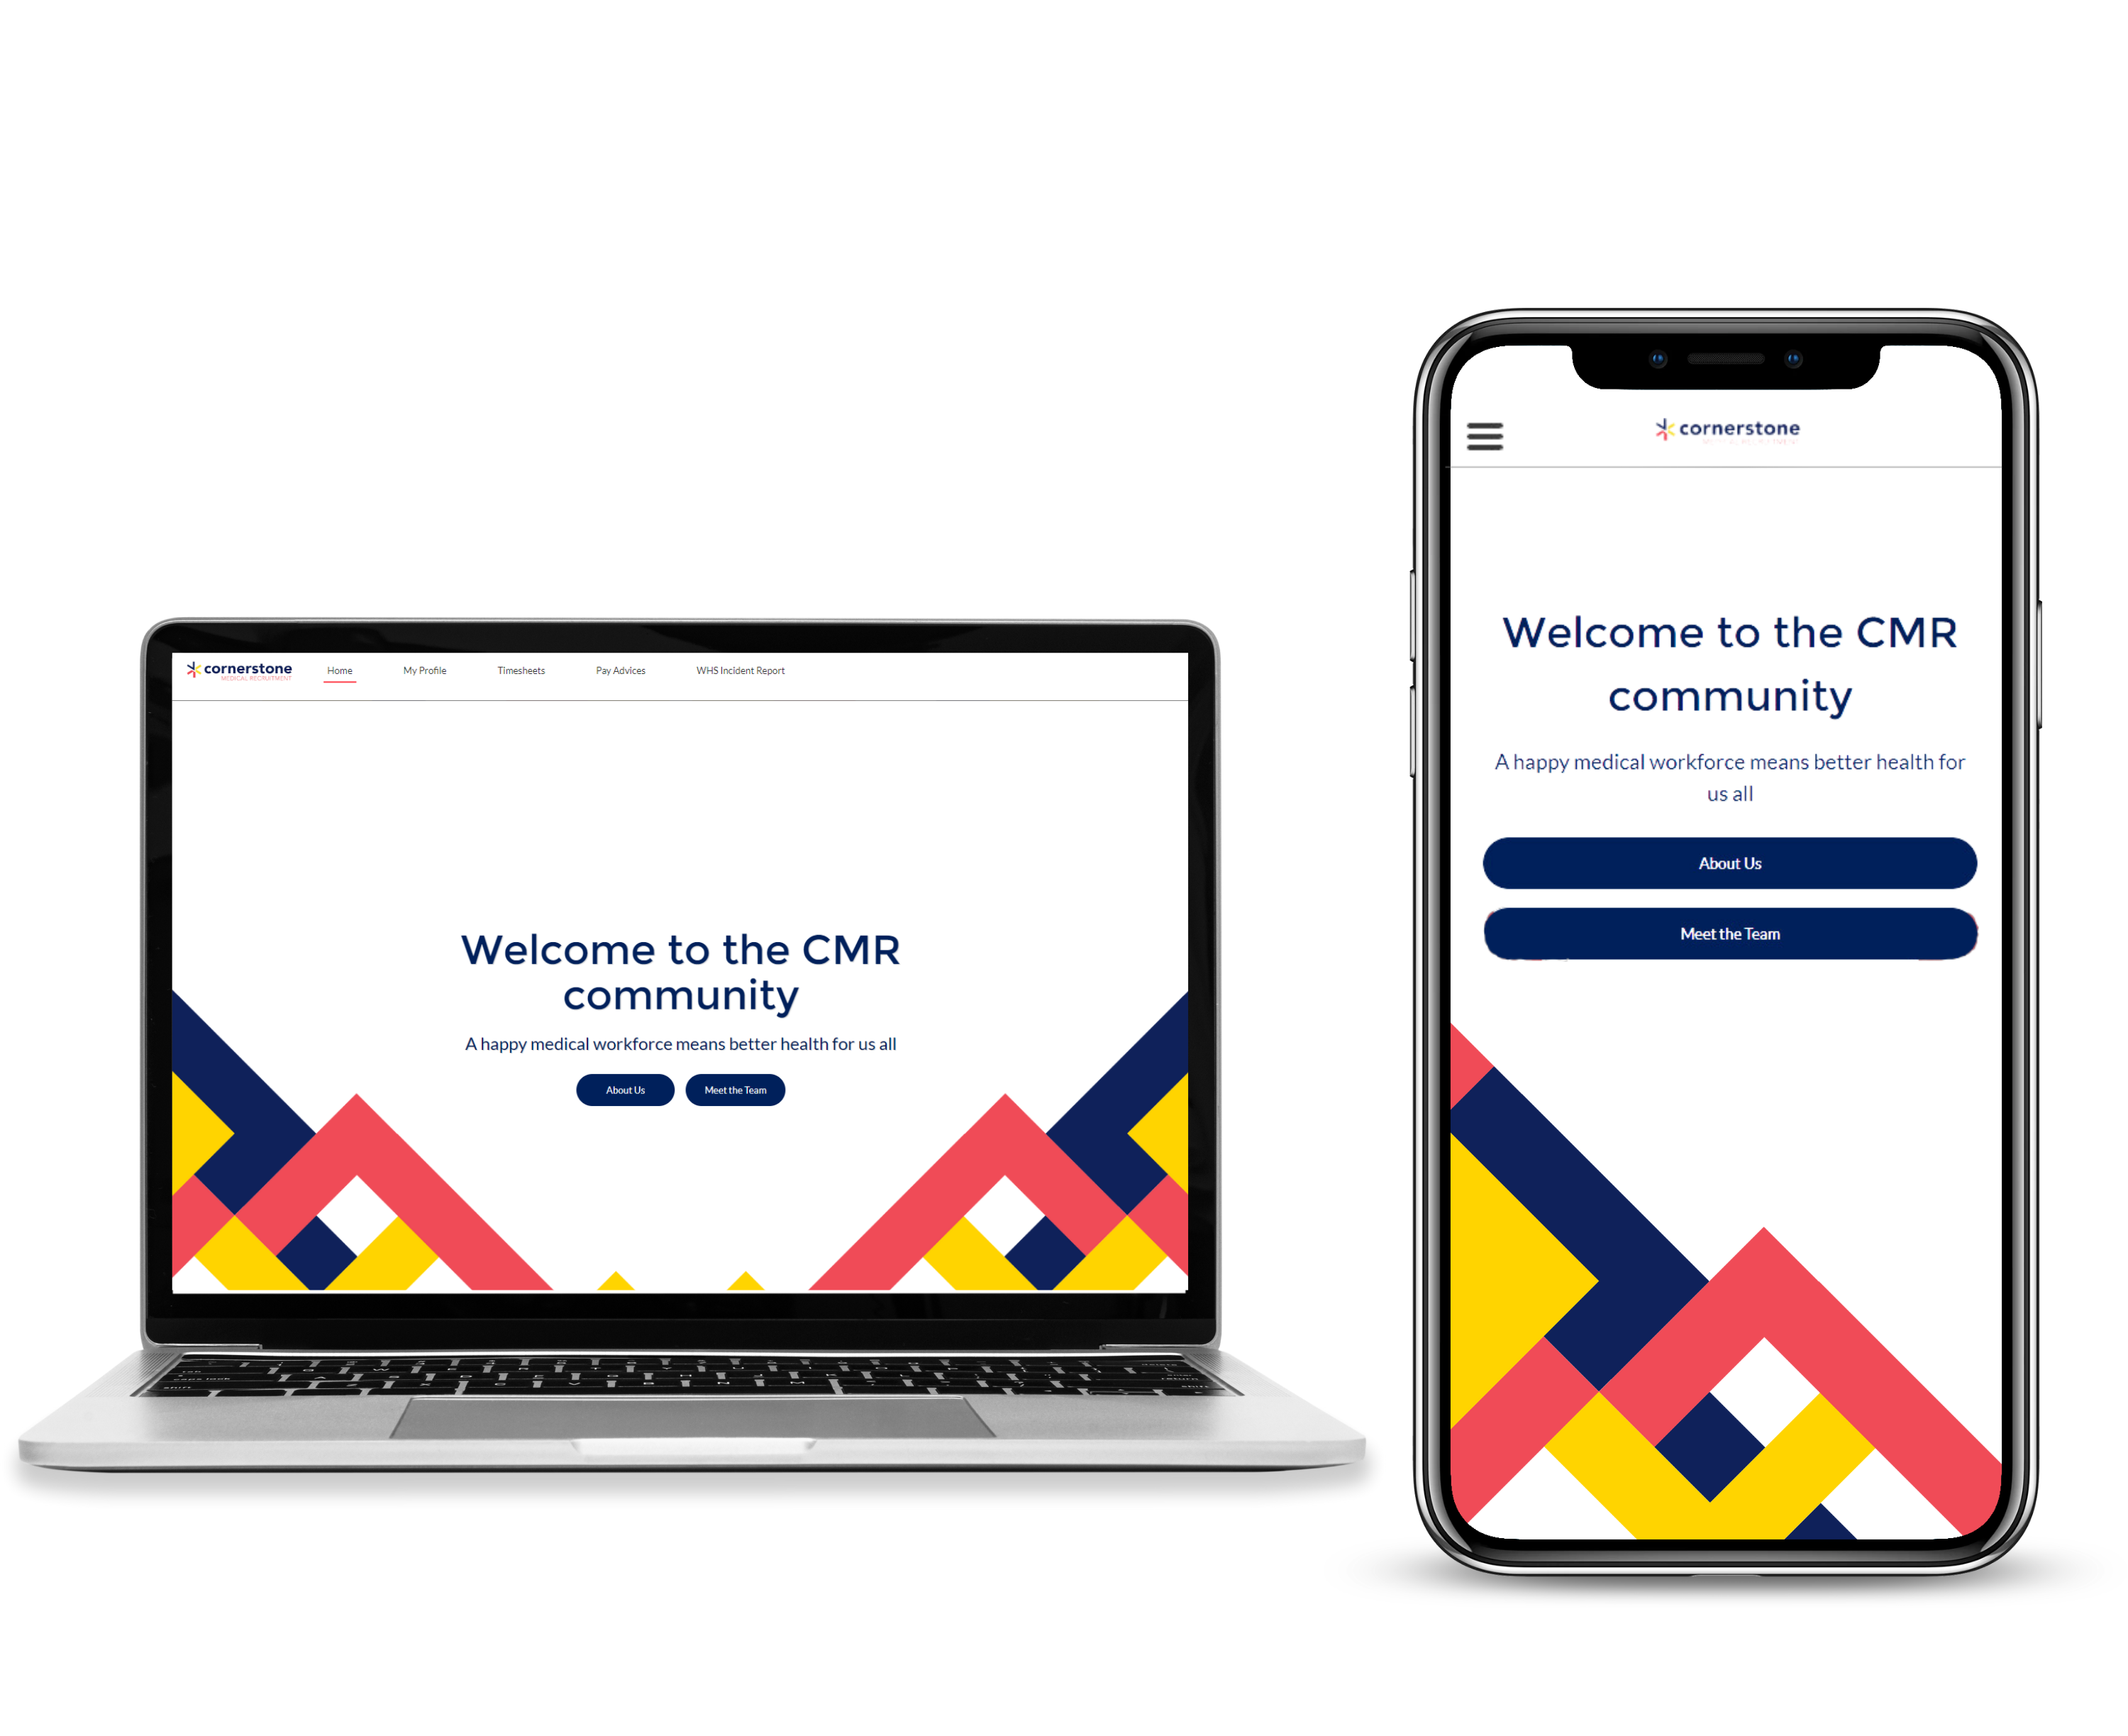
Once you are logged in, you will land on the main menu page of mycmr.
Access your profile and timesheets in the menu bar on desktop or by tapping on the three horizontal, stacked lines on mobile.
Setting Up Your Profile – Employee Details
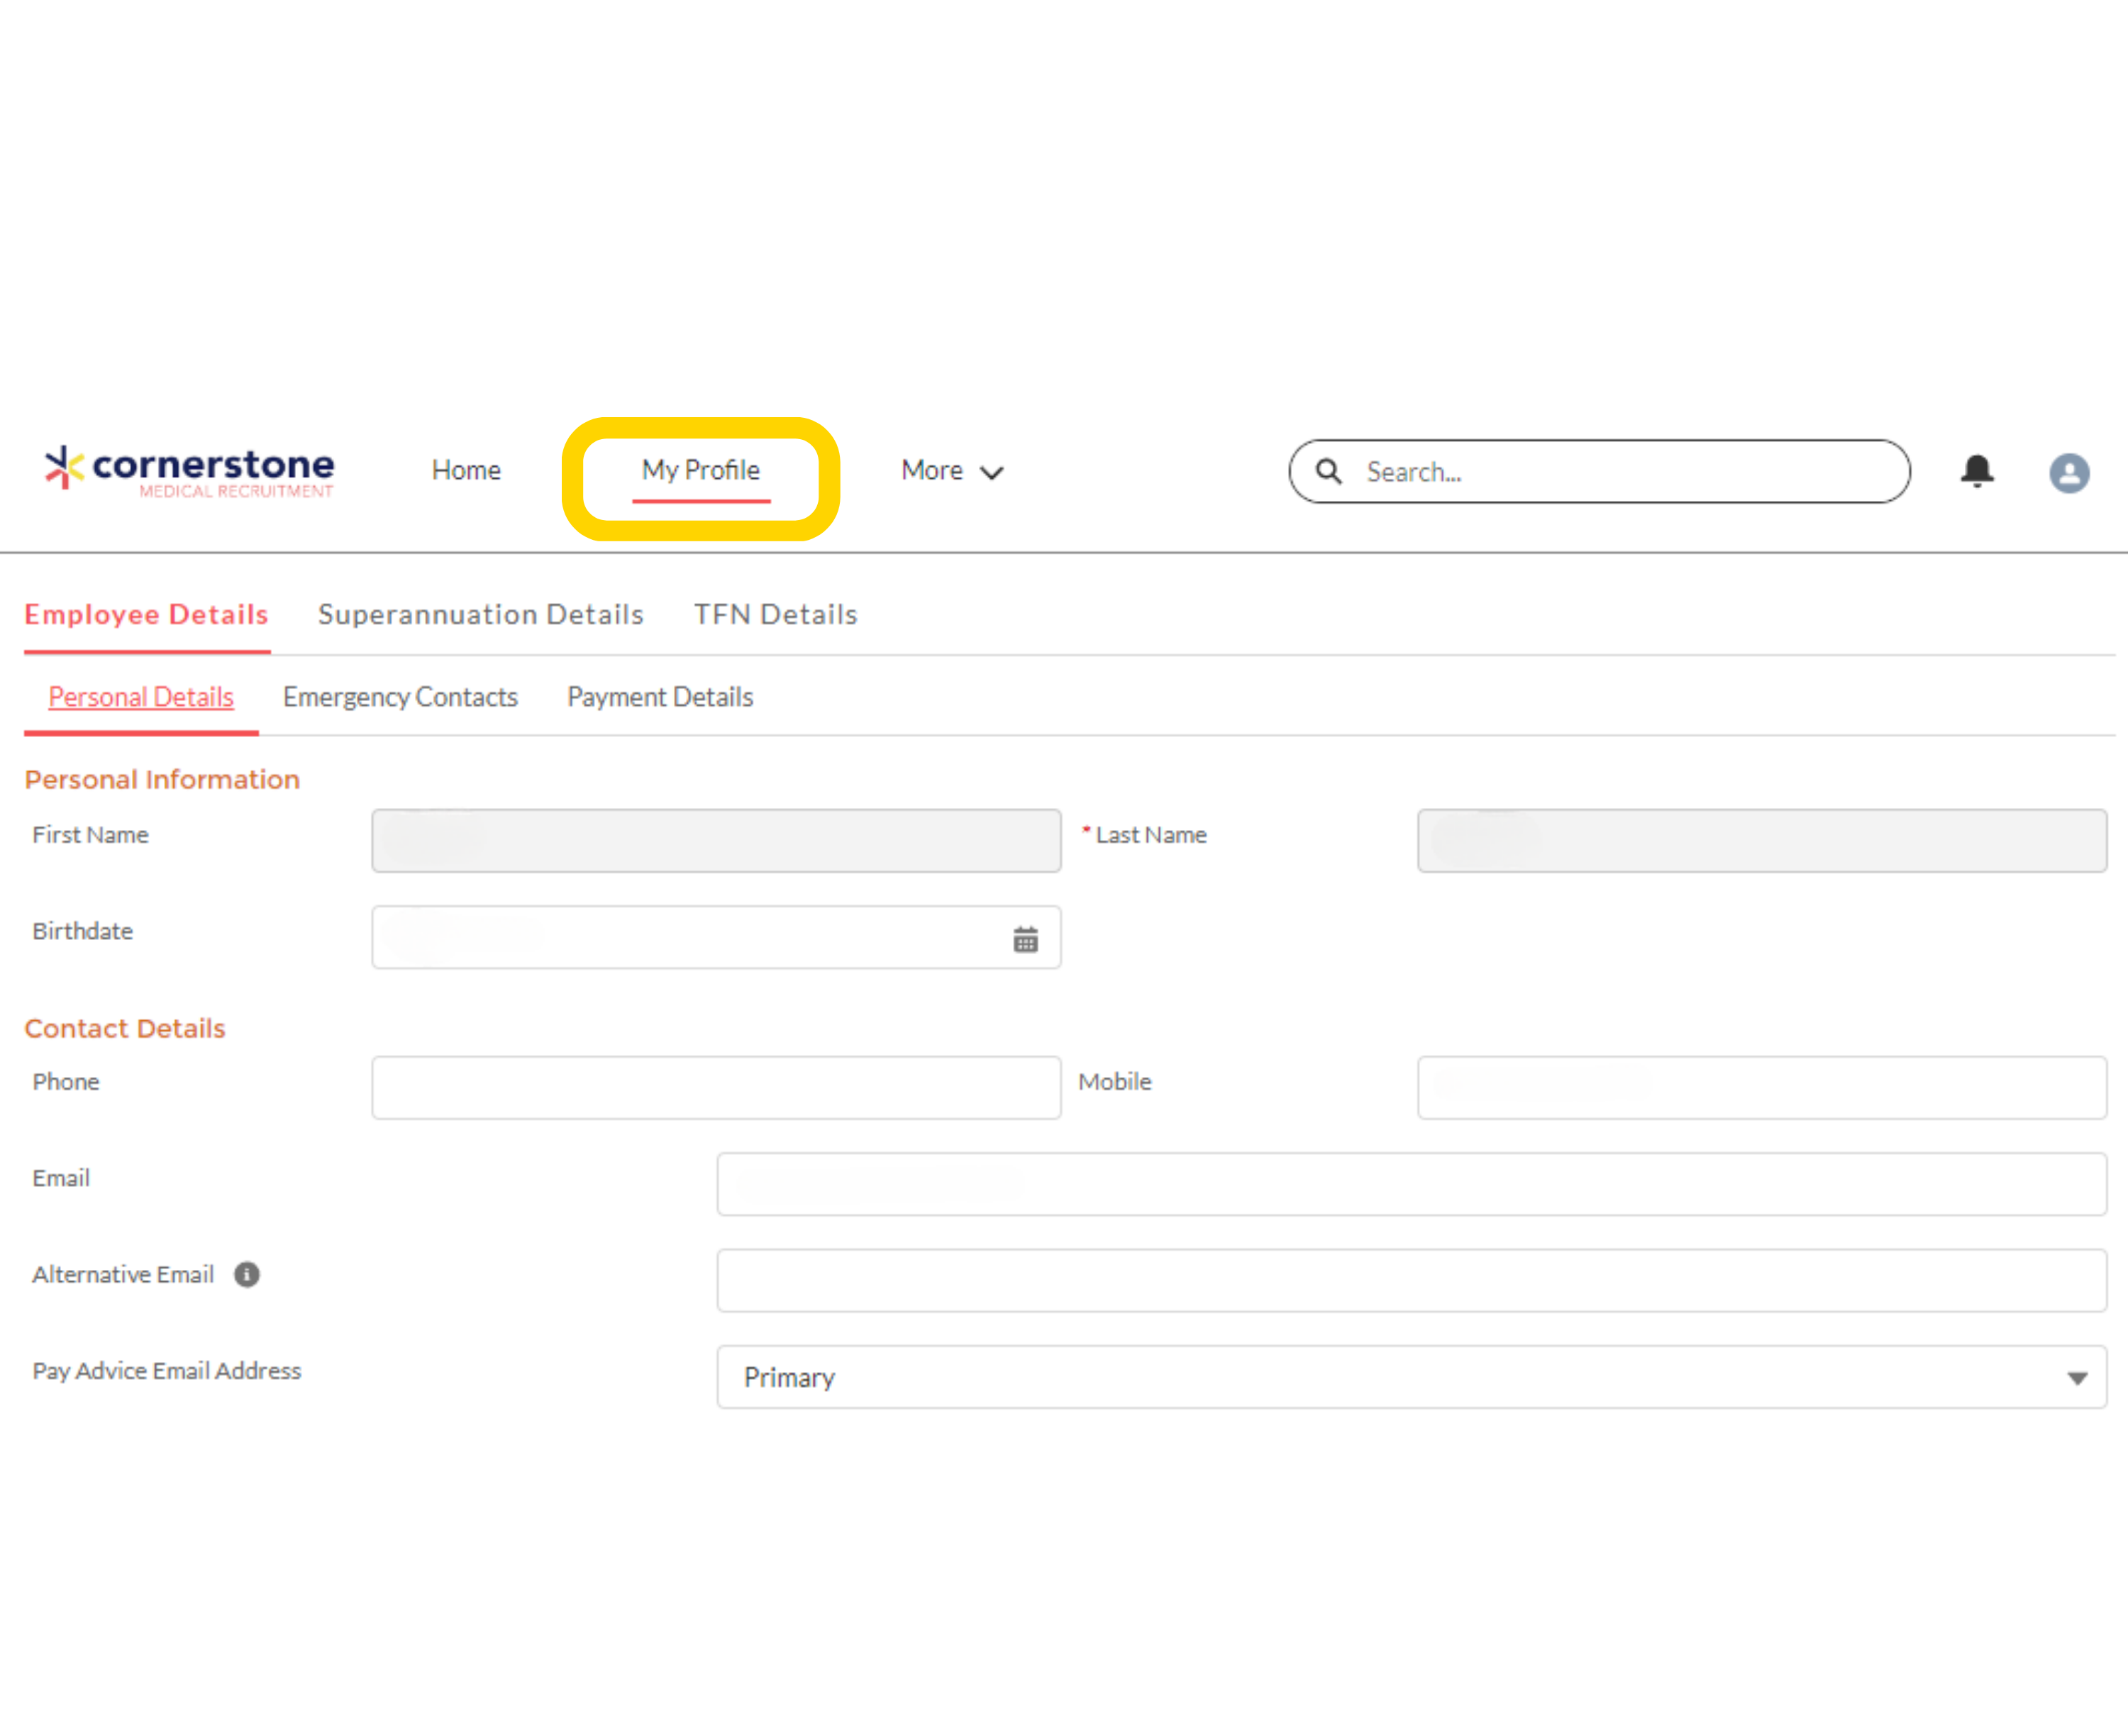
Select ‘My Profile’ and complete all necessary fields in ‘Personal Details.’
Back to top
My Profile – Emergency Contact
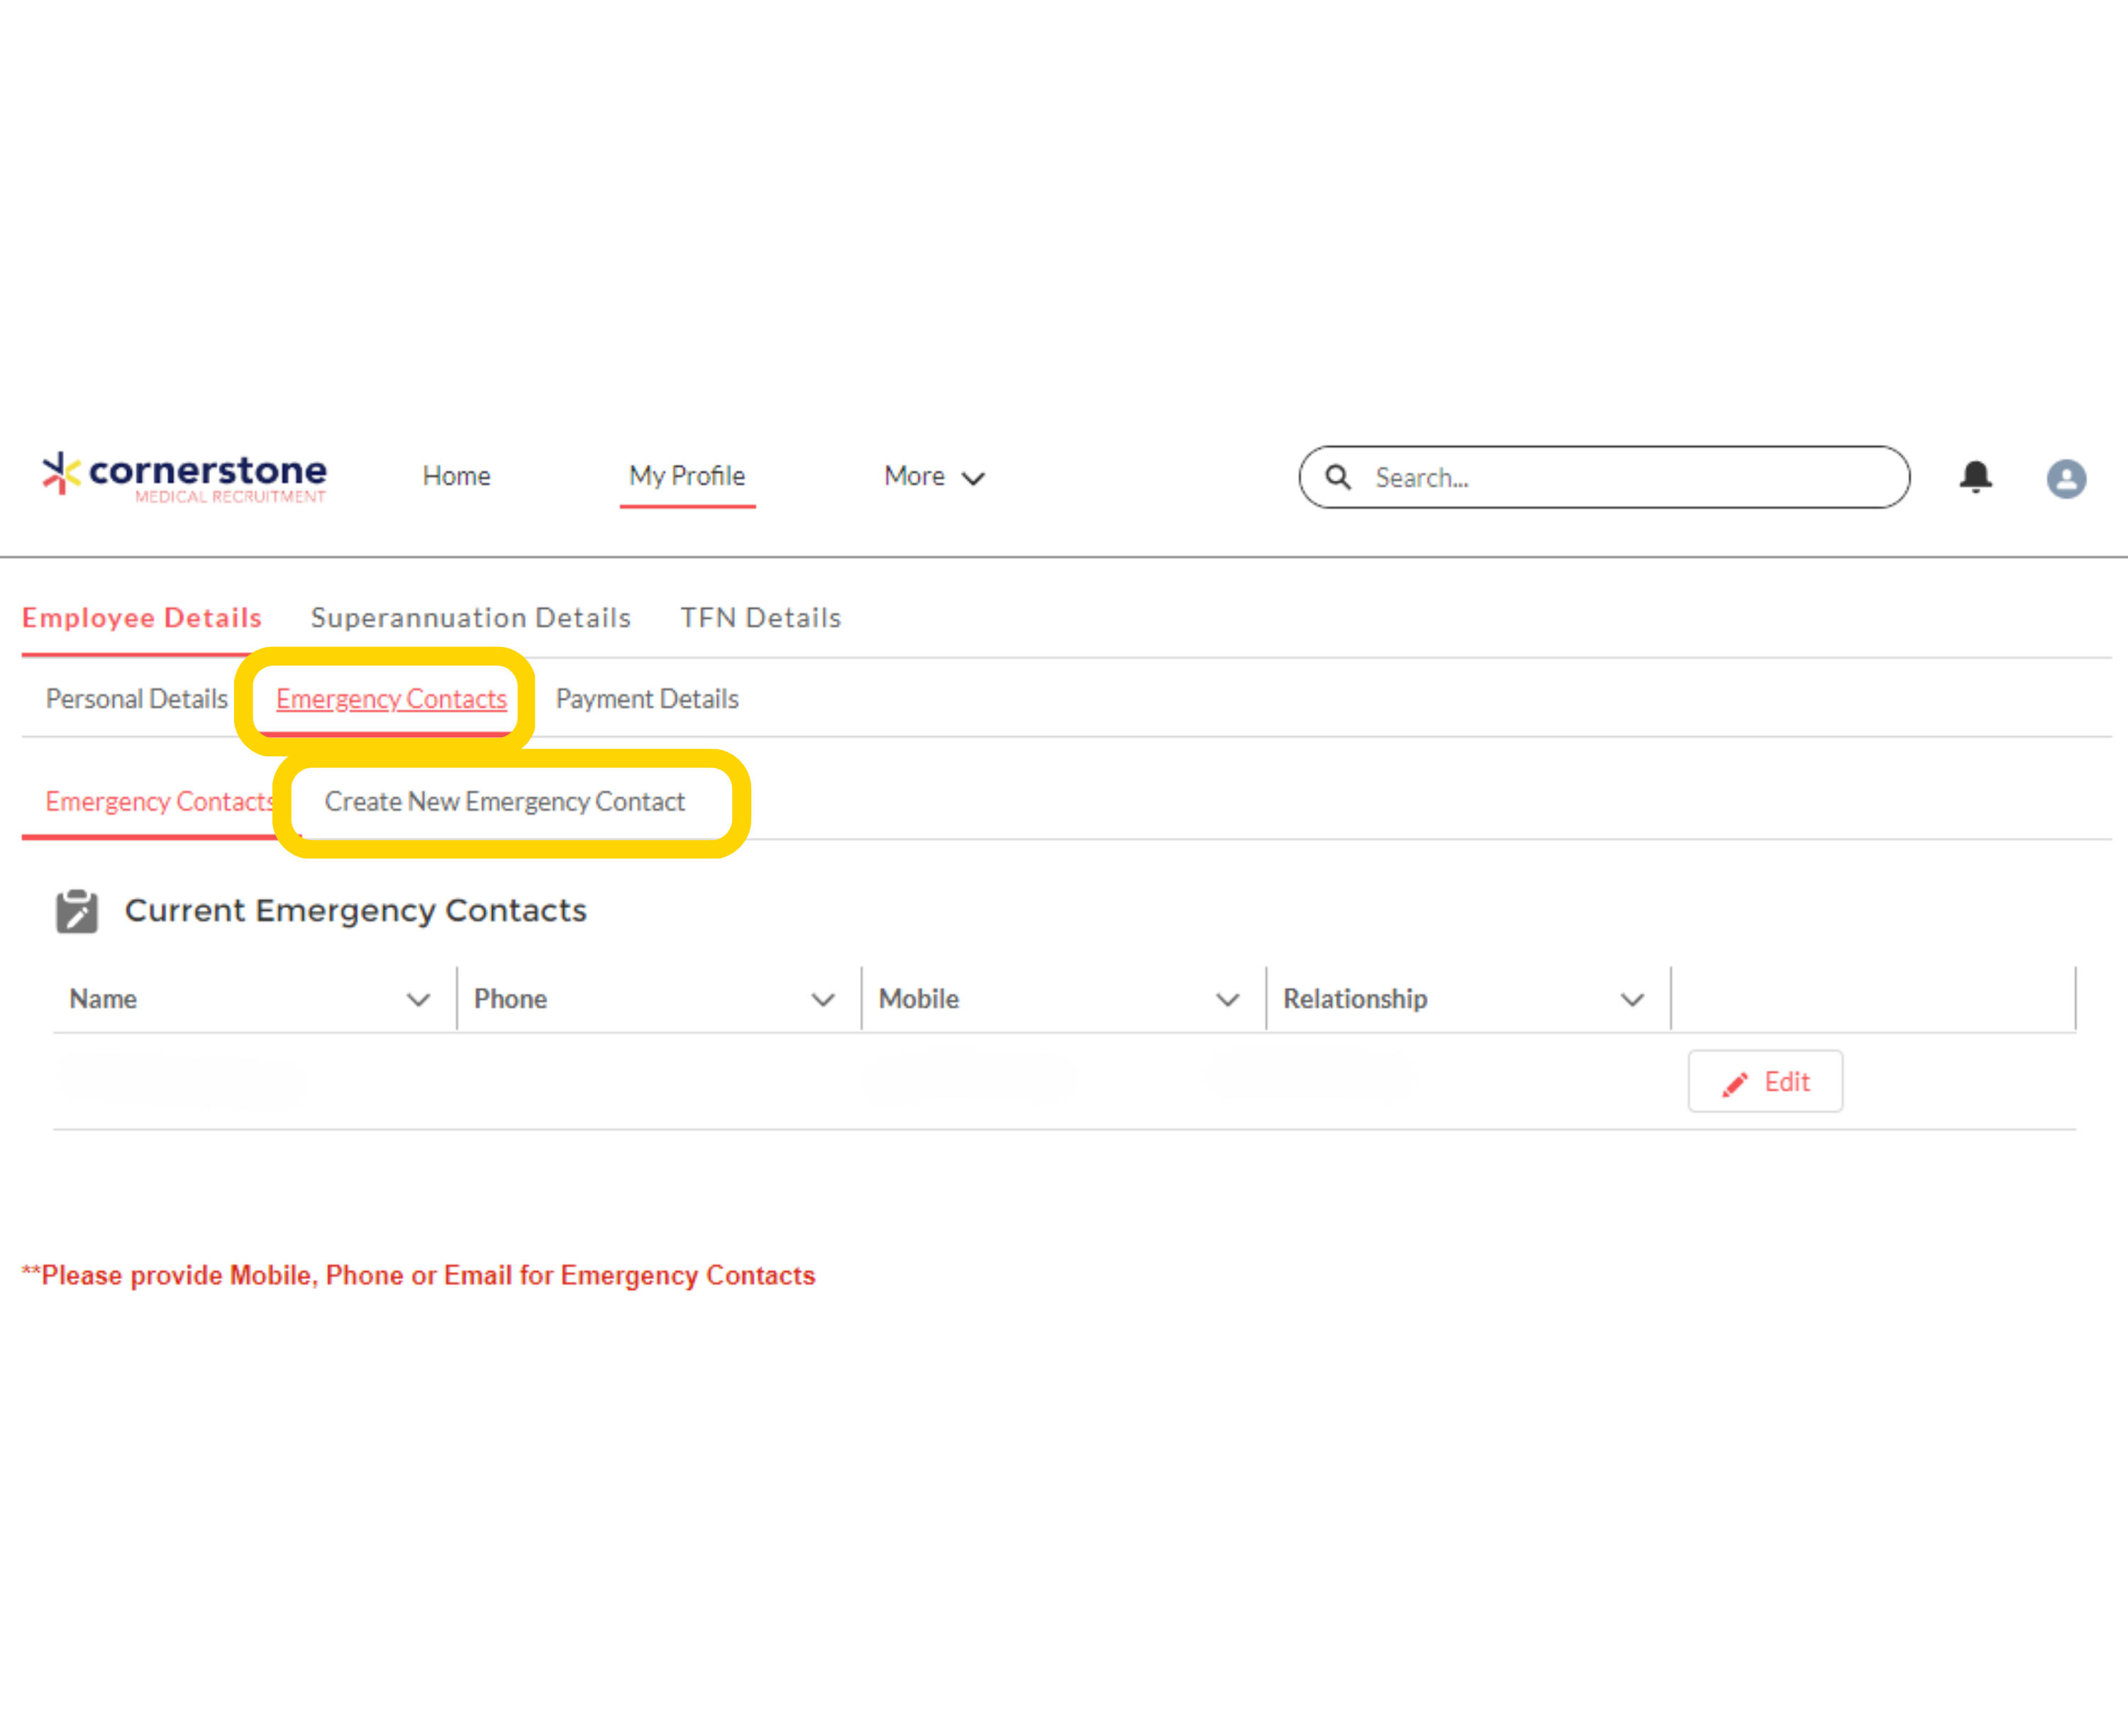
When first logging into mycmr, you will be asked to add details of your emergency contact.
To add or amend your emergency contact details:
1. Select ‘Emergency Contacts’
2. Select ‘Create New Emergency Contact’ and complete mandatory fields.
Back to top
My Profile – Payment Details
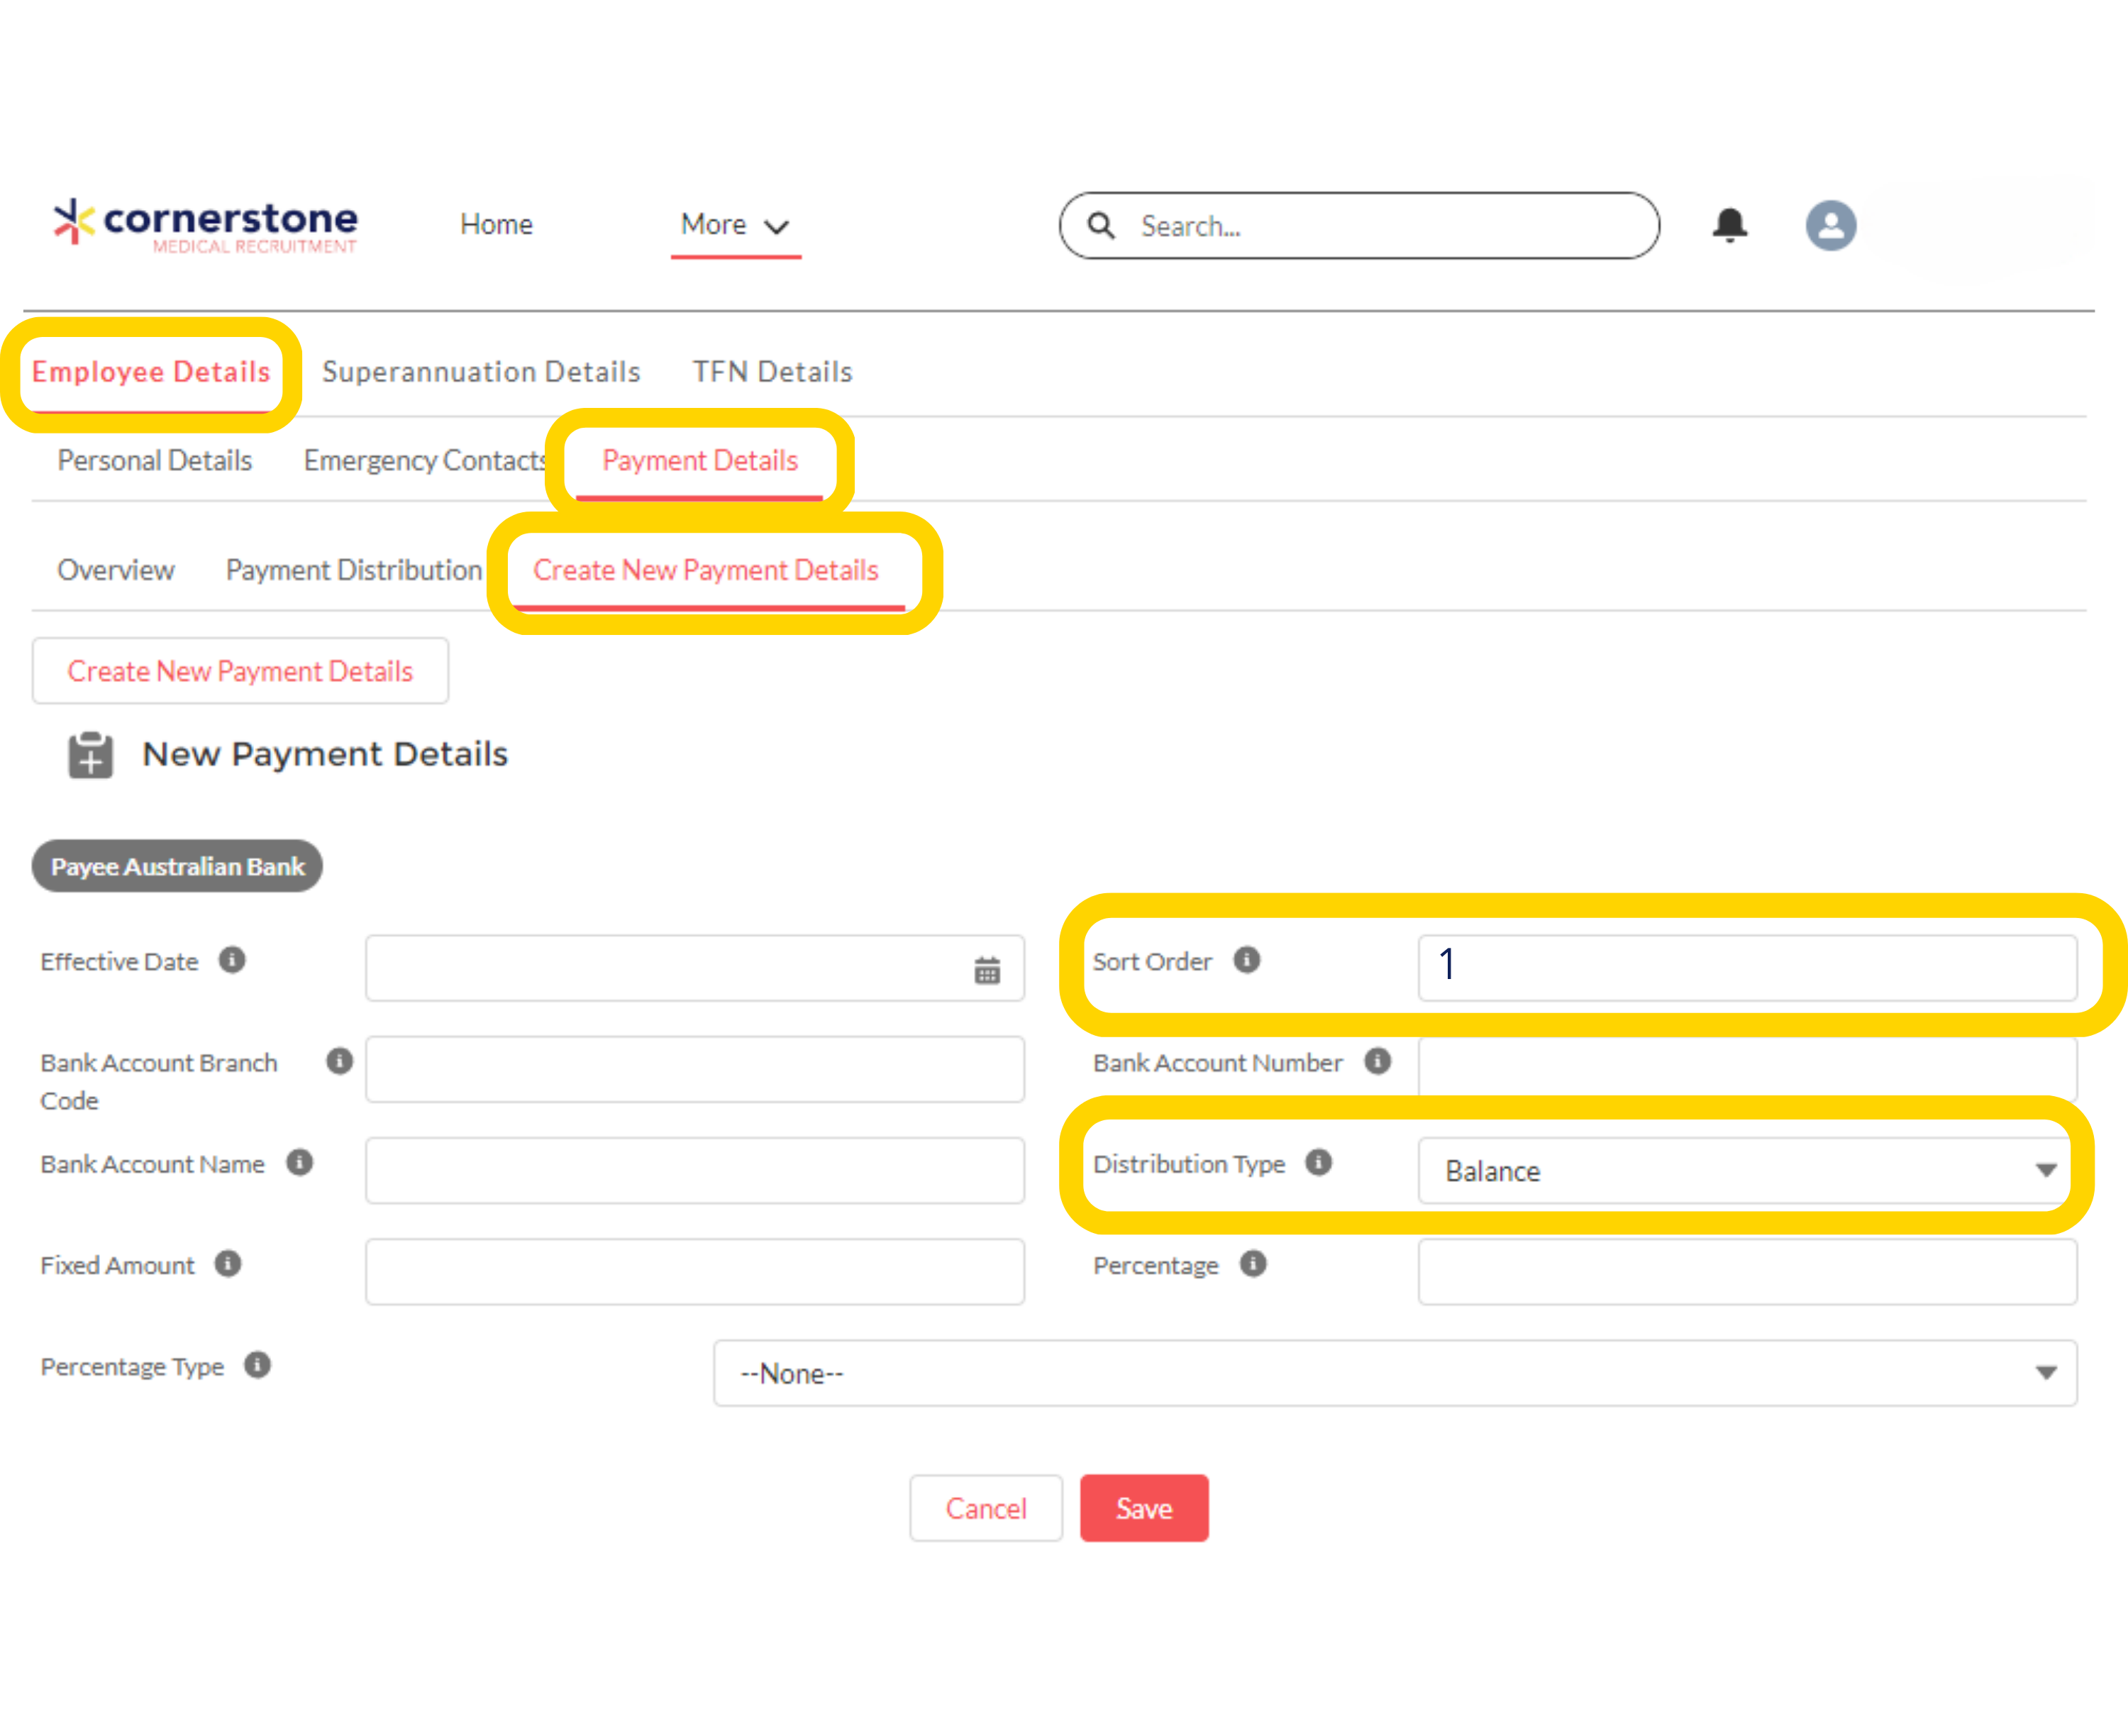
1. Select ‘Employee Details’ > ‘Payment Details’ > ‘Create New Payment Details.’
2. Enter payment information.
3. For one bank account, ‘Sort Order’ type ‘1’ and ‘Distribution’ select ‘Balance.’
Back to top
My Profile – Split Payment Distributions
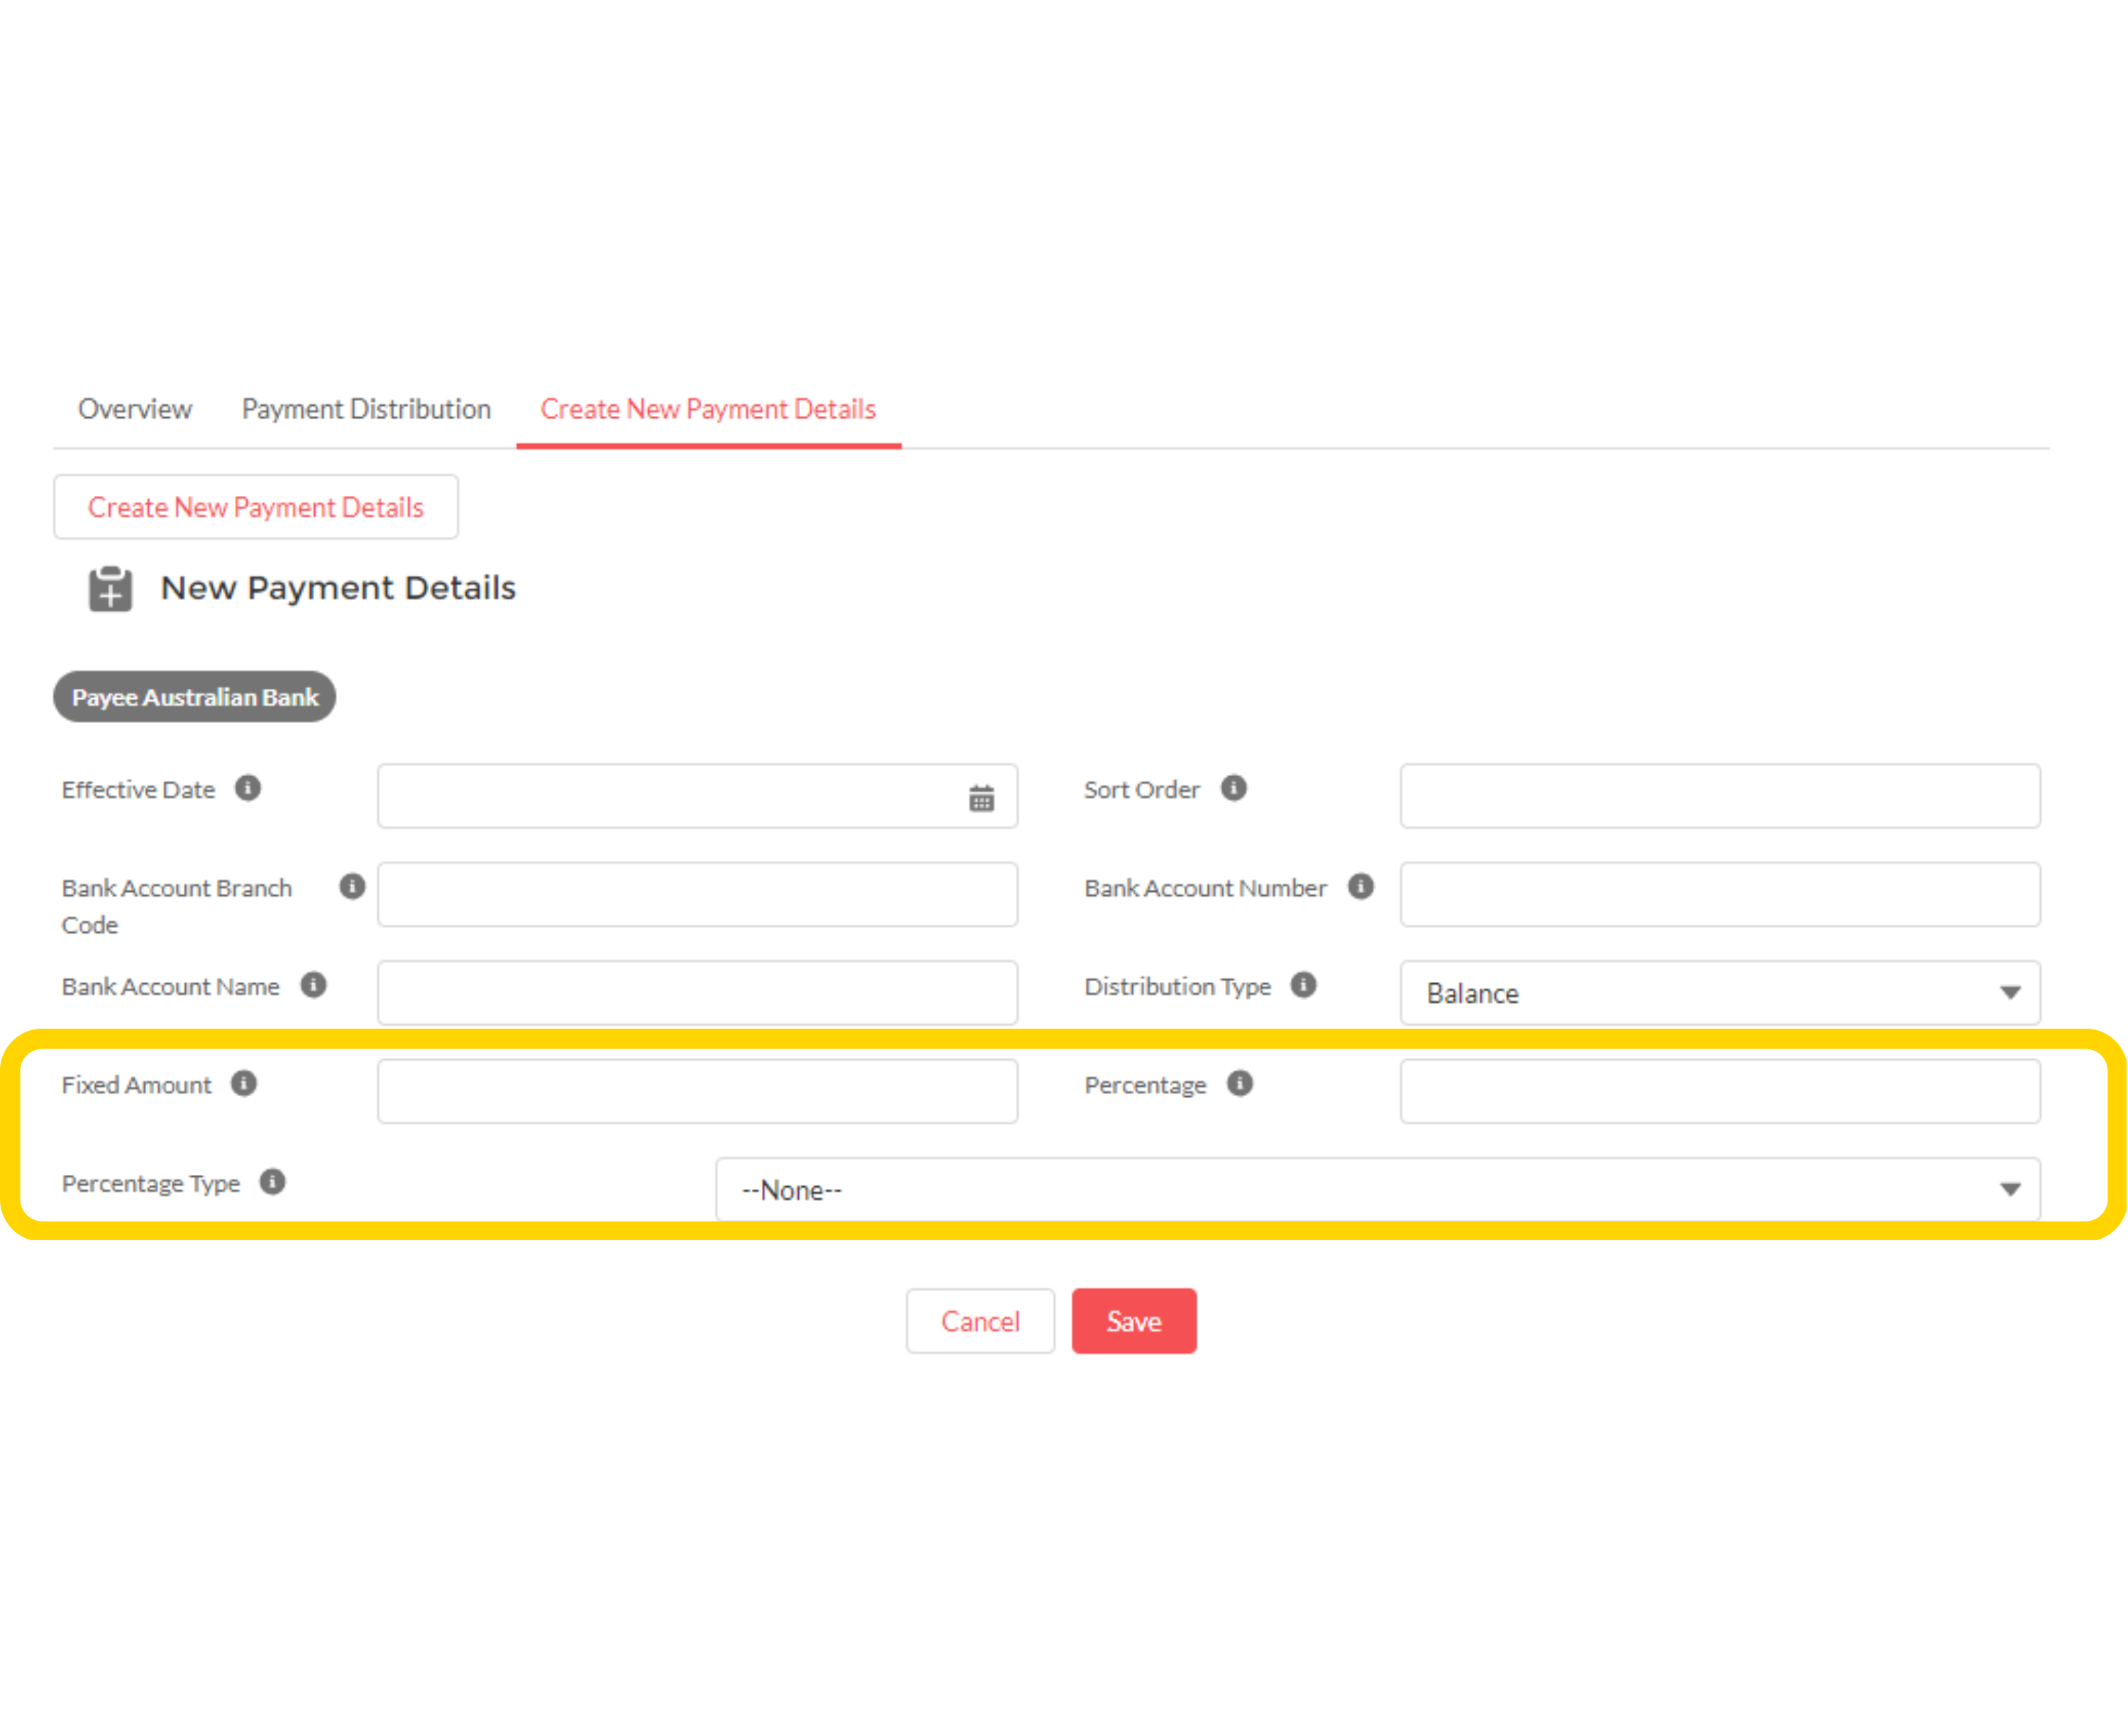
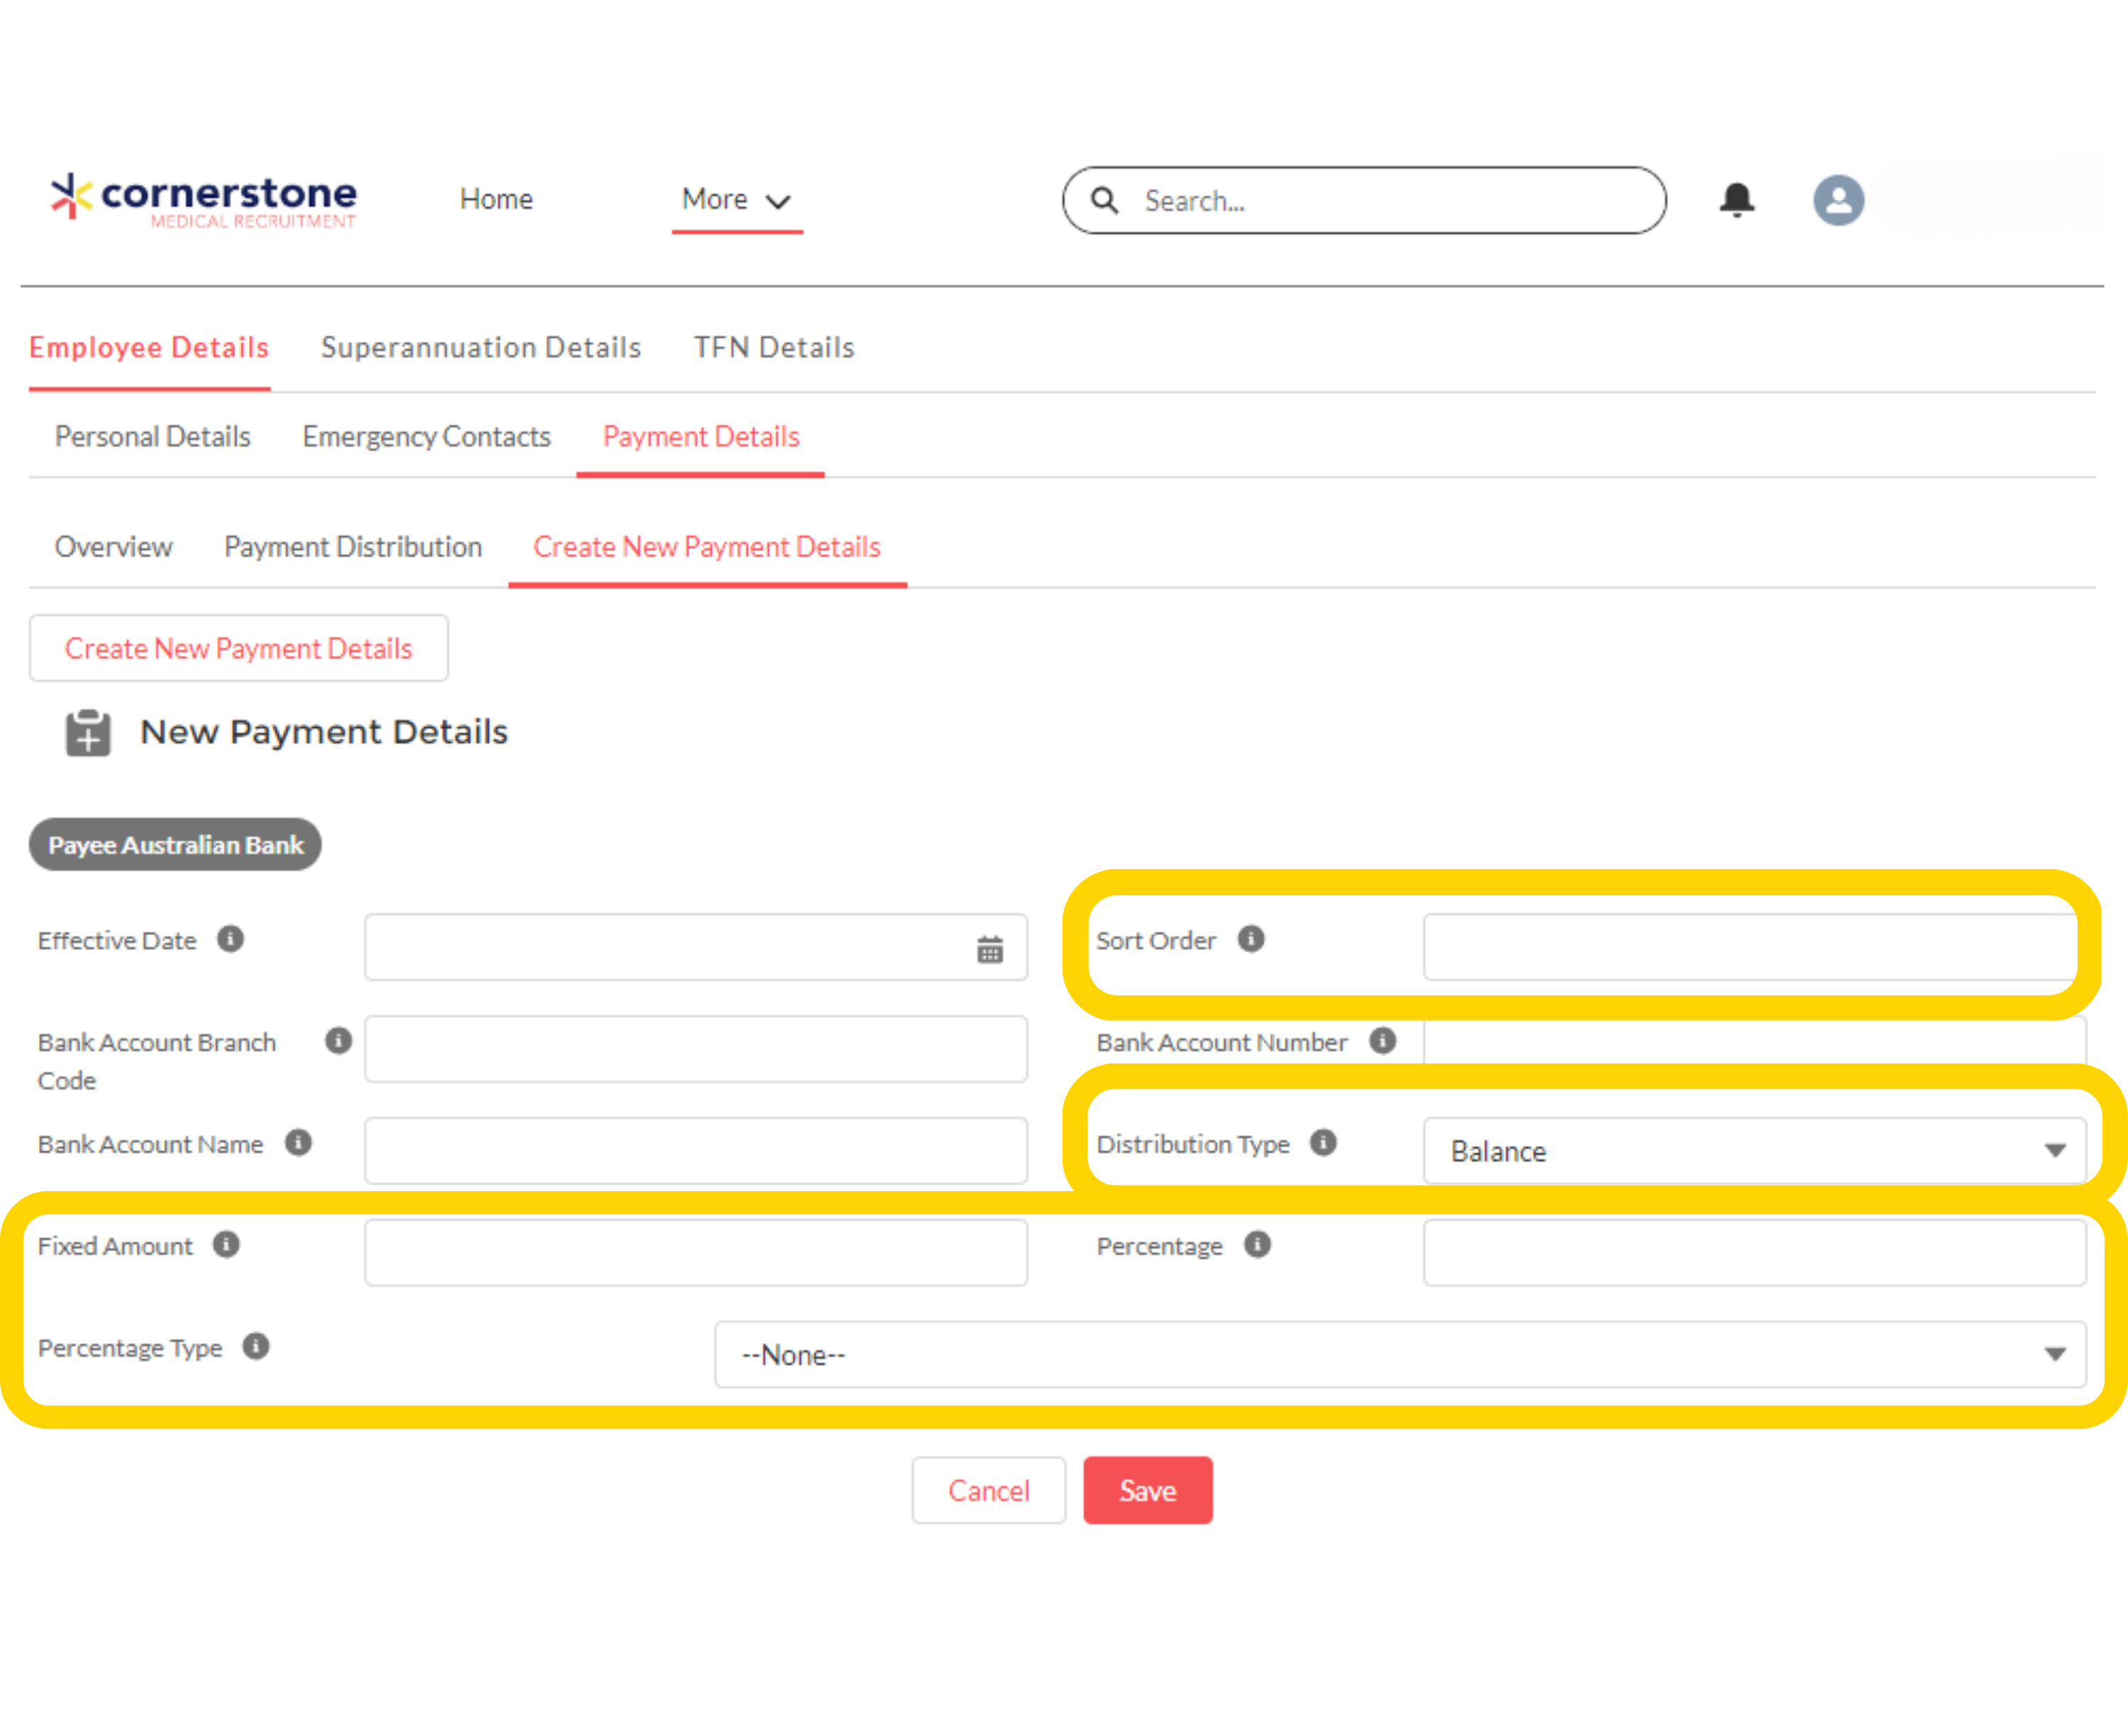
In mycmr you are able to distribute payments to different accounts as a fixed or percentage amount. The next image will detail how to create split payments.
My Profile – Split Payment Distributions
Bank 1: ‘Create New Details’ > enter fixed or percentage amount > ‘Sort Order’ 1 > select distribution amount.
Bank 2: Create New Details > ‘Sort Order’ 2 > ‘Distribution Type’ as ‘Balance.’
Back to top
My Profile – Superannuation
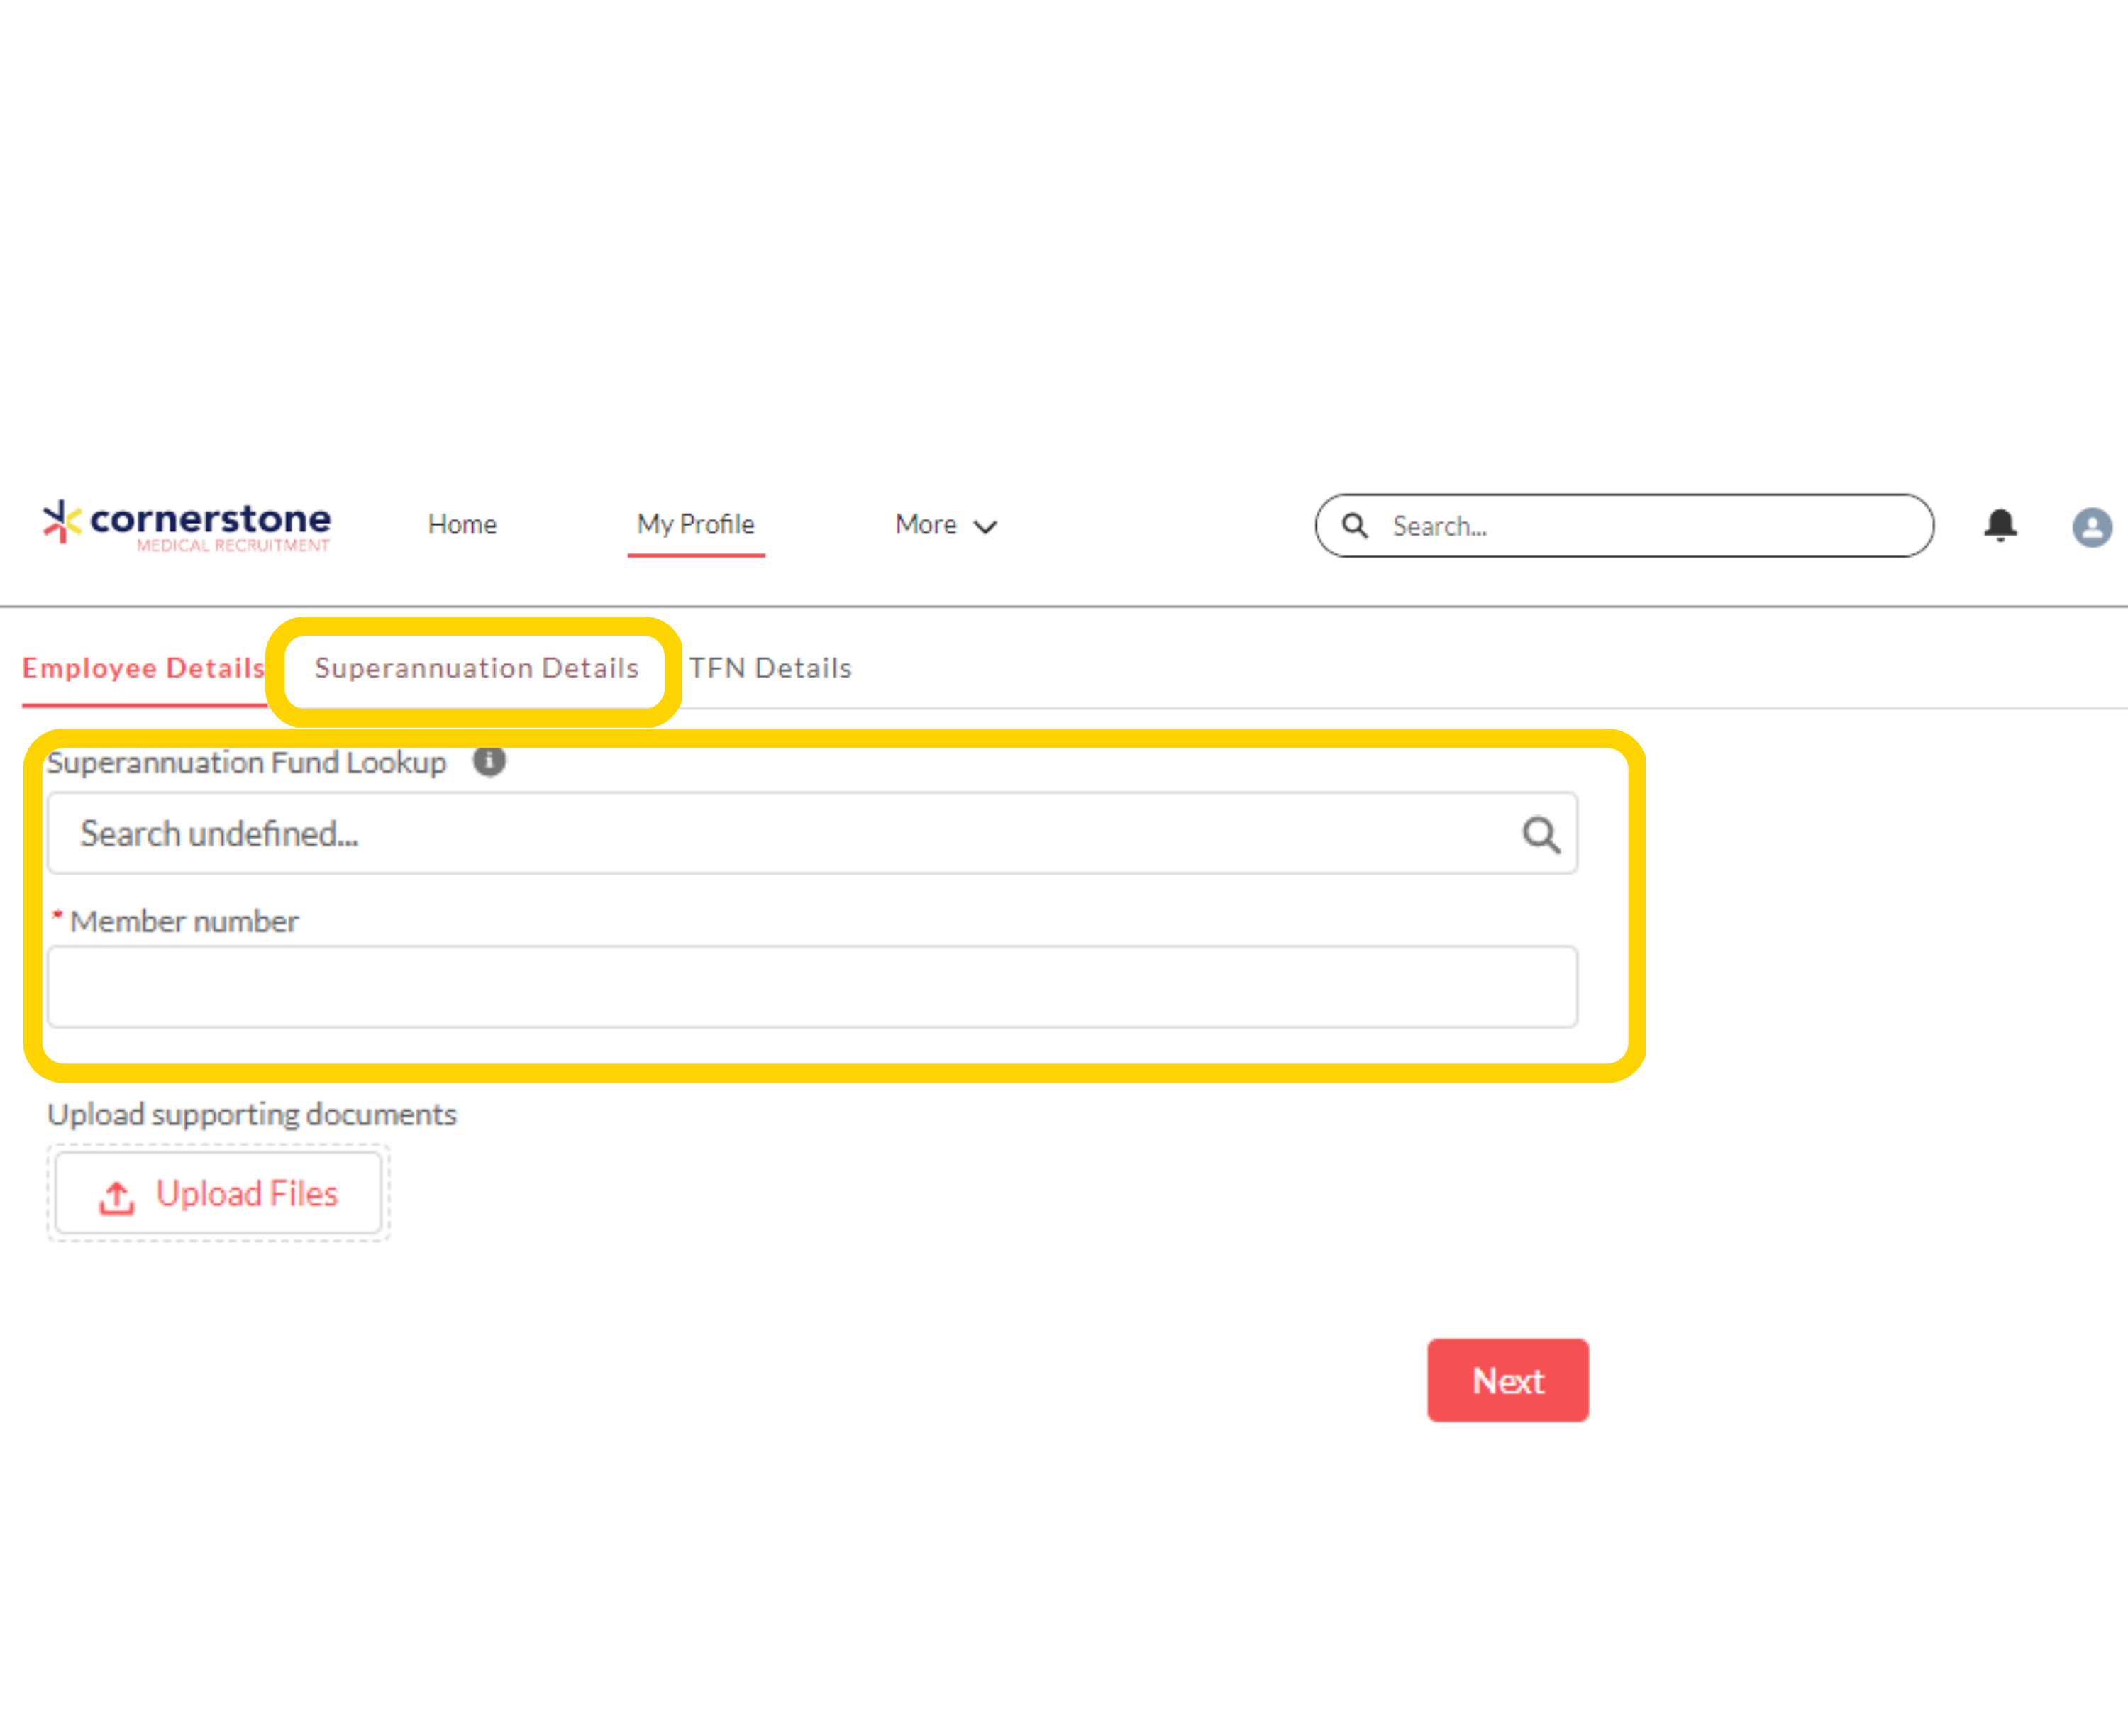
Select ‘Superannuation Details.’
Tip: You will need to look up your Super Fund and have your membership number ready!
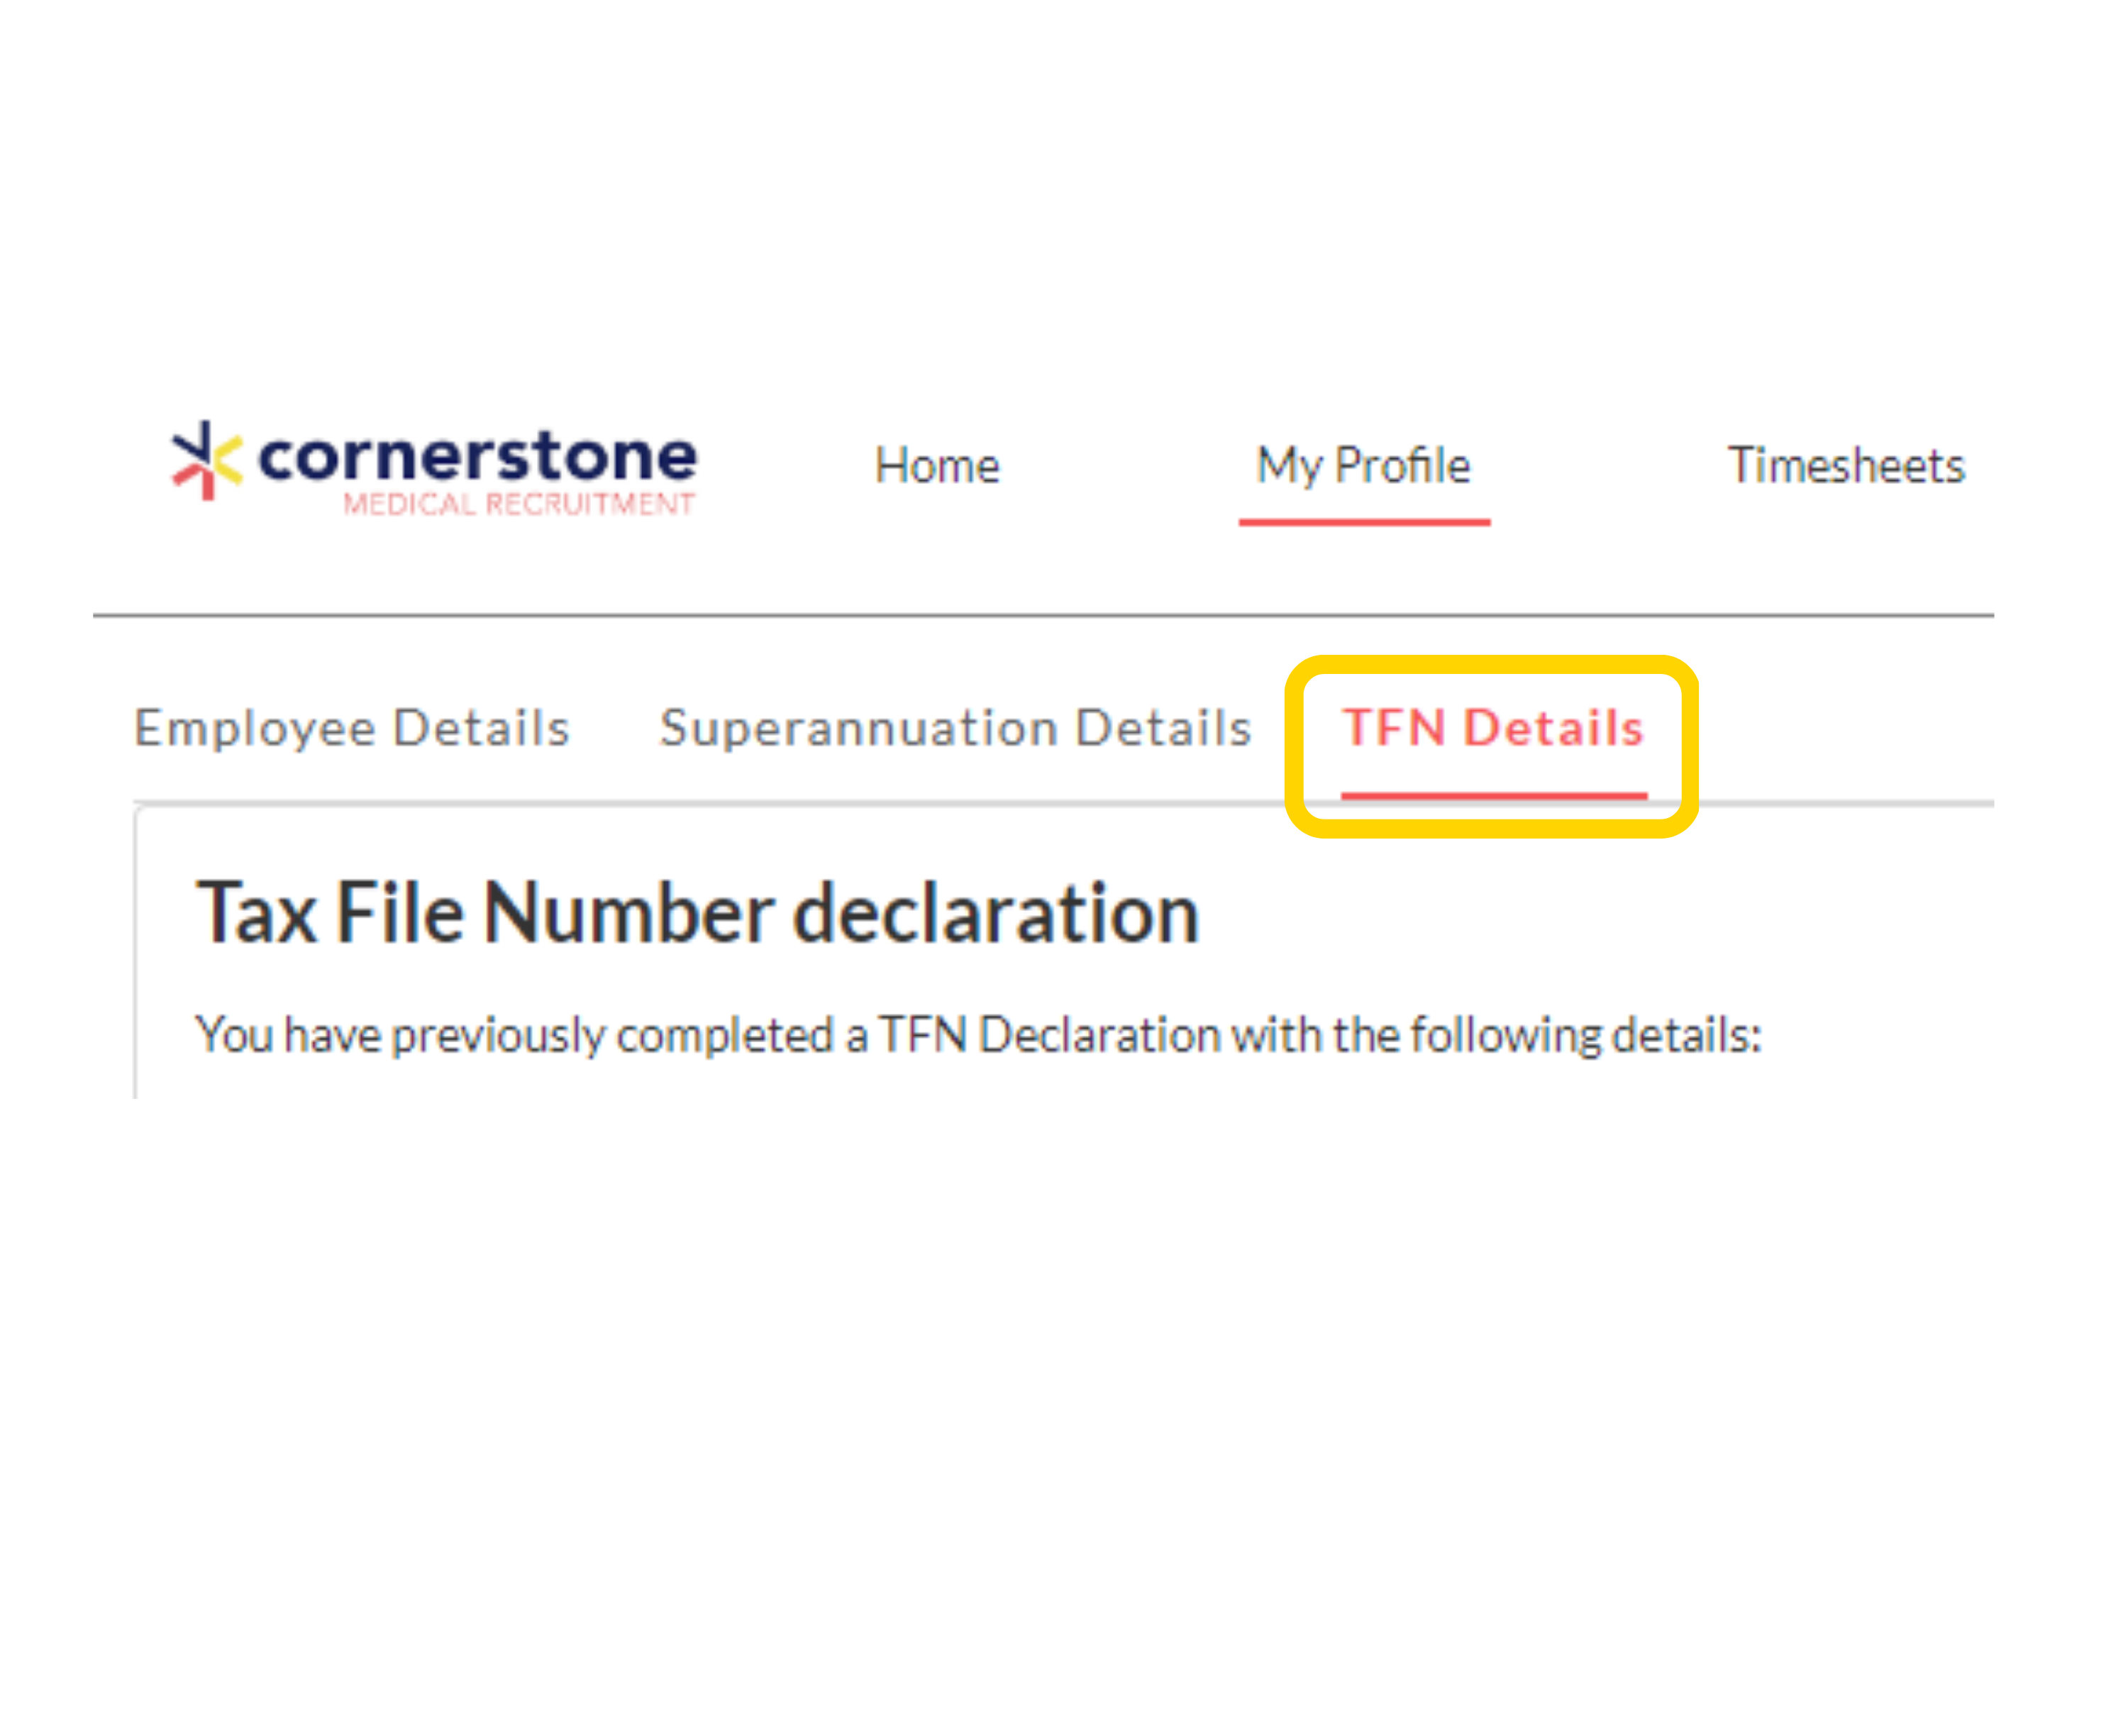
My Profile – Tax File Number
1. Select ‘TFN Details.’
2. Follow the prompts to complete your Tax File Number Declaration.
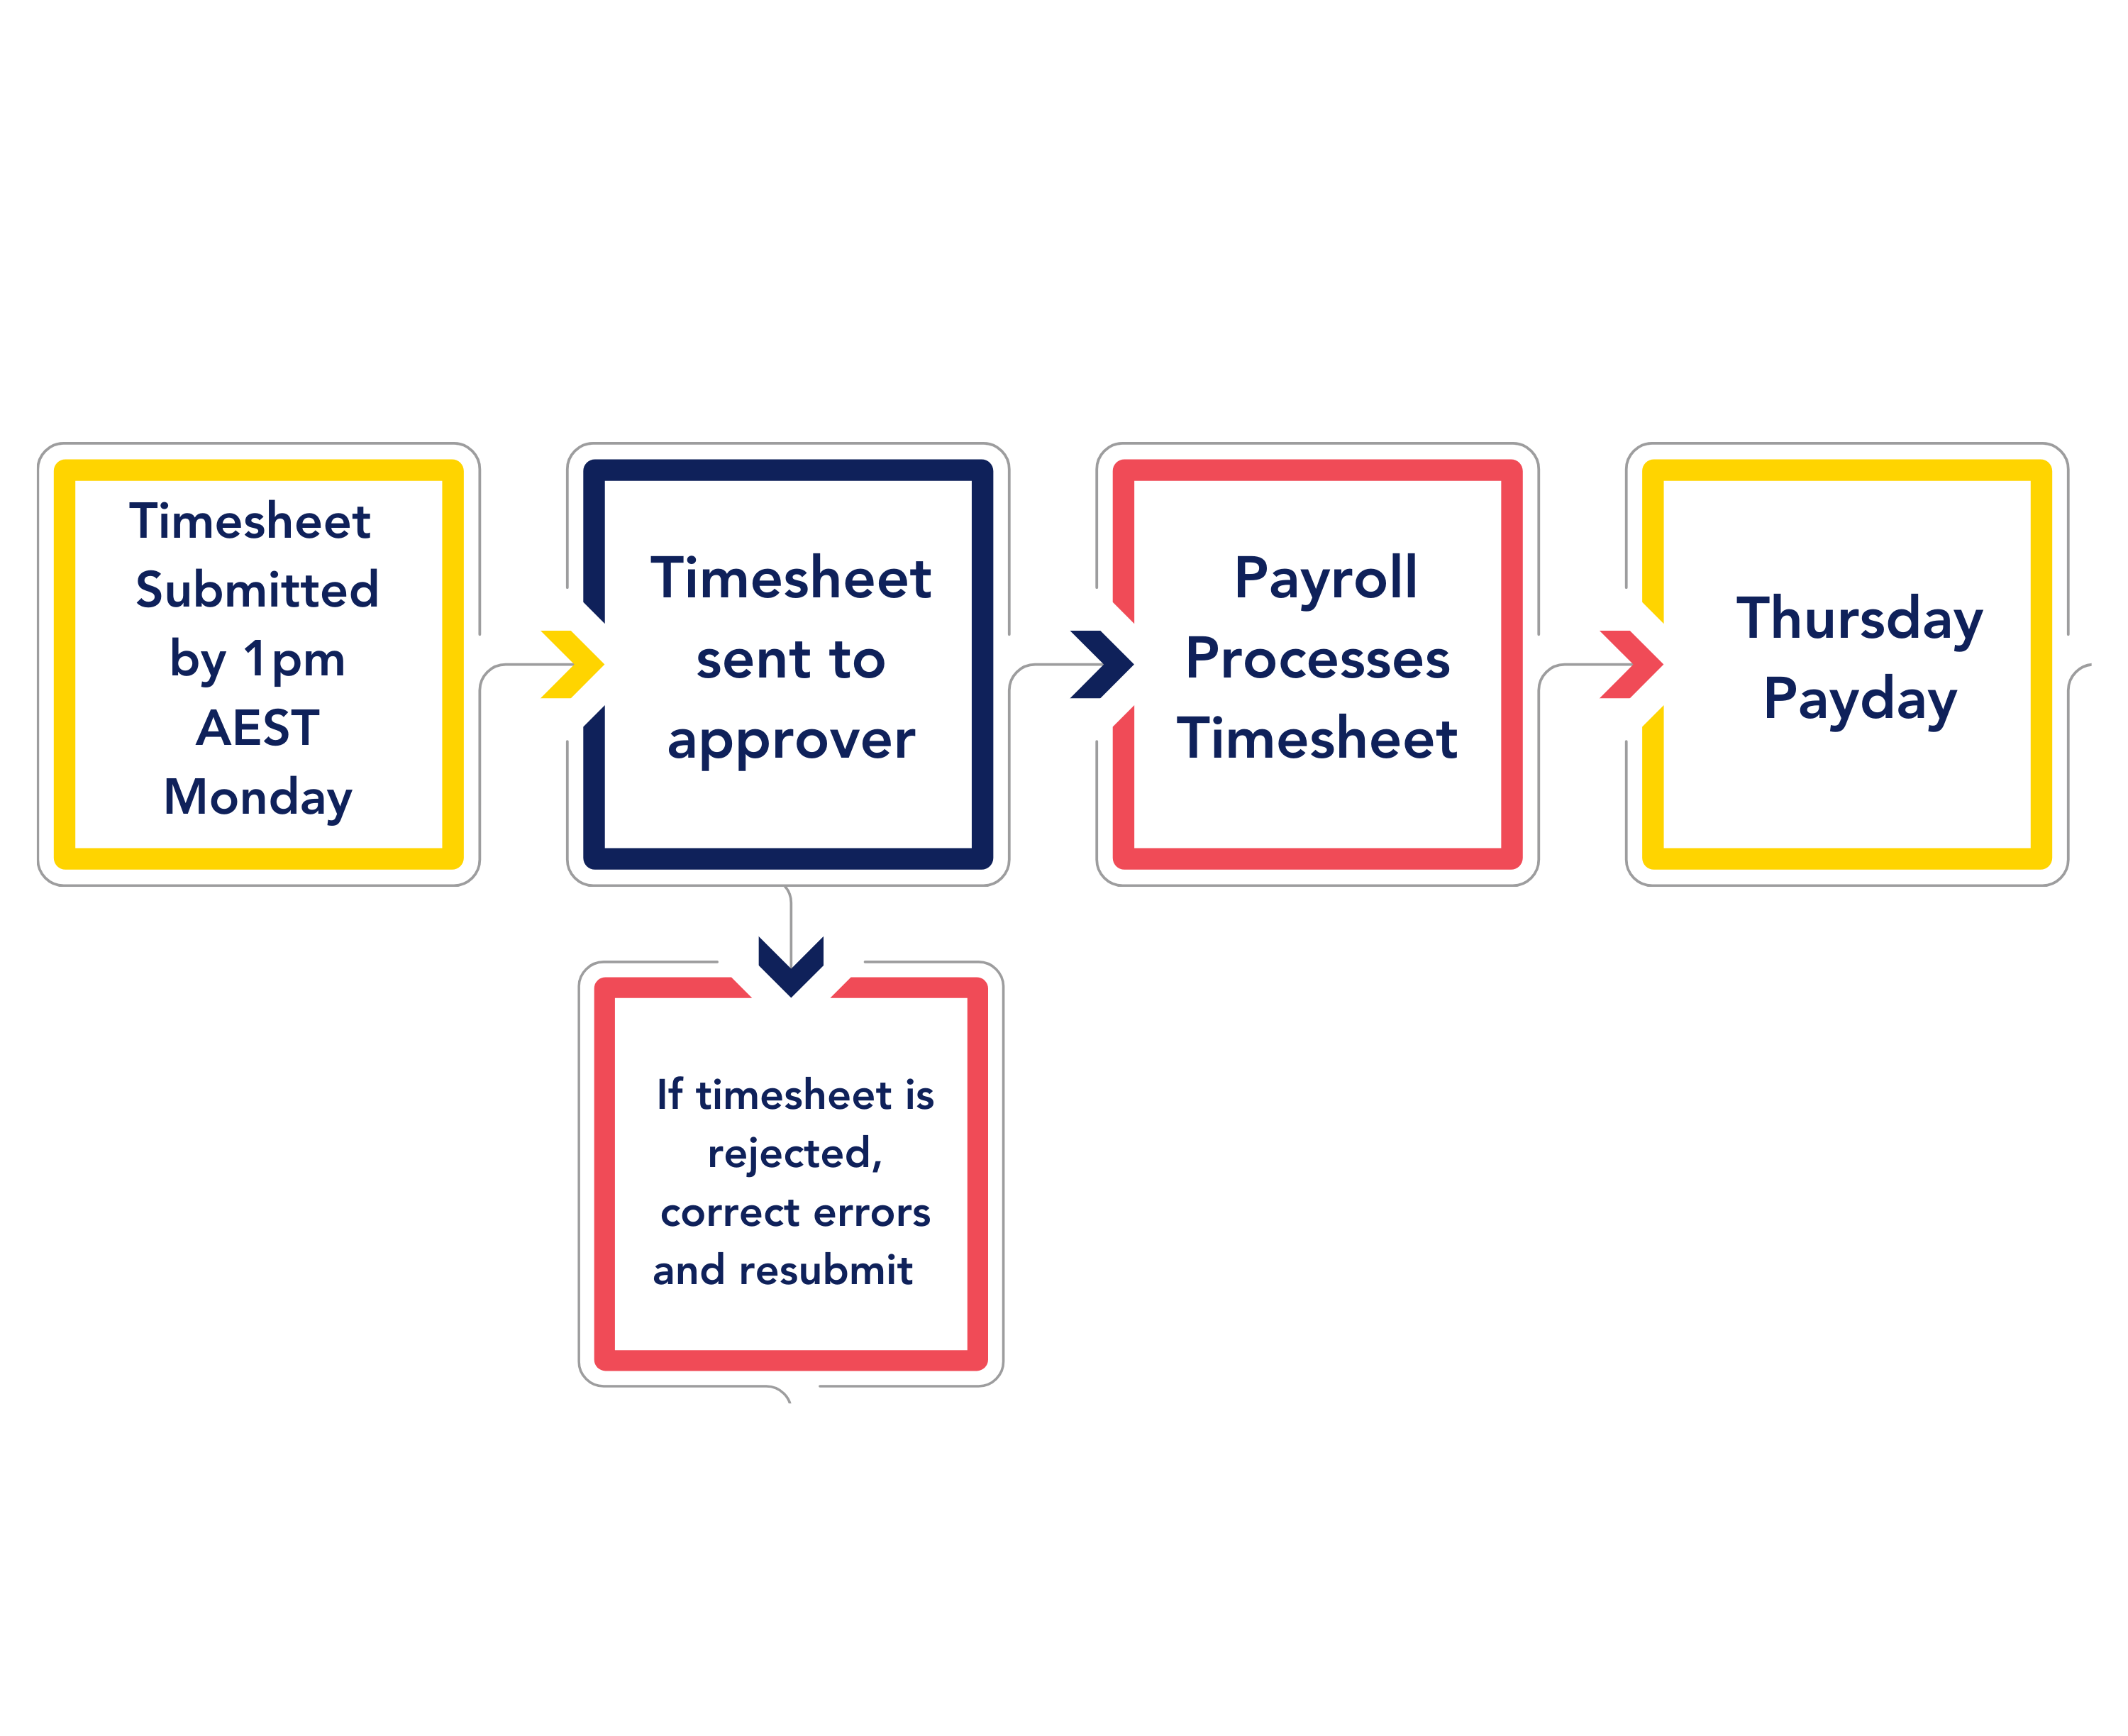
Payroll System Overview
Statement of Service
You can download your current Statement of Service in the mycmr portal
To save a PDF and print a copy, follow these steps:
1. Click on the Statement of Service link to display your document
2. Click on the ellipses menu (three dots) on the right-hand side of your browser
3. Select ‘Print’
4. When the Print menu opens, select ‘Save as PDF’ as the printer
5. Click on ‘Save’, this will allow you to save to your preferred file location.
Completing your Timesheet – Computer
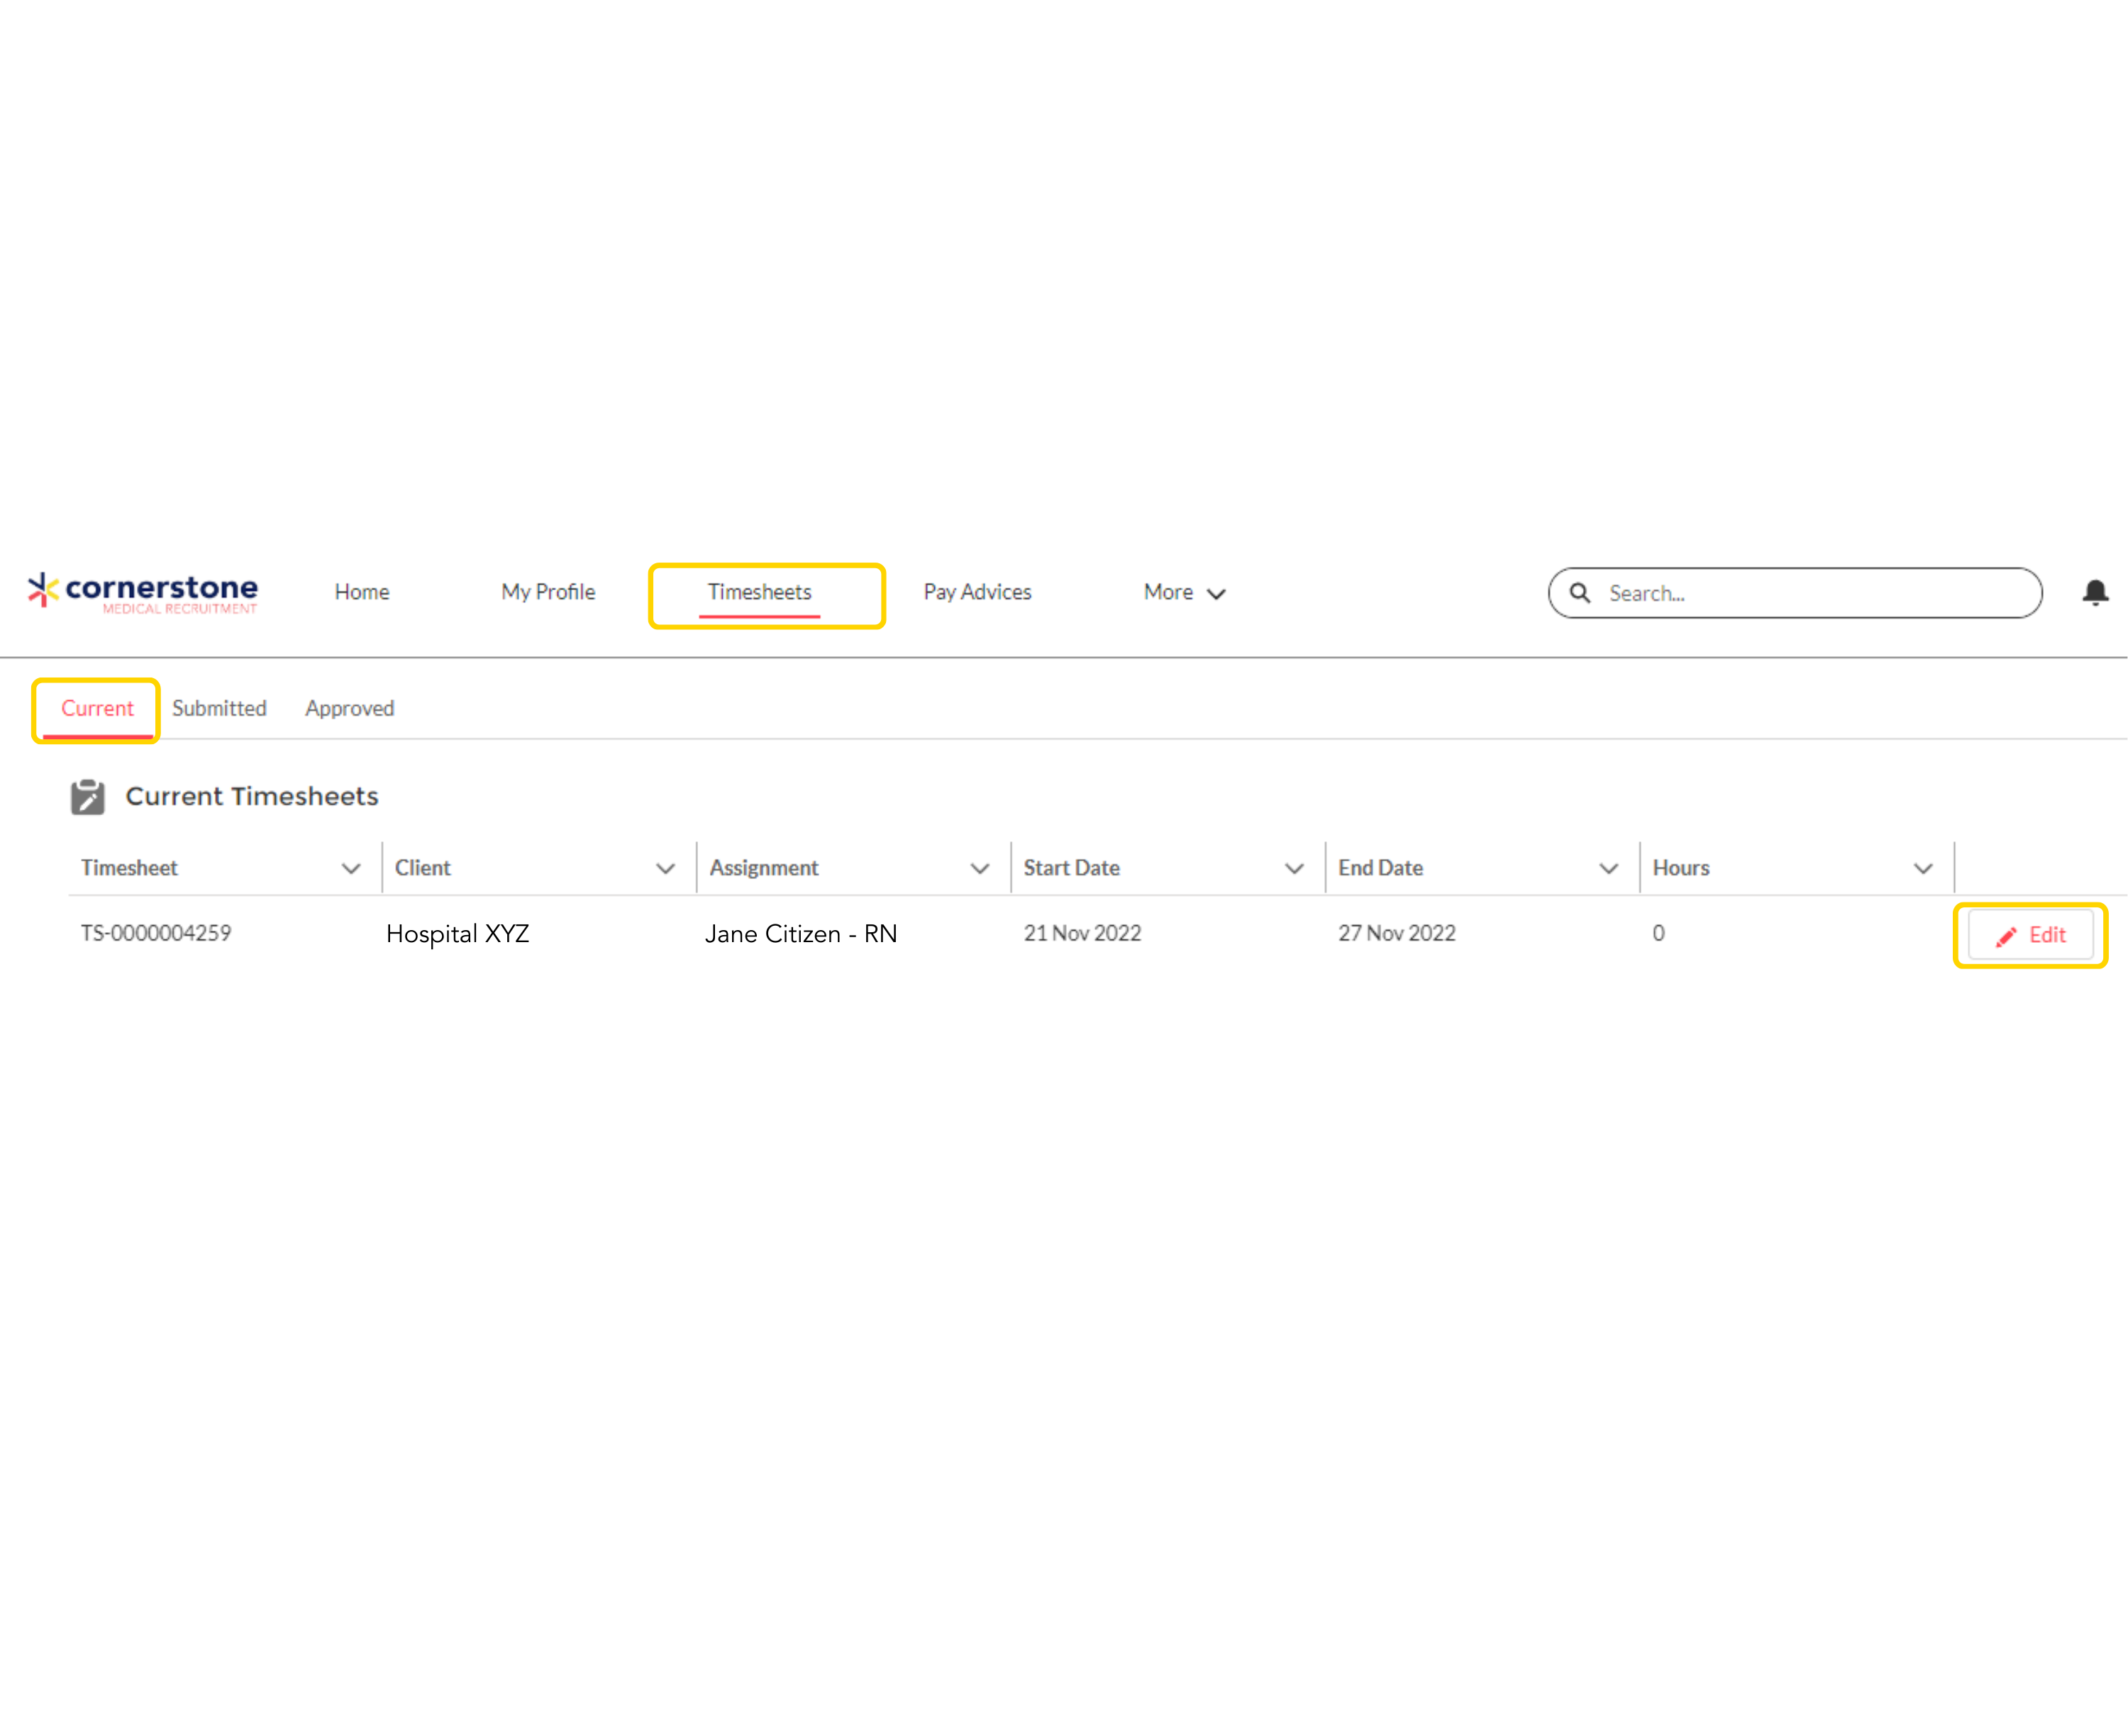
To update and edit your timesheet on a computer,
1. Select ‘Timesheets’ and ‘Current.’
2. Select ‘Edit’ in the far righthand column to add in timesheet hours and details.
Completing your Timesheet – Mobile
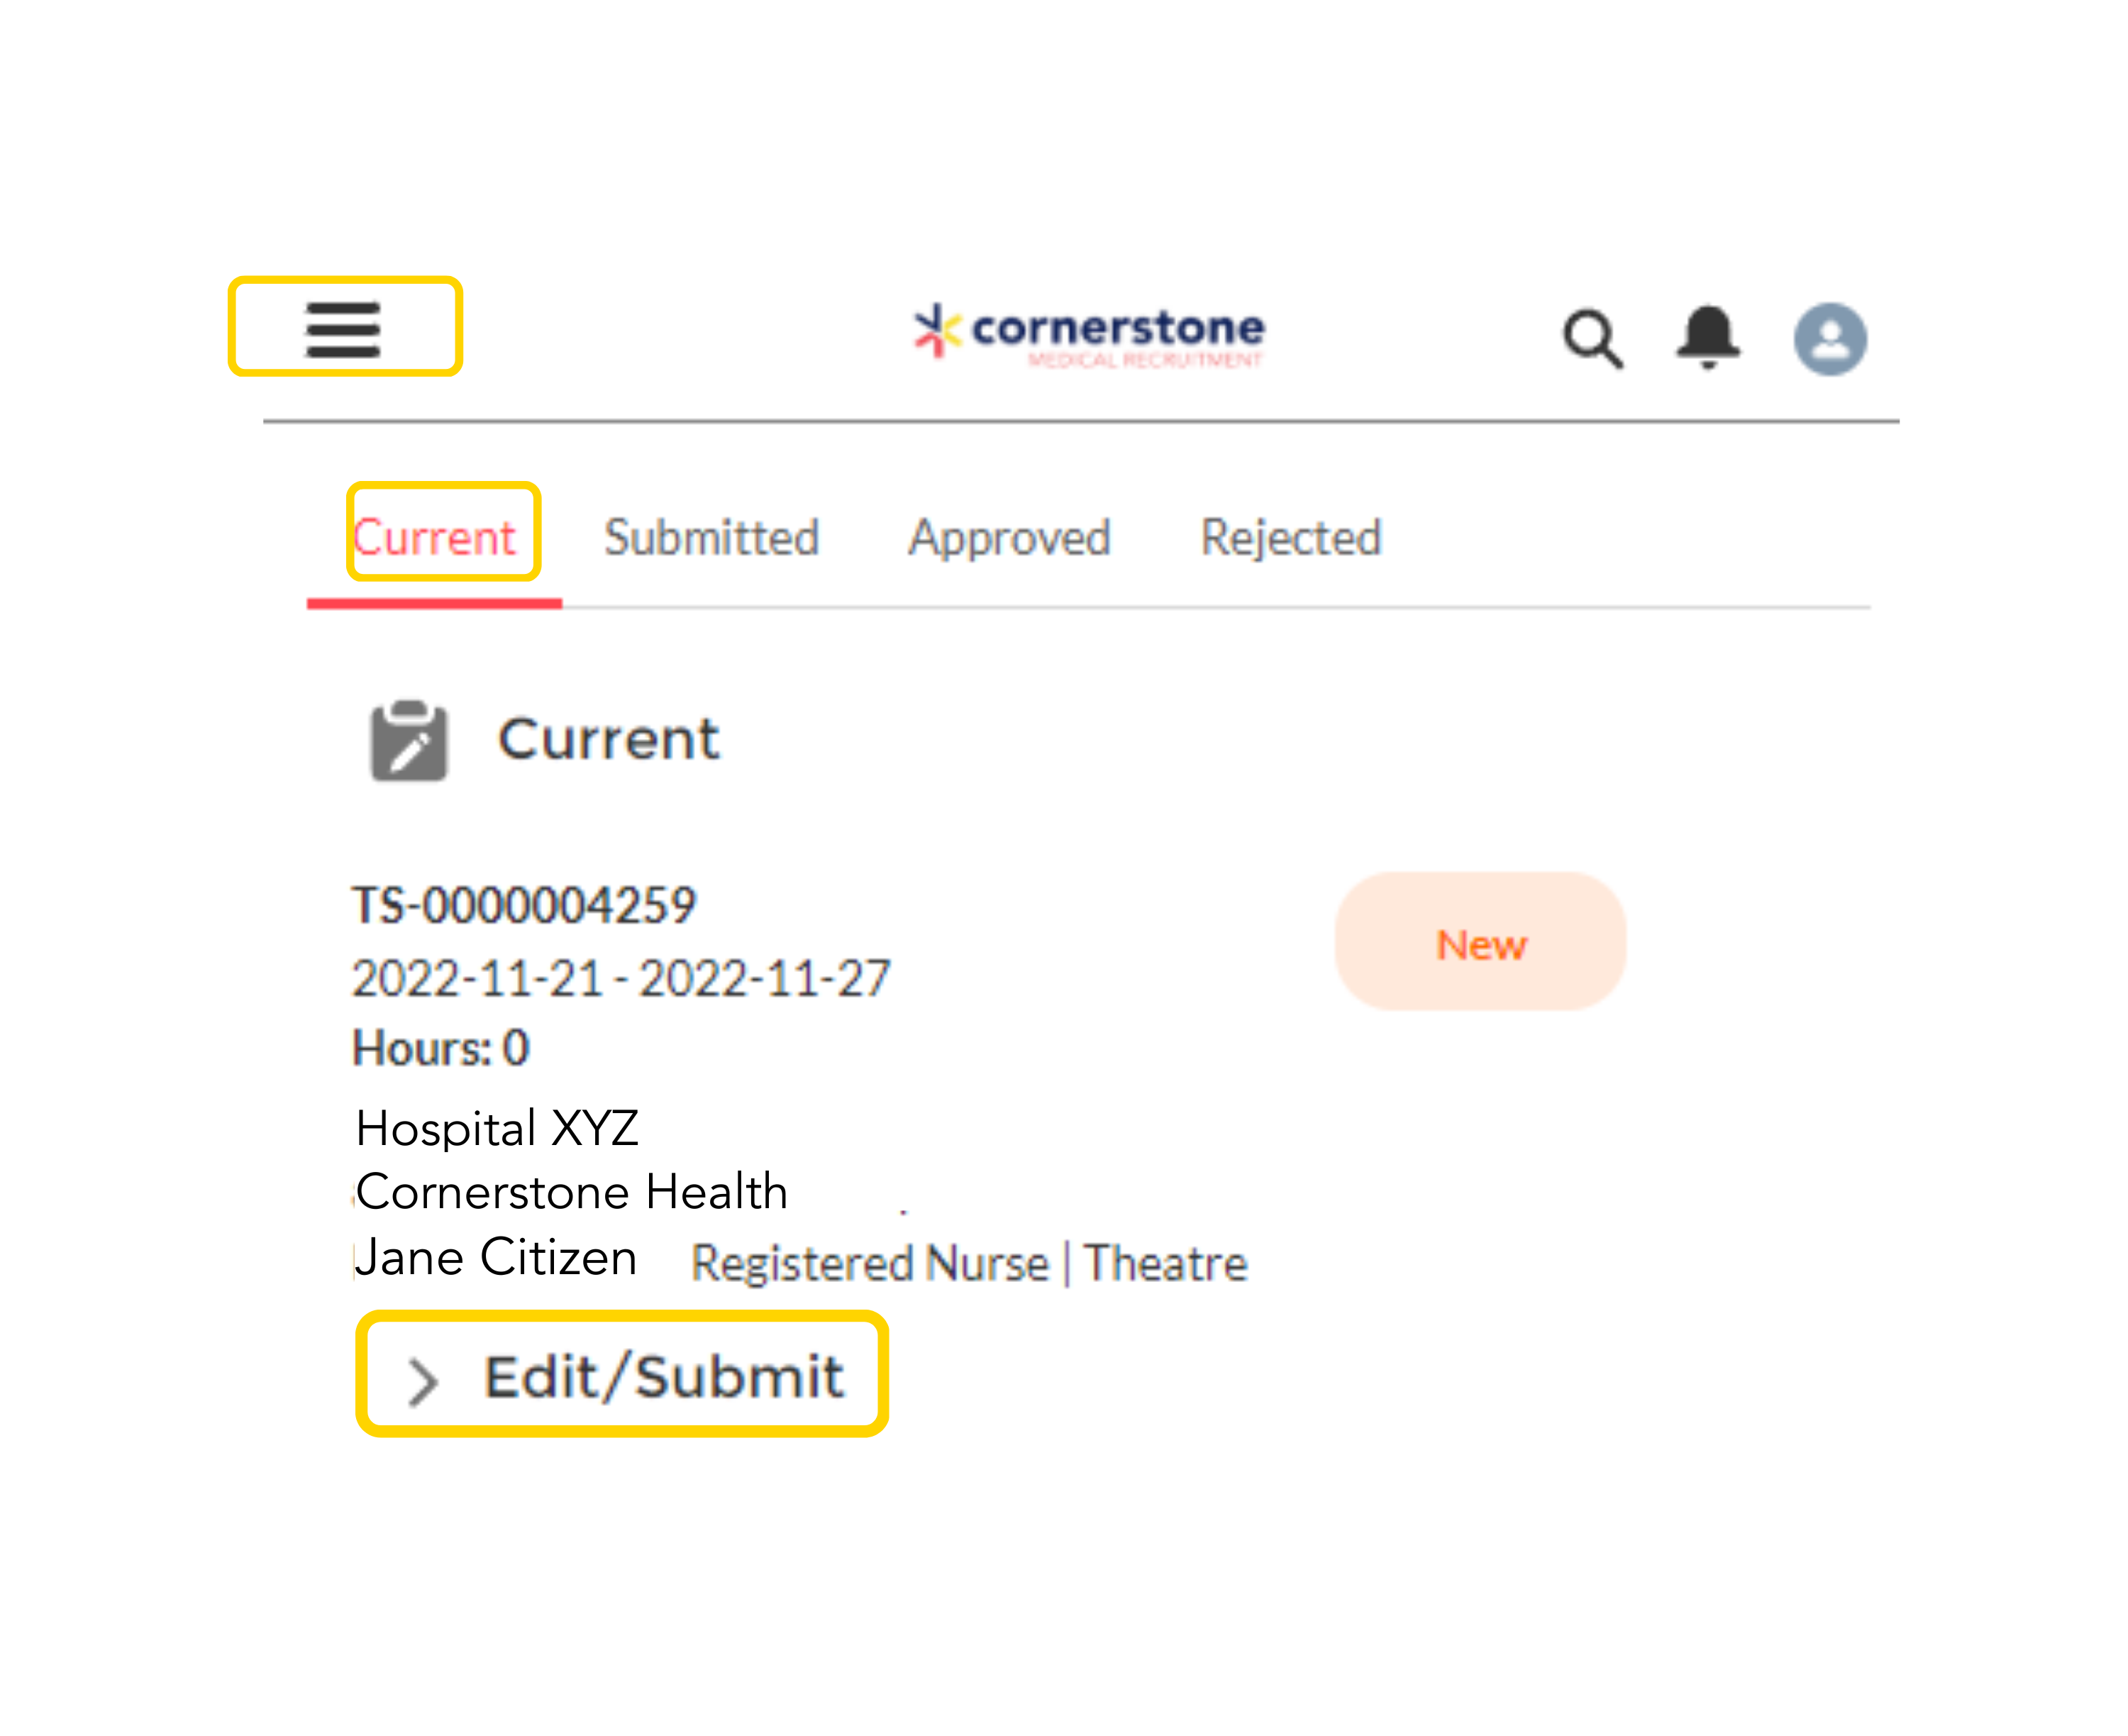
To update and edit your timesheet on your phone:
1. Select the three horizontal lines icon, select ‘Timesheets’ and ‘Current.’
2. Select ‘Edit/Submit’ to enter in your timesheet hours and details and to submit your timesheet
Tip: Rotating your phone to landscape when entering timesheets, makes it easier to enter!
Completing your Timesheet
Timesheets are due every Monday by 1pm AEST
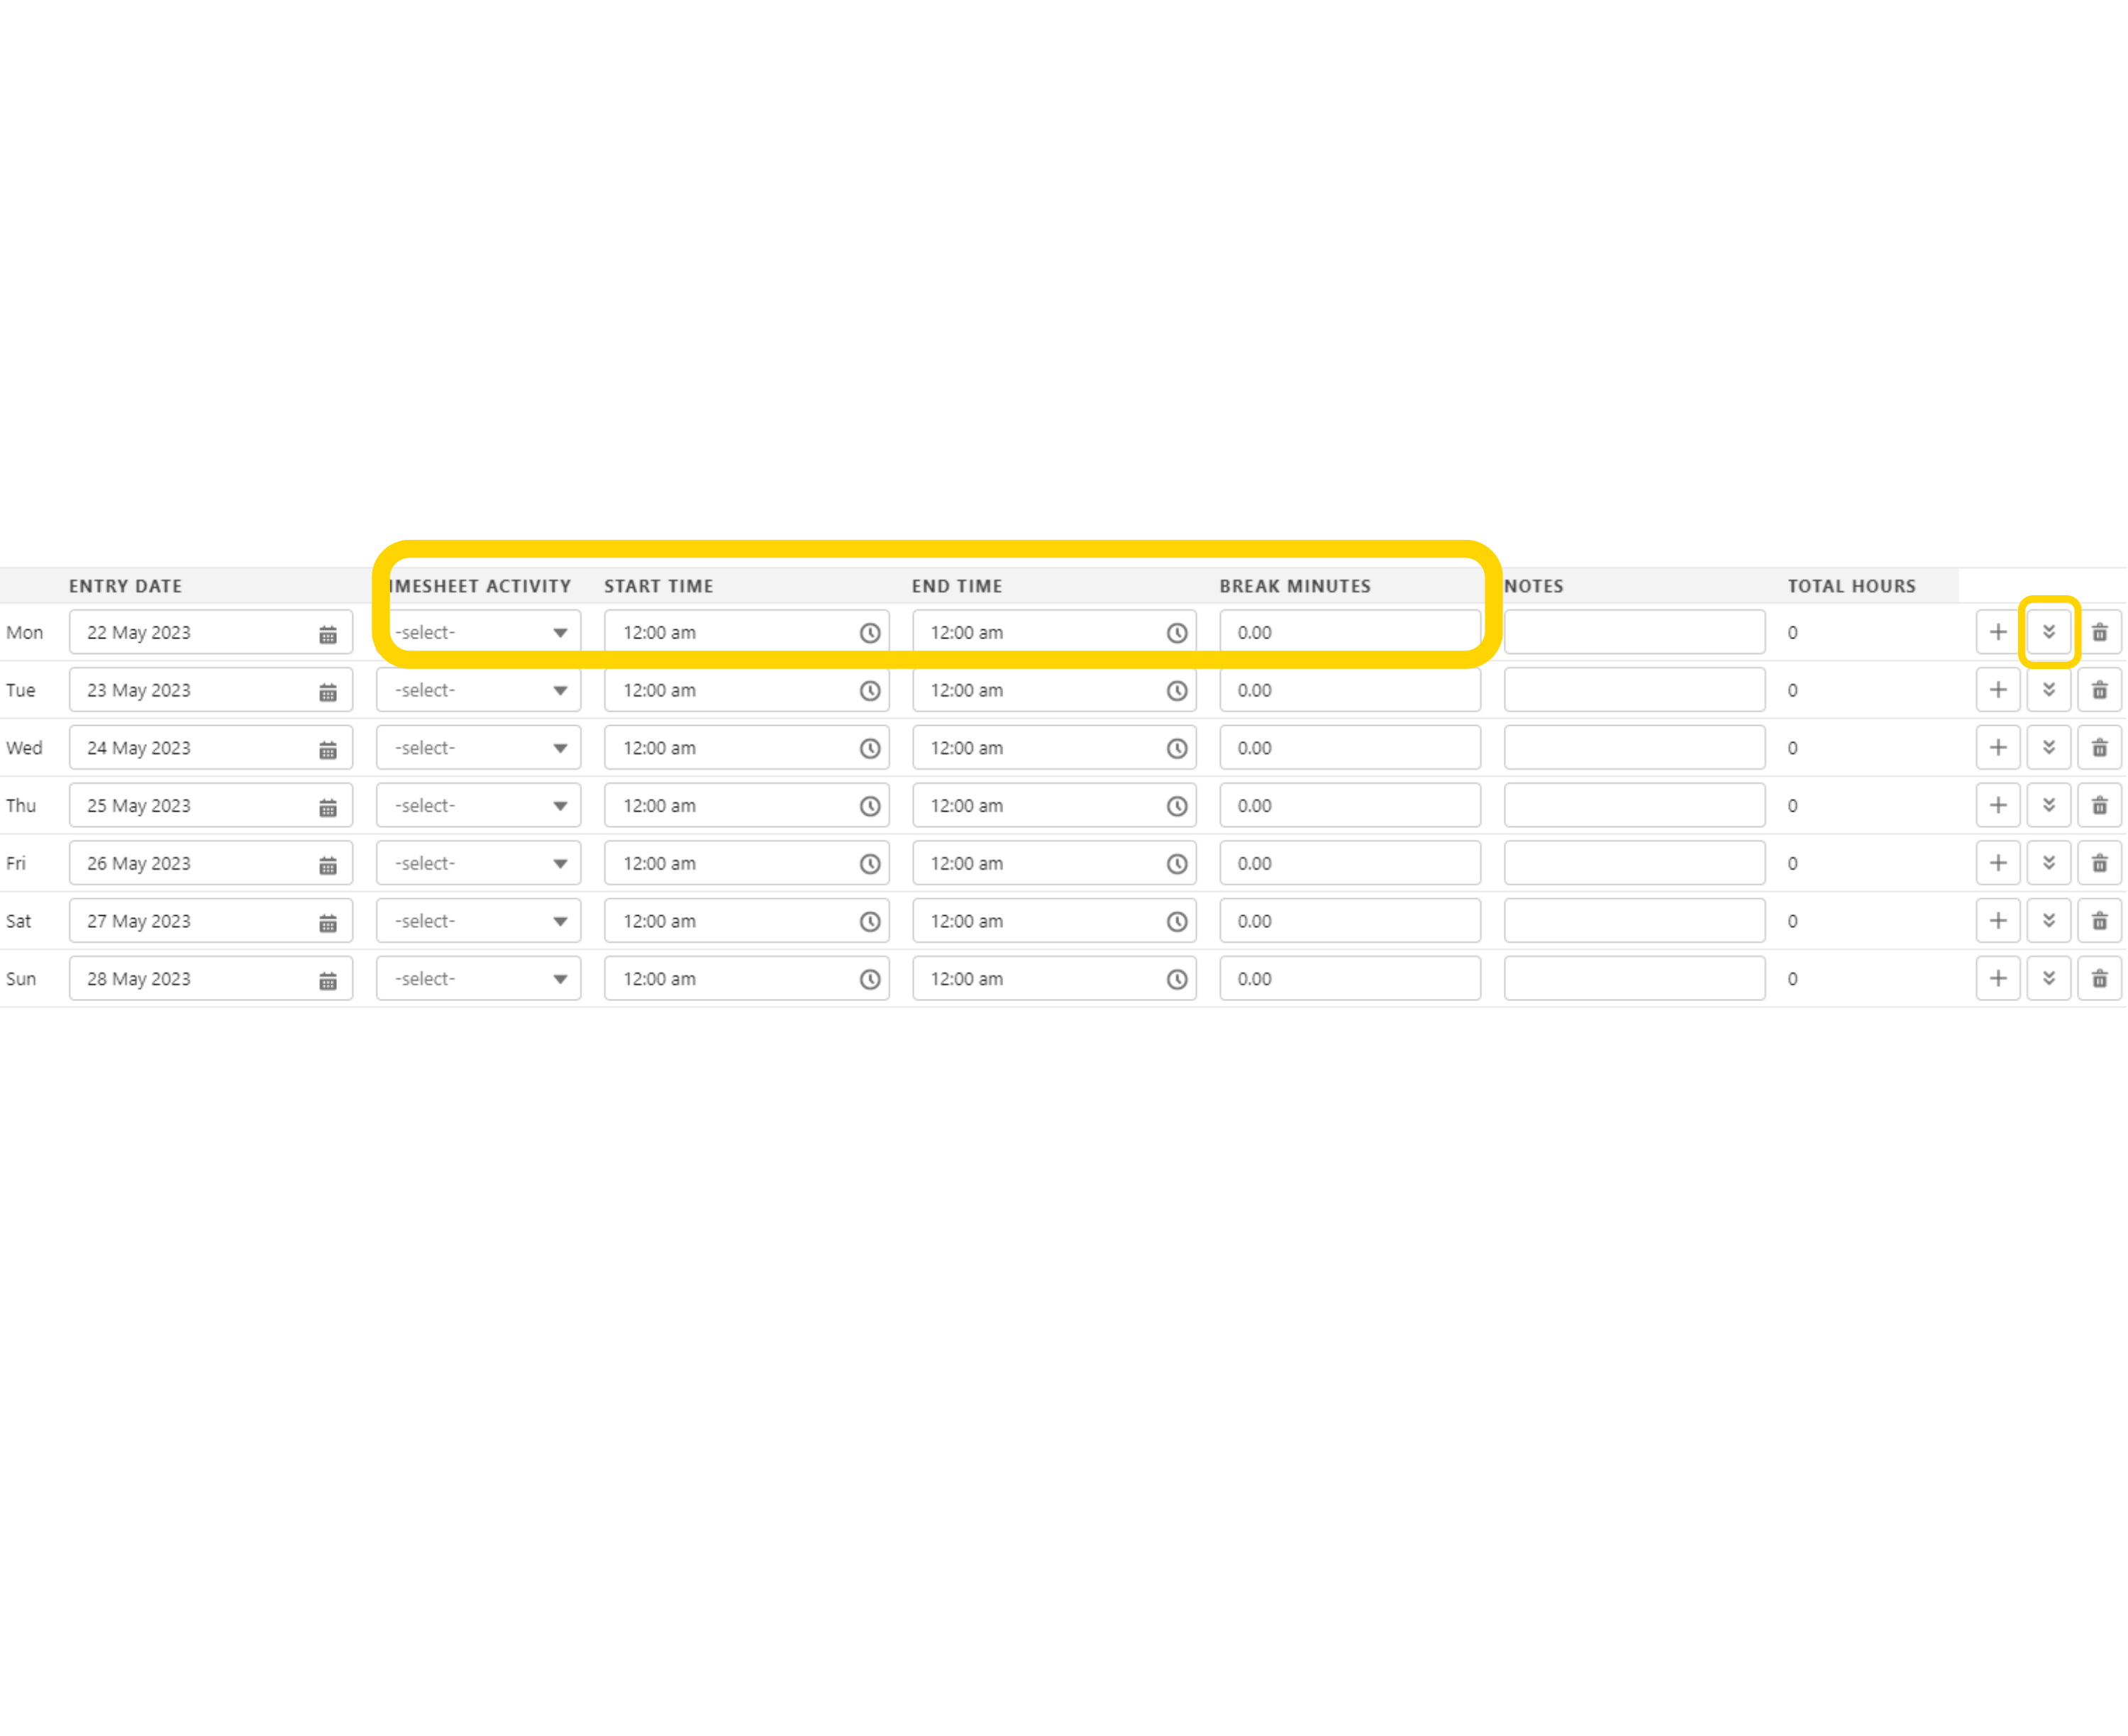
1. Leave the ‘Timesheet Activity’ column as ‘Select’ if you have worked ordinary hours.
2. Fill in your start and end times by typing them in or selecting from the drop down.
3. Fill in your break time in minutes. E.g., 30mins or 60mins.
4. If shifts are the same over multiple days, press the double down arrows on the right-hand side.
Remember to always press save.
Press submit once timesheet entries are complete.
For assistance with payroll email: payroll@cmr.com.au
Back to top
Nightshift Entries
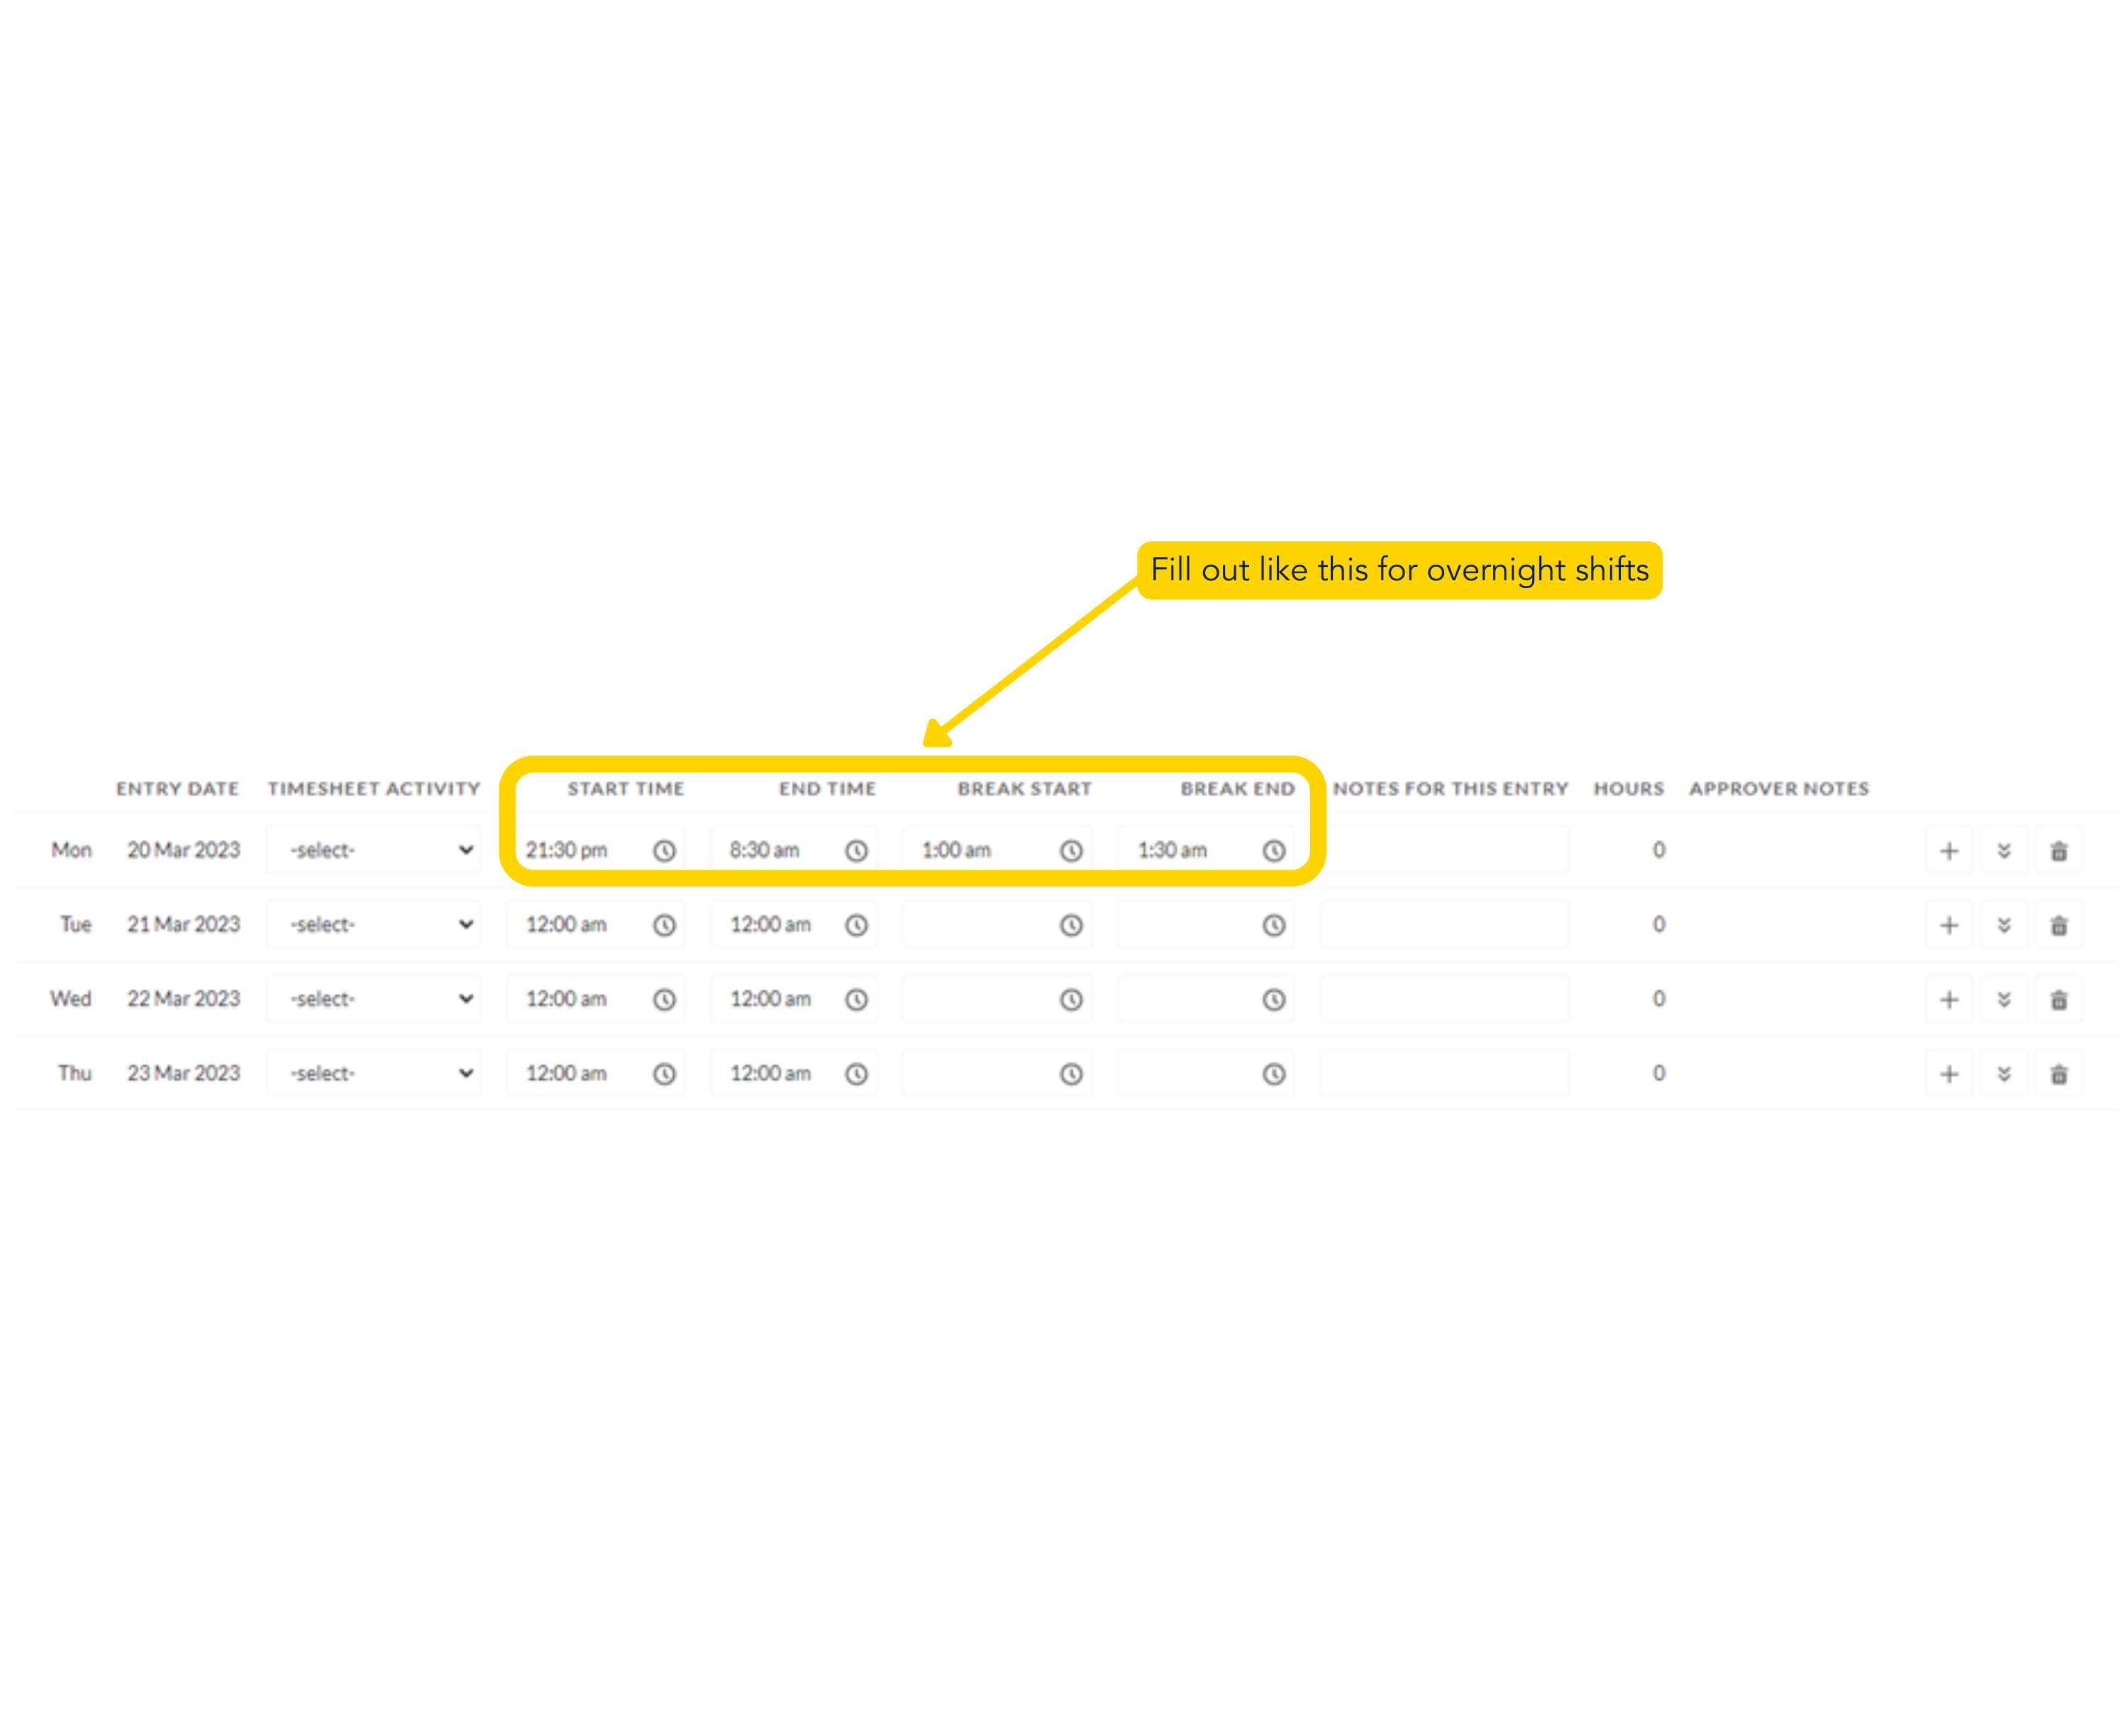
1. Enter as 24-hour time on the same day
Tip: Do not add hours into the second day.
2. Leave the ‘Timesheet Activity’ column as ‘Select’ if you have worked ordinary hours.
3. Fill in start and end break times.
Remember to always press save.
Back to top
Overtime or Callouts
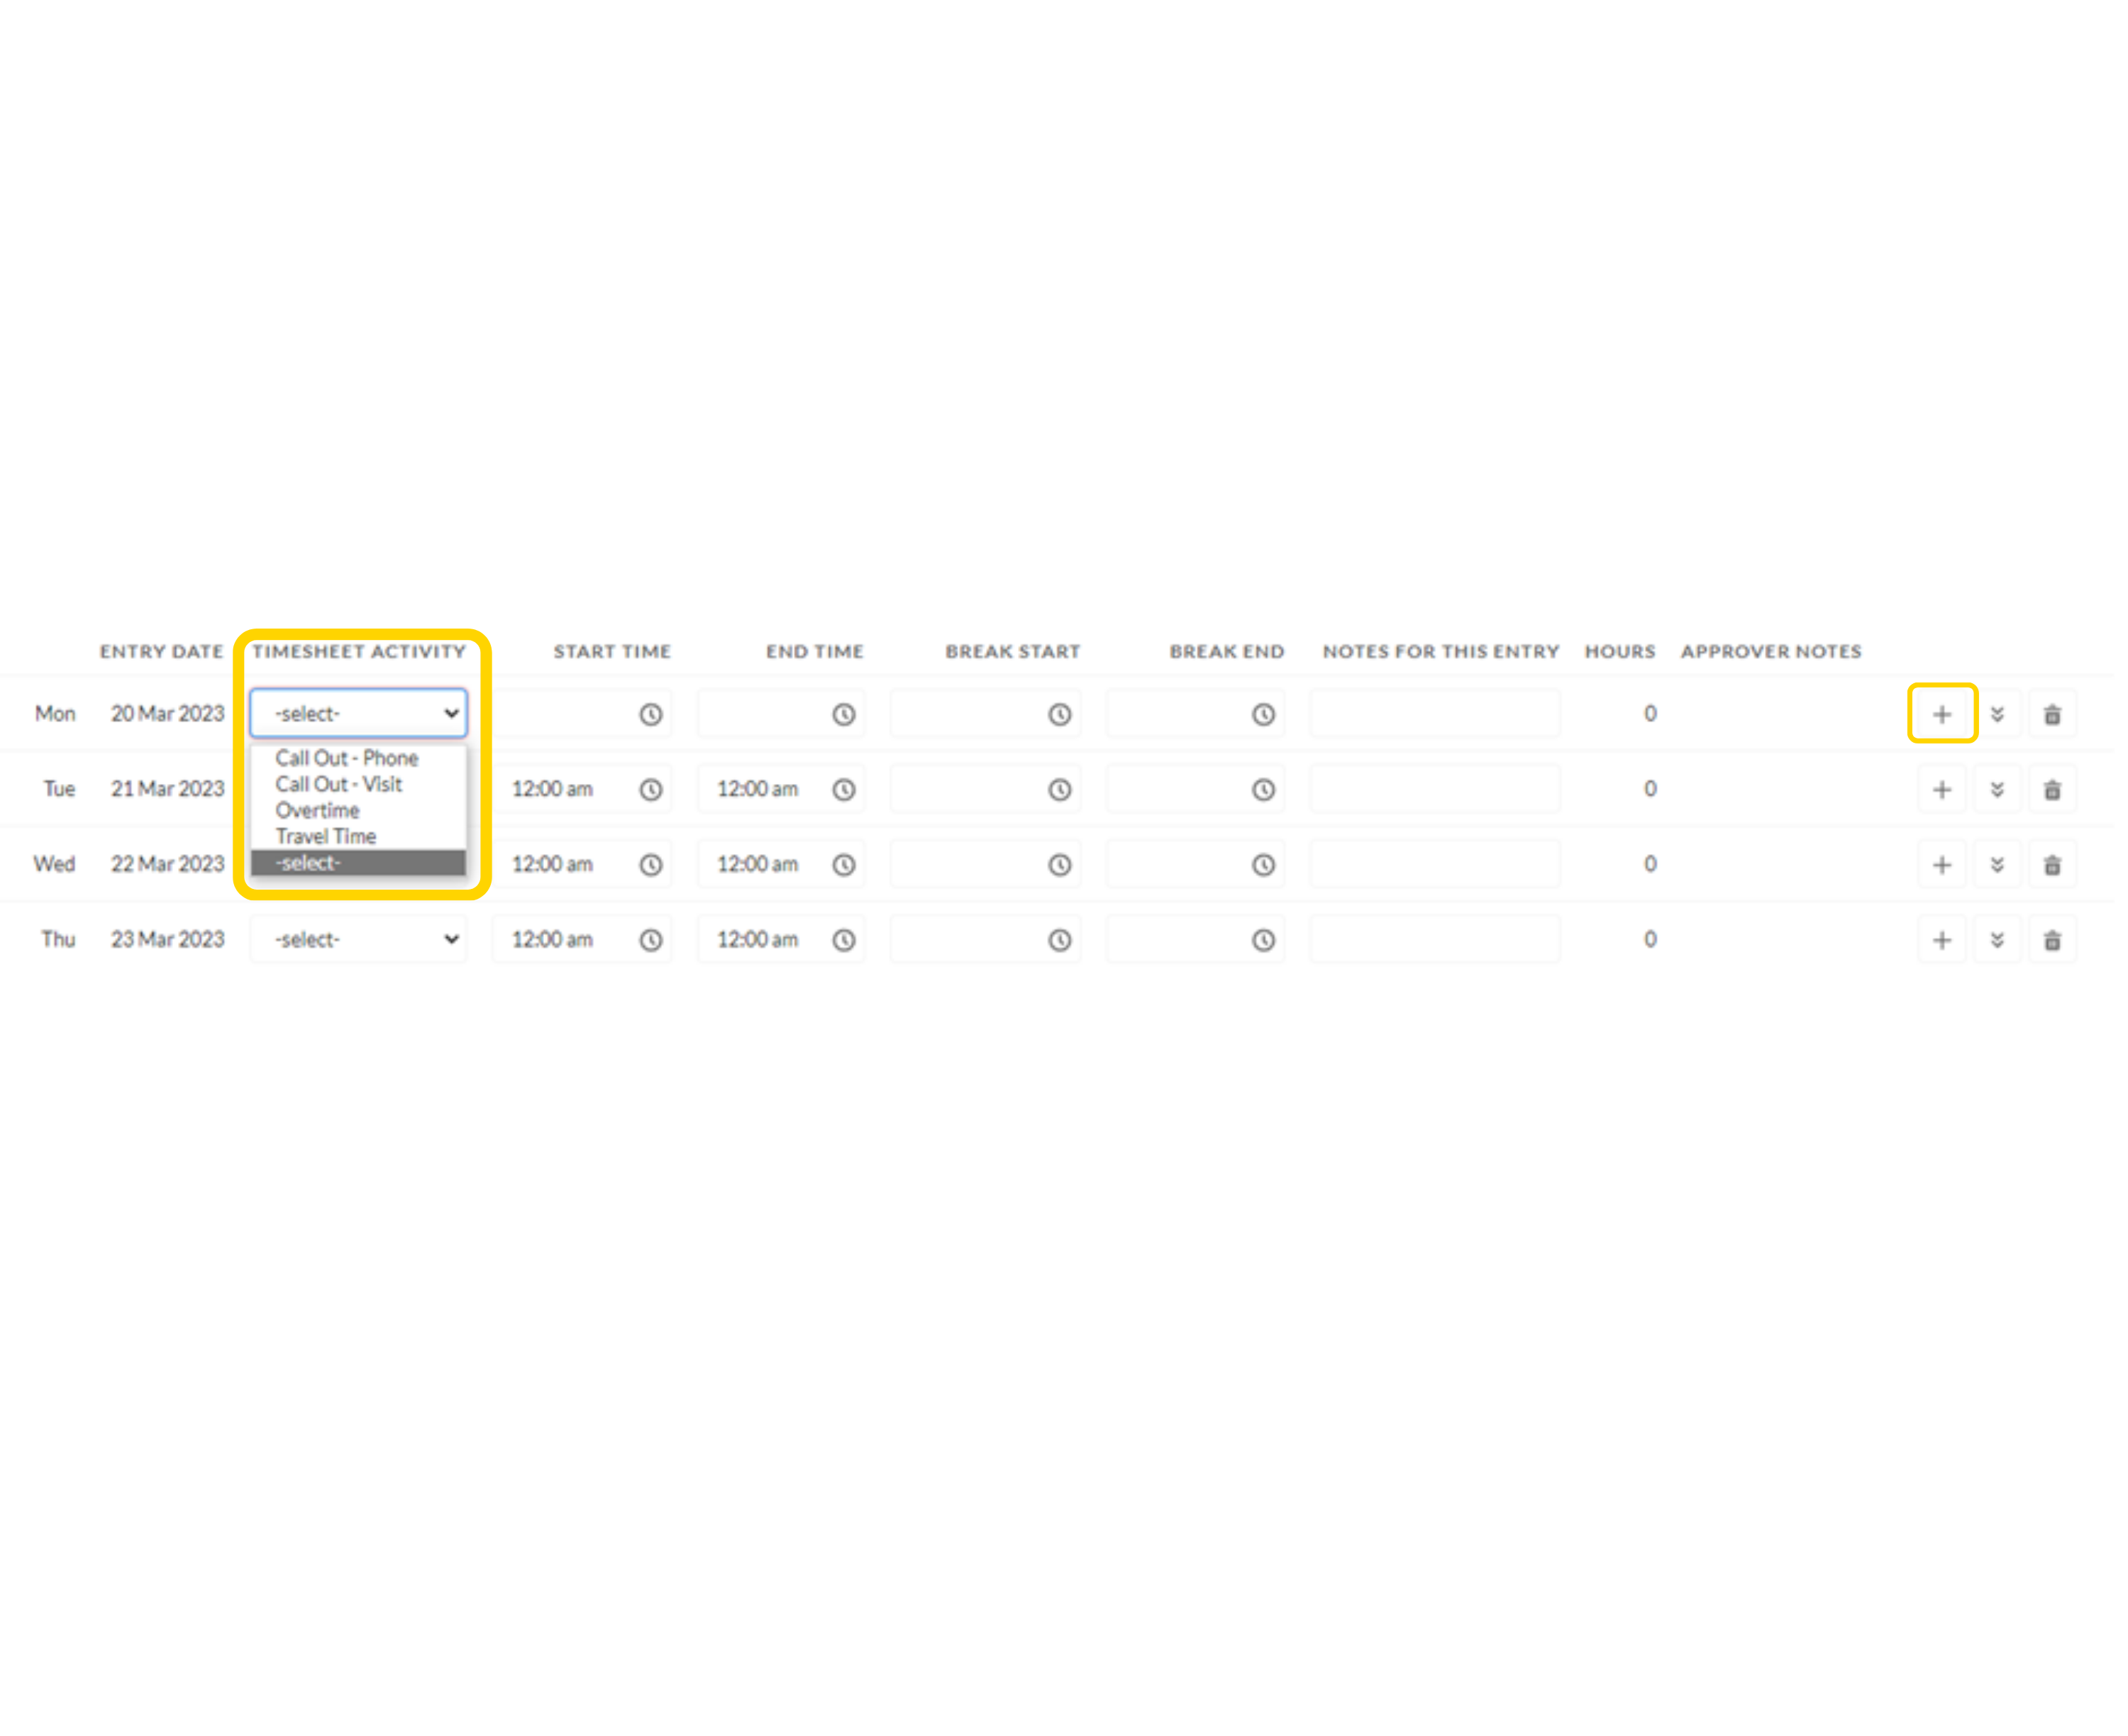
1. Click on the + (plus) symbol to add another time slot for the day selected.
2. A new row will appear at the bottom of the week.
3. From the ‘Timesheet Activity’ drop down box, select ‘Overtime’ or ‘Call Out.’
4. Add hours as you would for normal shifts.
Higher Duties
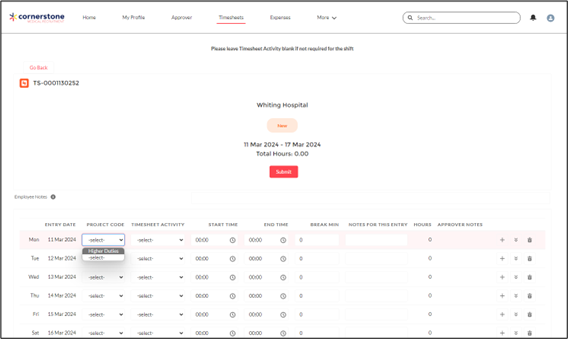
When completing your timesheet where you are required to be paid the higher duties rate as specified on your contract, use the Project Code drop down list to select Higher Duties and continue to enter the remaining fields as you normally would.
The applicable rate will be applied to the shift automatically.
Tip: If higher duties are not applicable to these shift times, leave this field as -Select-.
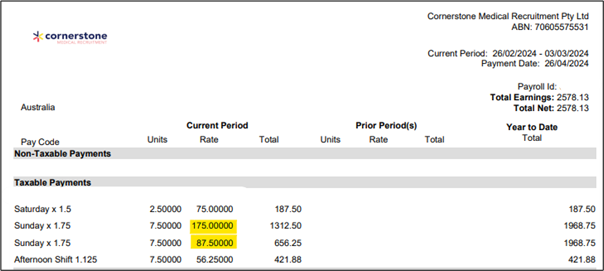
Higher Duties – Reading Your Payslip
Your pay advice will display with the relevant pay code for the payment and applicable hourly rate for the higher duties, on separate lines.
Aged Care Award
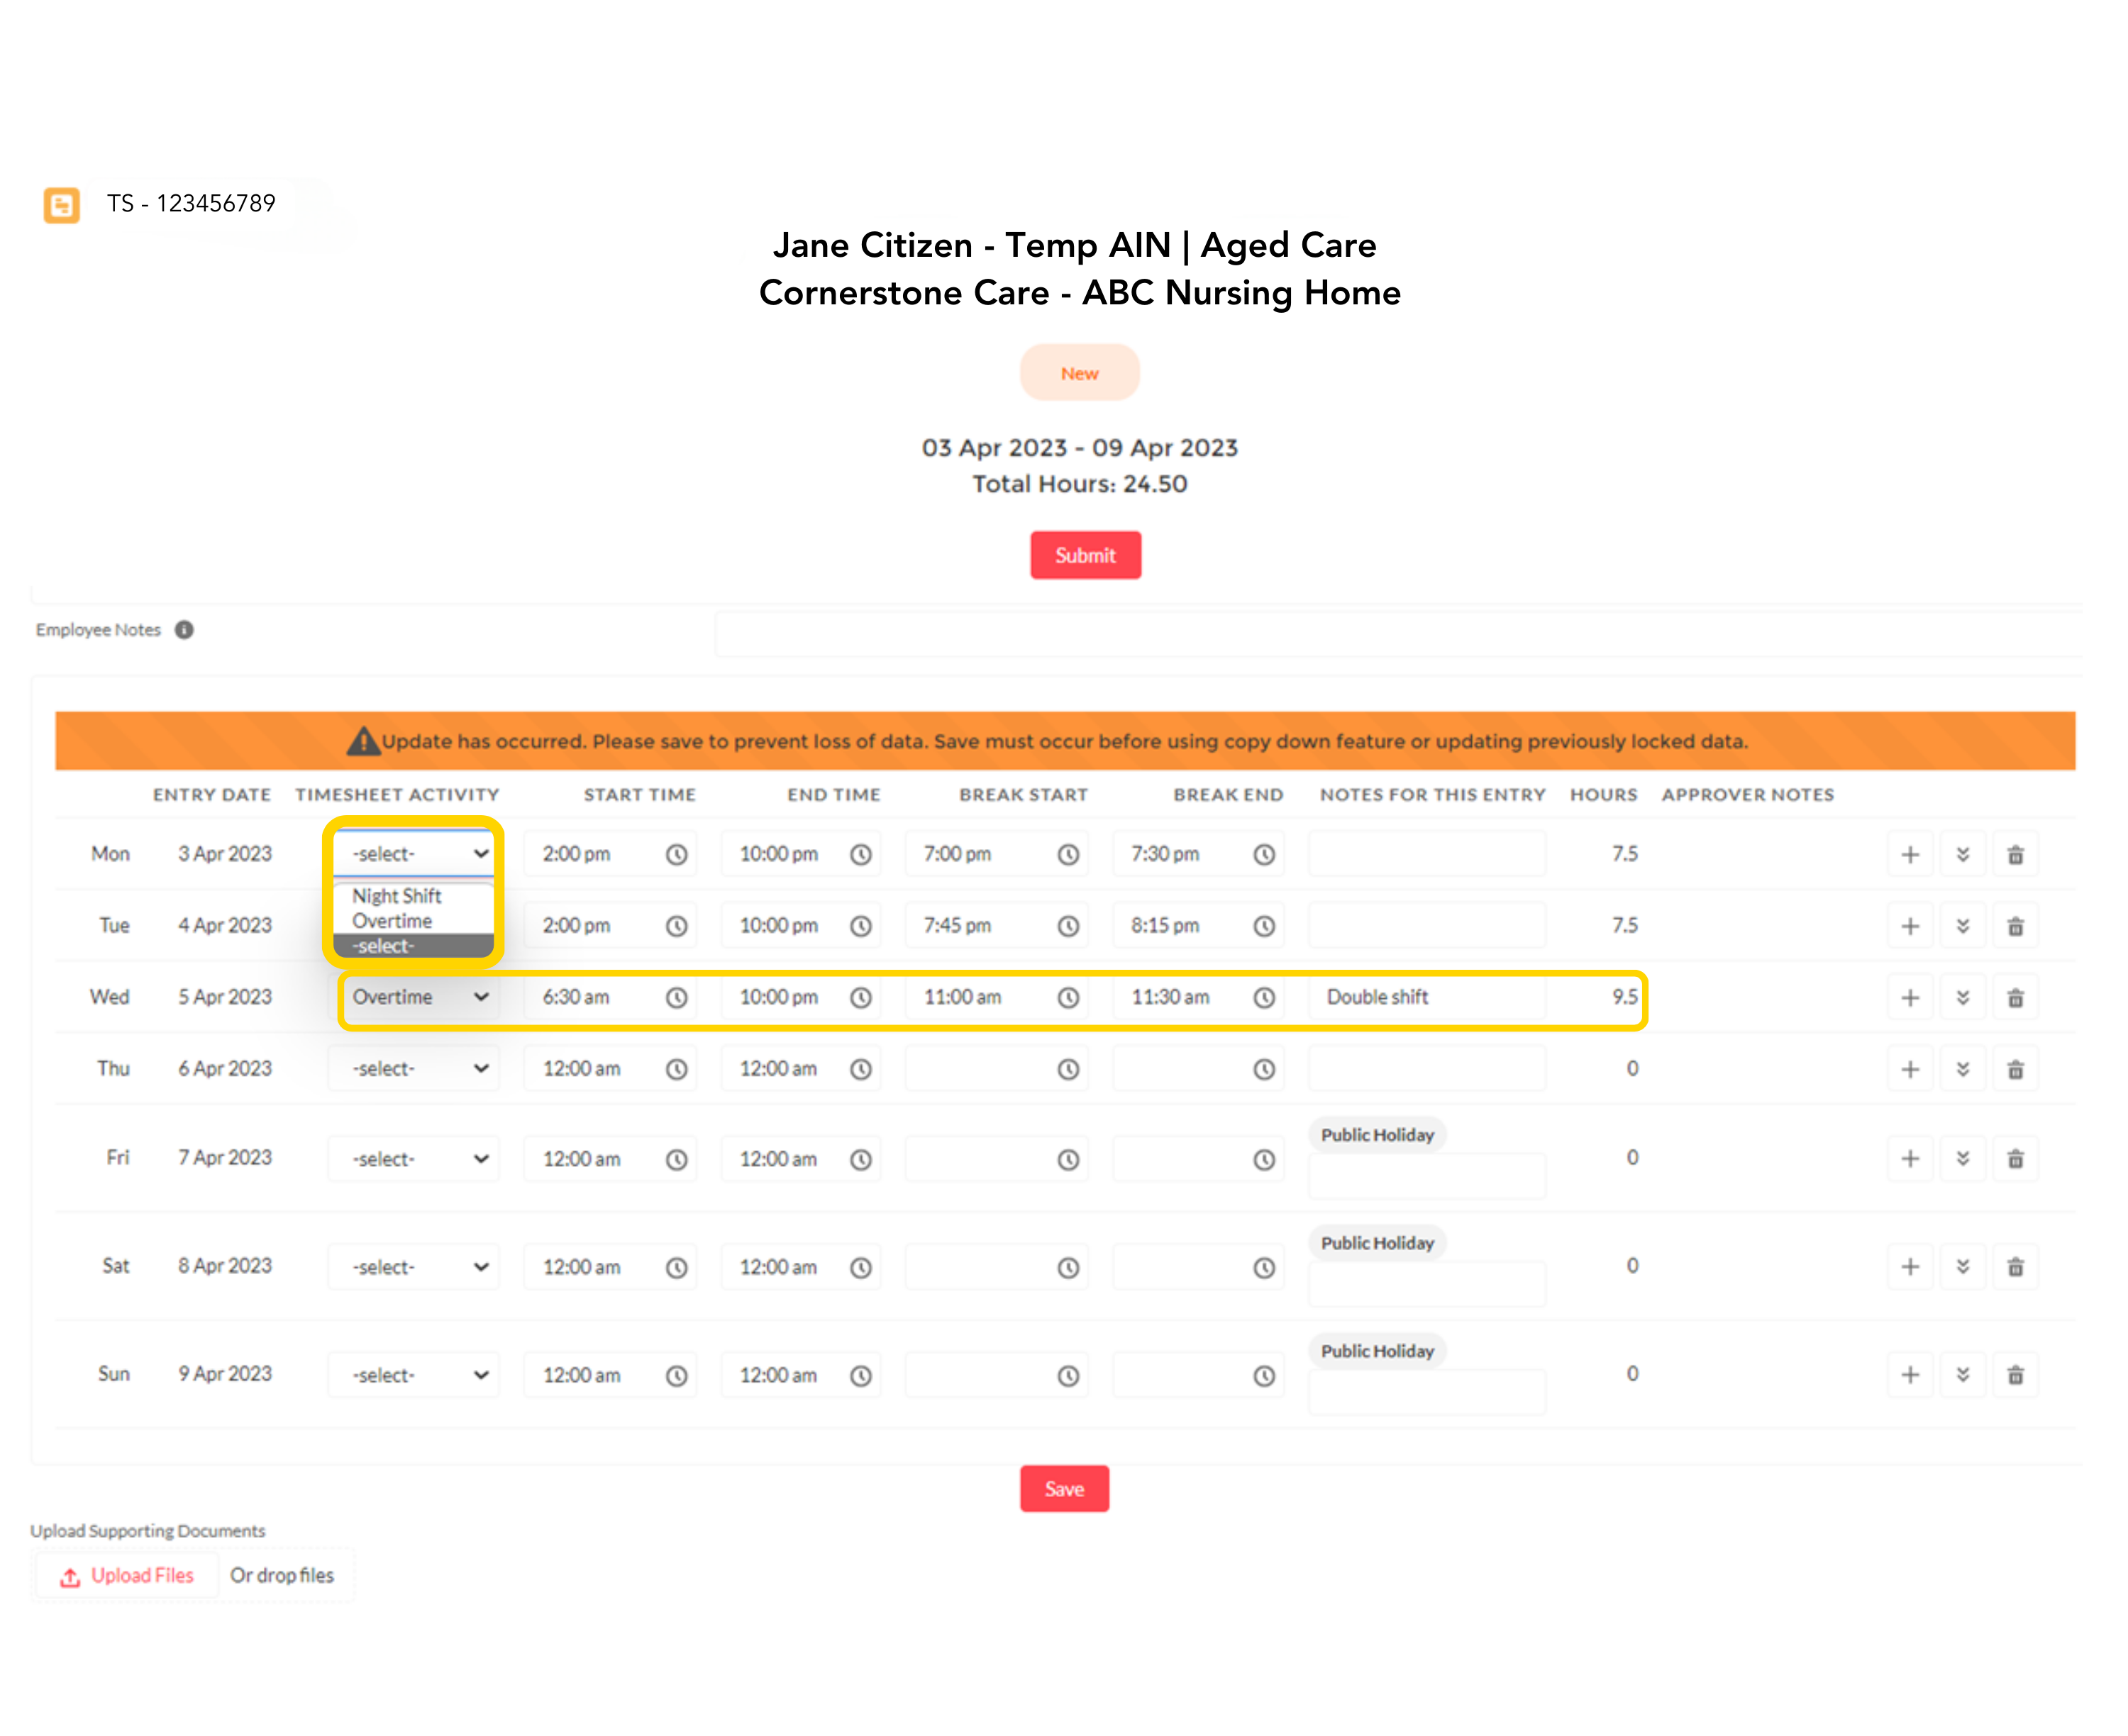
1. Overtime – double shift must be split between rostered shift and add additional line for overtime hours.
2. Timesheet activity stays as ‘Select’ if ordinary rostered shift.
Tip: Use the drop down selection only when working a night shift or overtime.
Adding Allowances (Including On-Call)
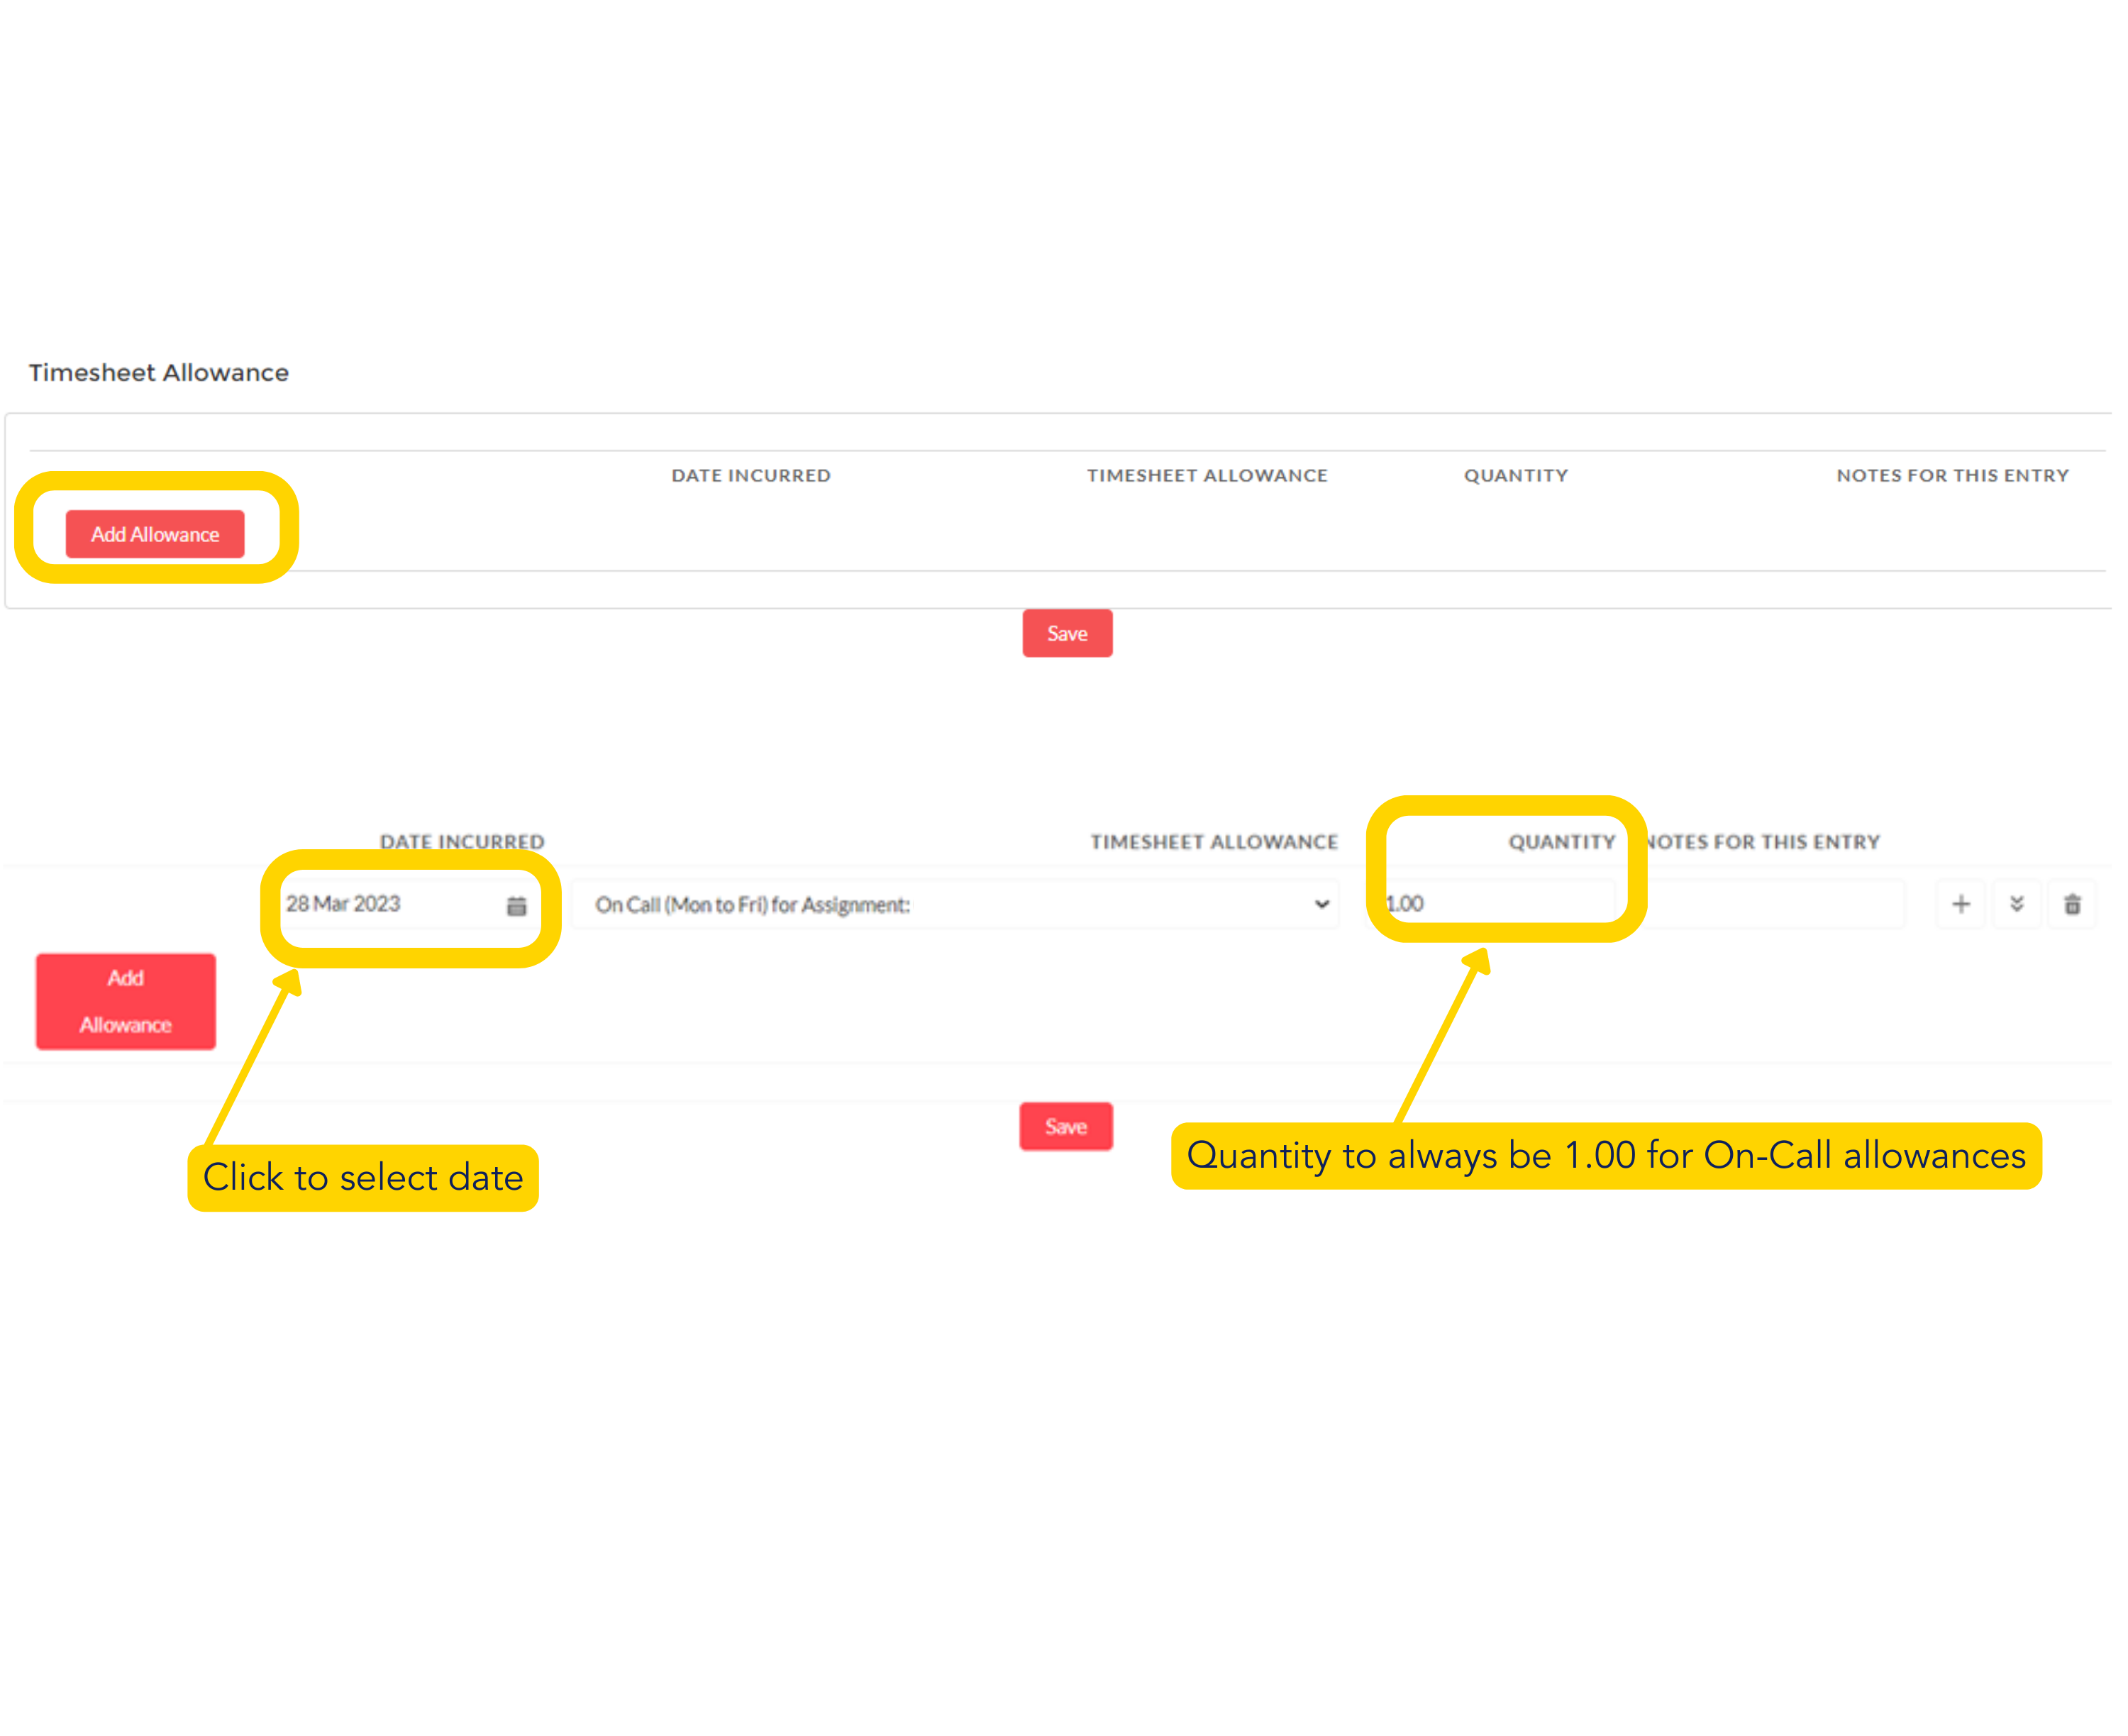
1. Click on ‘Add Allowance’ under ‘Timesheet Allowance.’
2. Click on calendar icon, choose the relevant date.
3. Choose either ‘On Call (Mon to Fri)’ for allowances on the weekdays, or ‘On Call (Weekend/PH)’ for allowances on weekends or public holidays.
Tip: Quantity will always be 1.00 for On Call allowances.
Remember to press save.
Back to top
Submitting Expenses
You can submit all your expenses as one claim or multiple claims.
A eligible receipt can be a:
- GST tax invoice –
- Cash register docket –
- Hand-written document –
The receipt must include:
- The business’s name –
- The business’s ABN or ACN –
- The product or service –
- The date the product/service was supplied –
- The price of the product/service and balance paid –
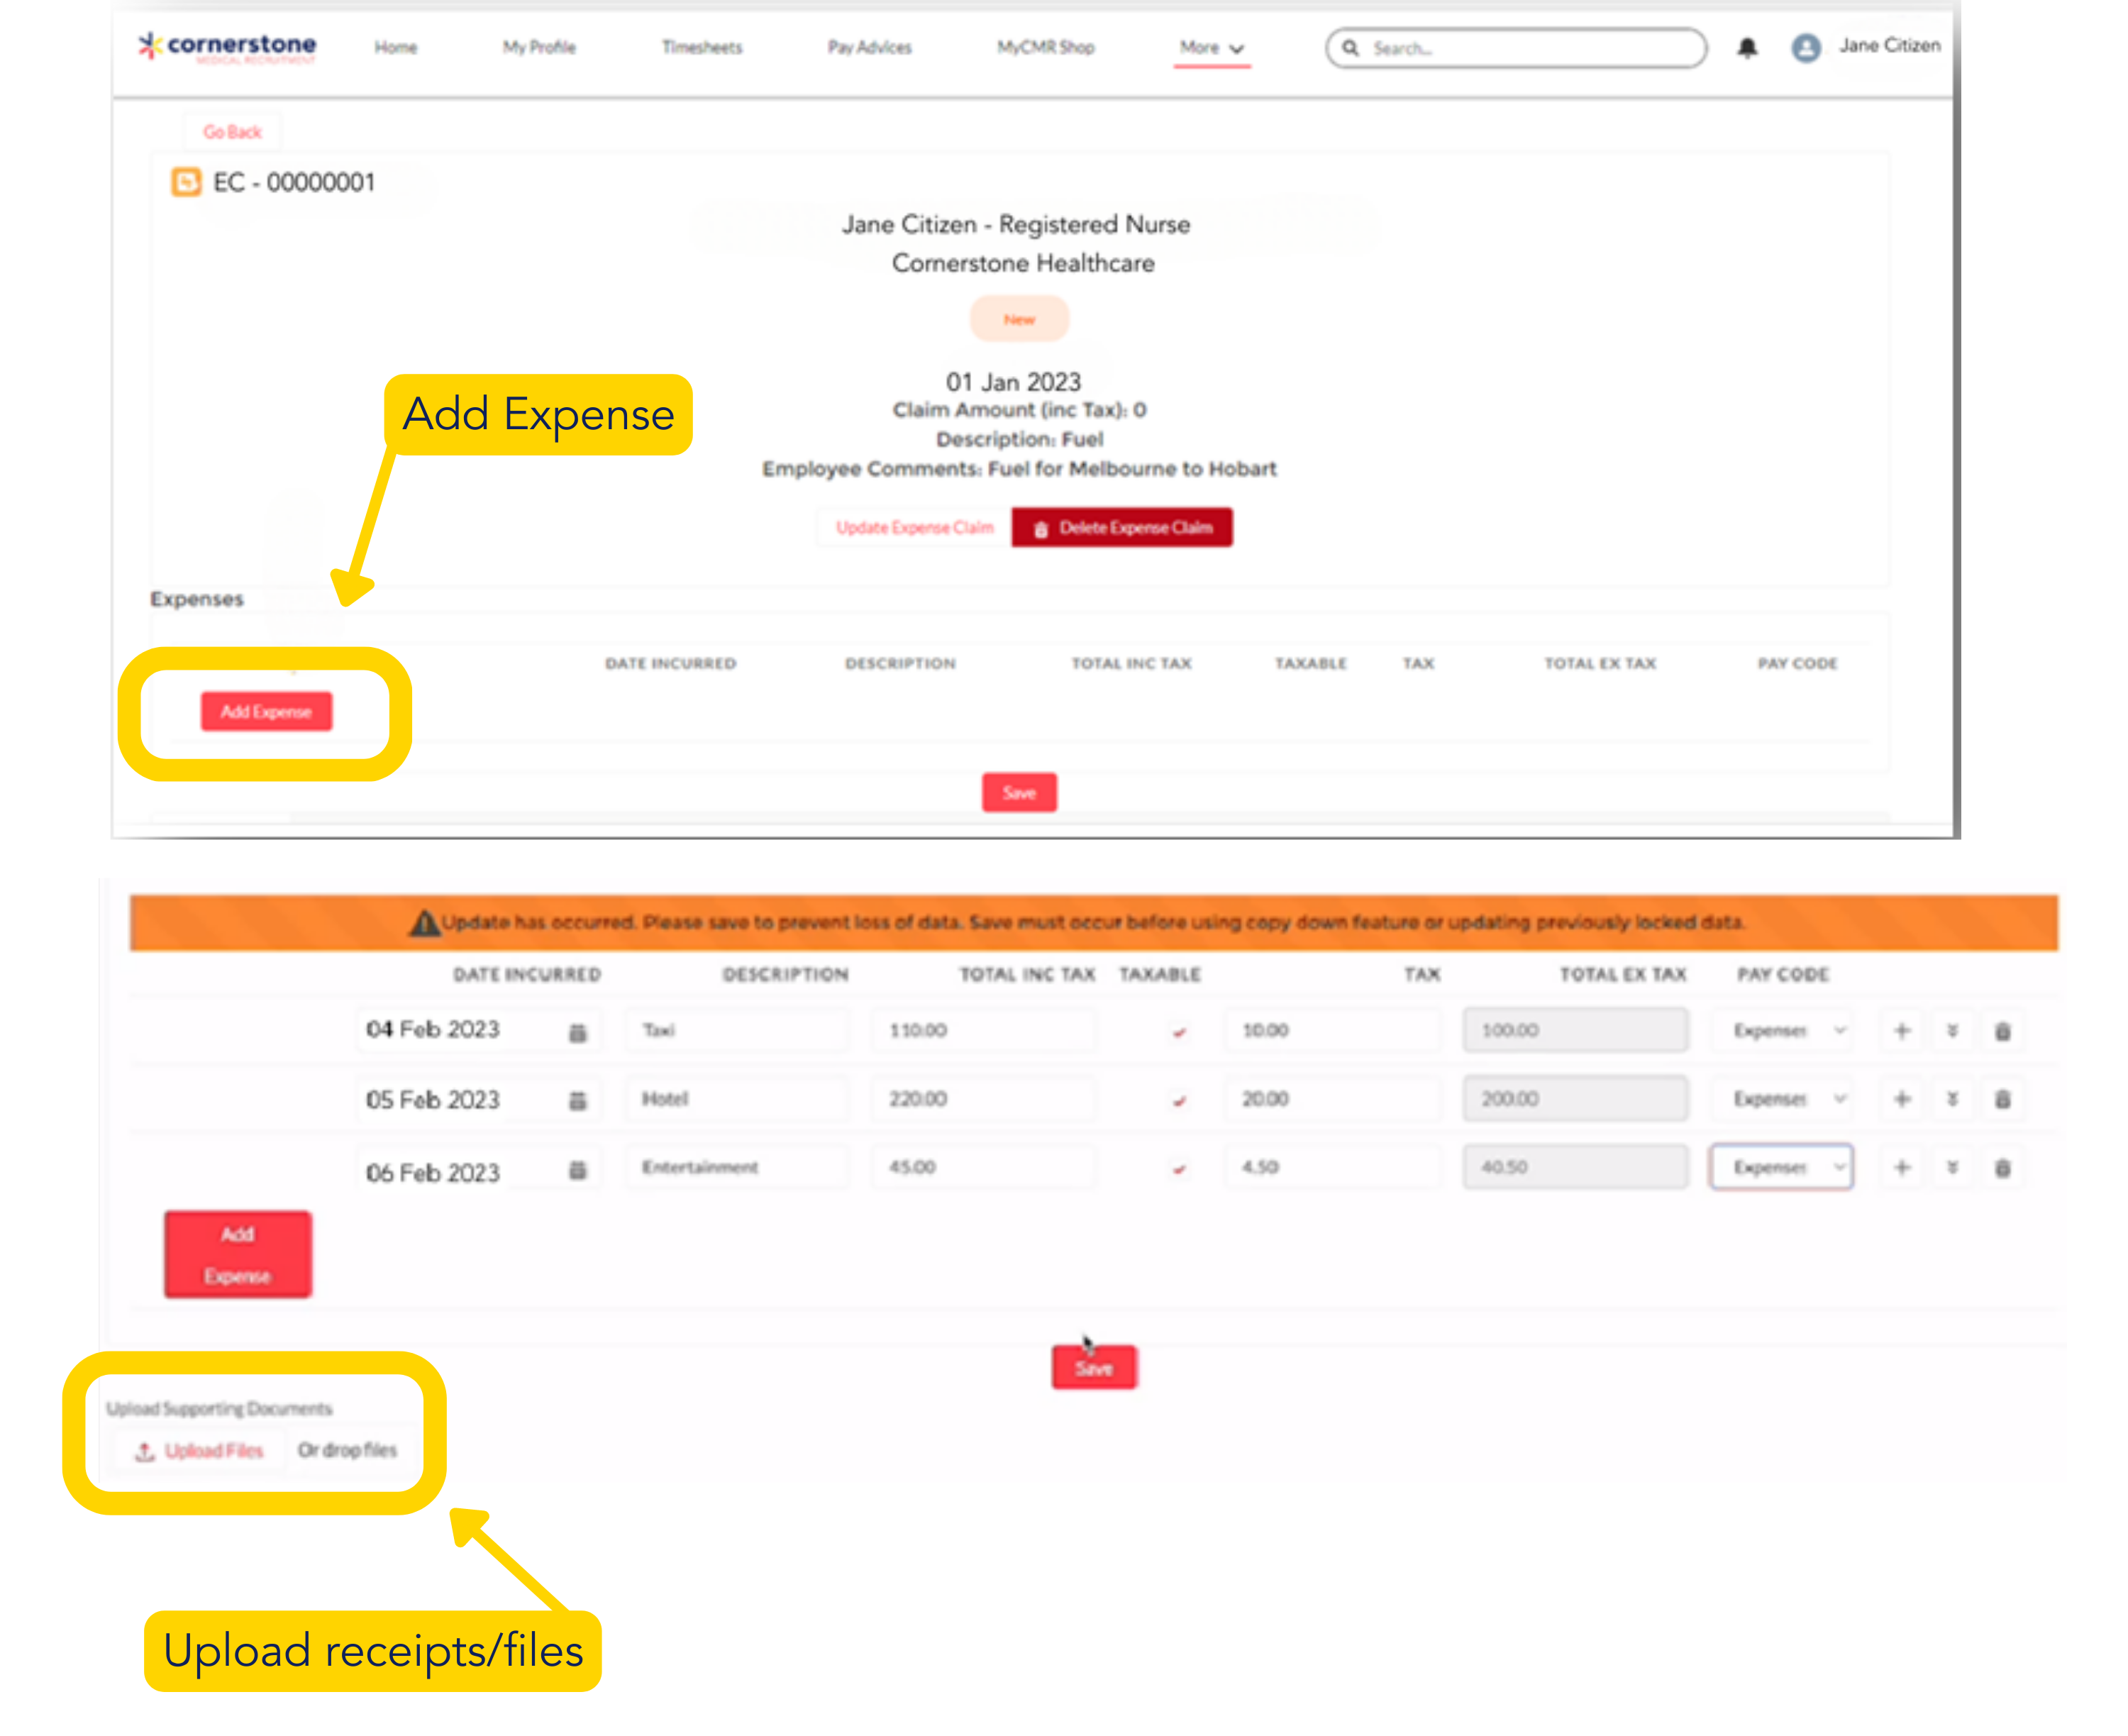
Create New Expense Claim
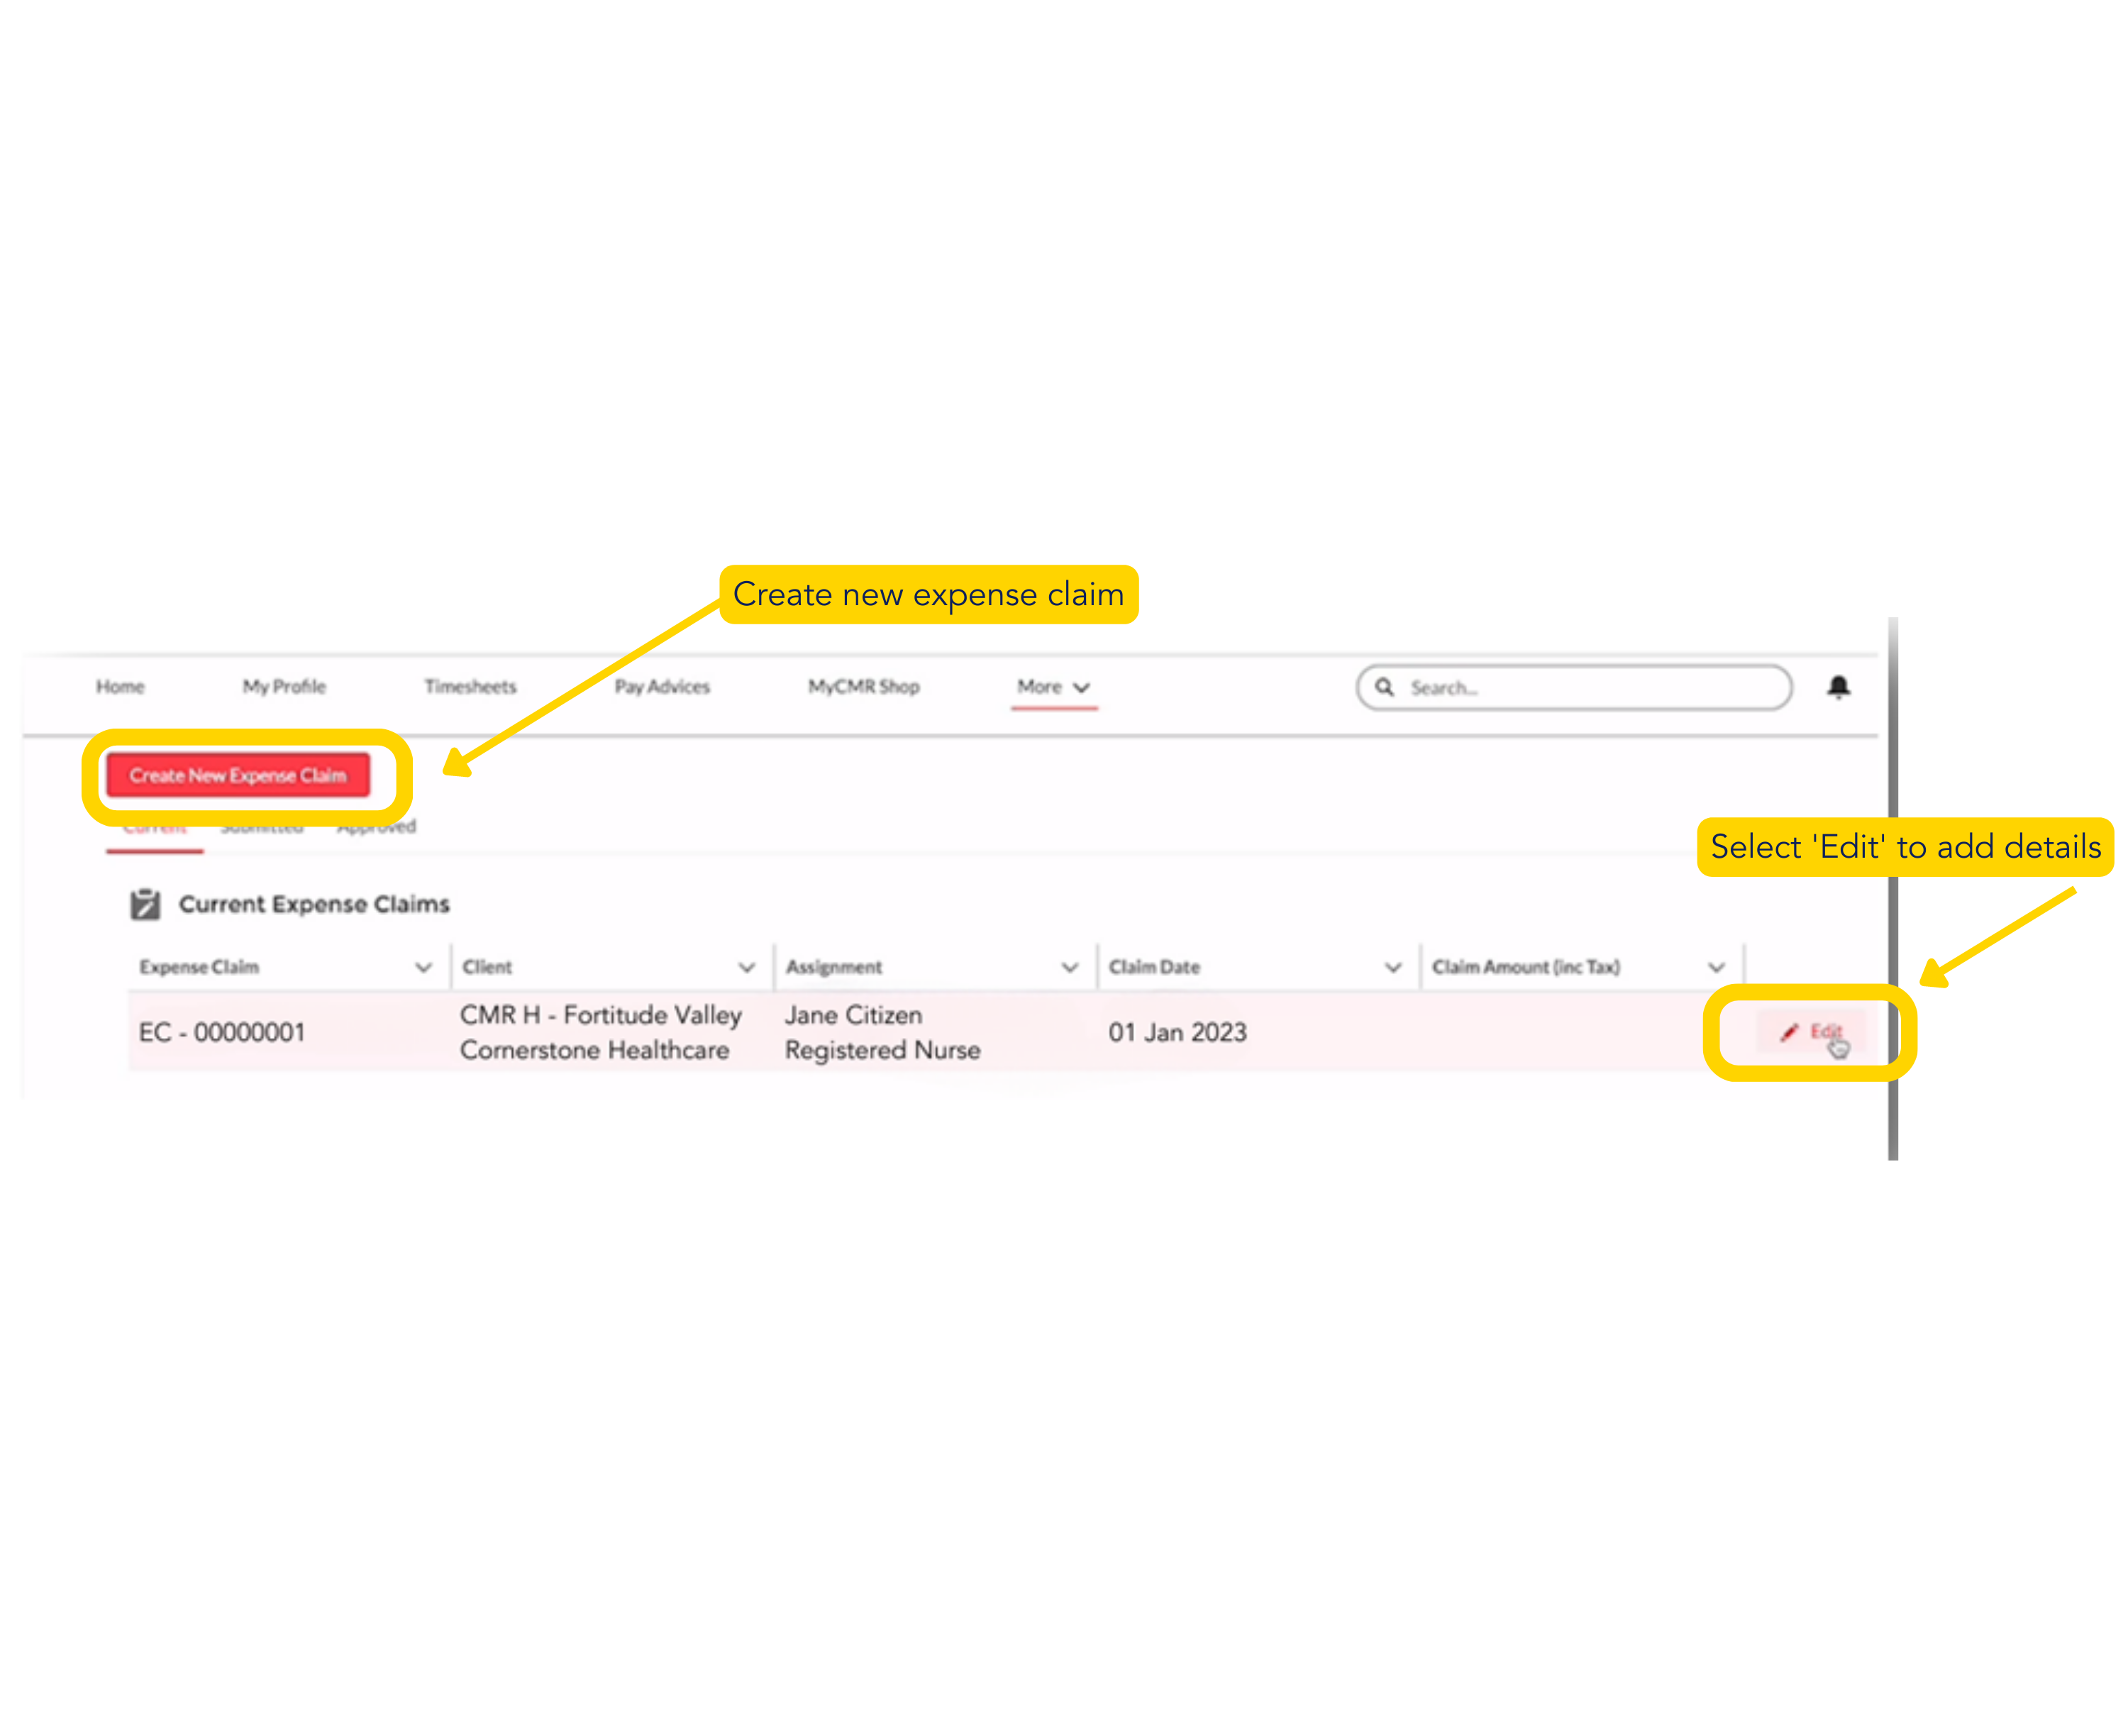
1. Select ‘Expenses’ found under ‘More’ in the mycmr portal and click ‘Create New Expense Claim.’
2. Select the ‘Assignment’ that the expense relates to and complete the ‘Claim Date’ and ‘Expense Claim Description’ (like the name of the hospital or health service the claim relates to)
3. Press ‘Save.’
The new claim will now appear under your ‘Current Expense Claims’ list. To enter details, such as receipts, select ‘Edit.’
Adding Expenses
1. Select ‘Add Expense’ to enter details of an expense you would like to claim.
2. Fill in ‘Date Incurred’, ‘Description’, ‘Total’, tick the ‘Taxable’ box, enter the tax amount and select the ‘Pay Code.’
3. To enter multiple expenses, select ‘Add Expense.’
4. Once added, always press ‘Save.’
Please note: All expenses must have a receipt, not EFTPOS summary.
5. Upload receipts by clicking on ‘Upload Files’ or dragging the file into the ‘Upload Supporting Documentation’ area.
The next page details eligible receipts.
Submitting Expenses
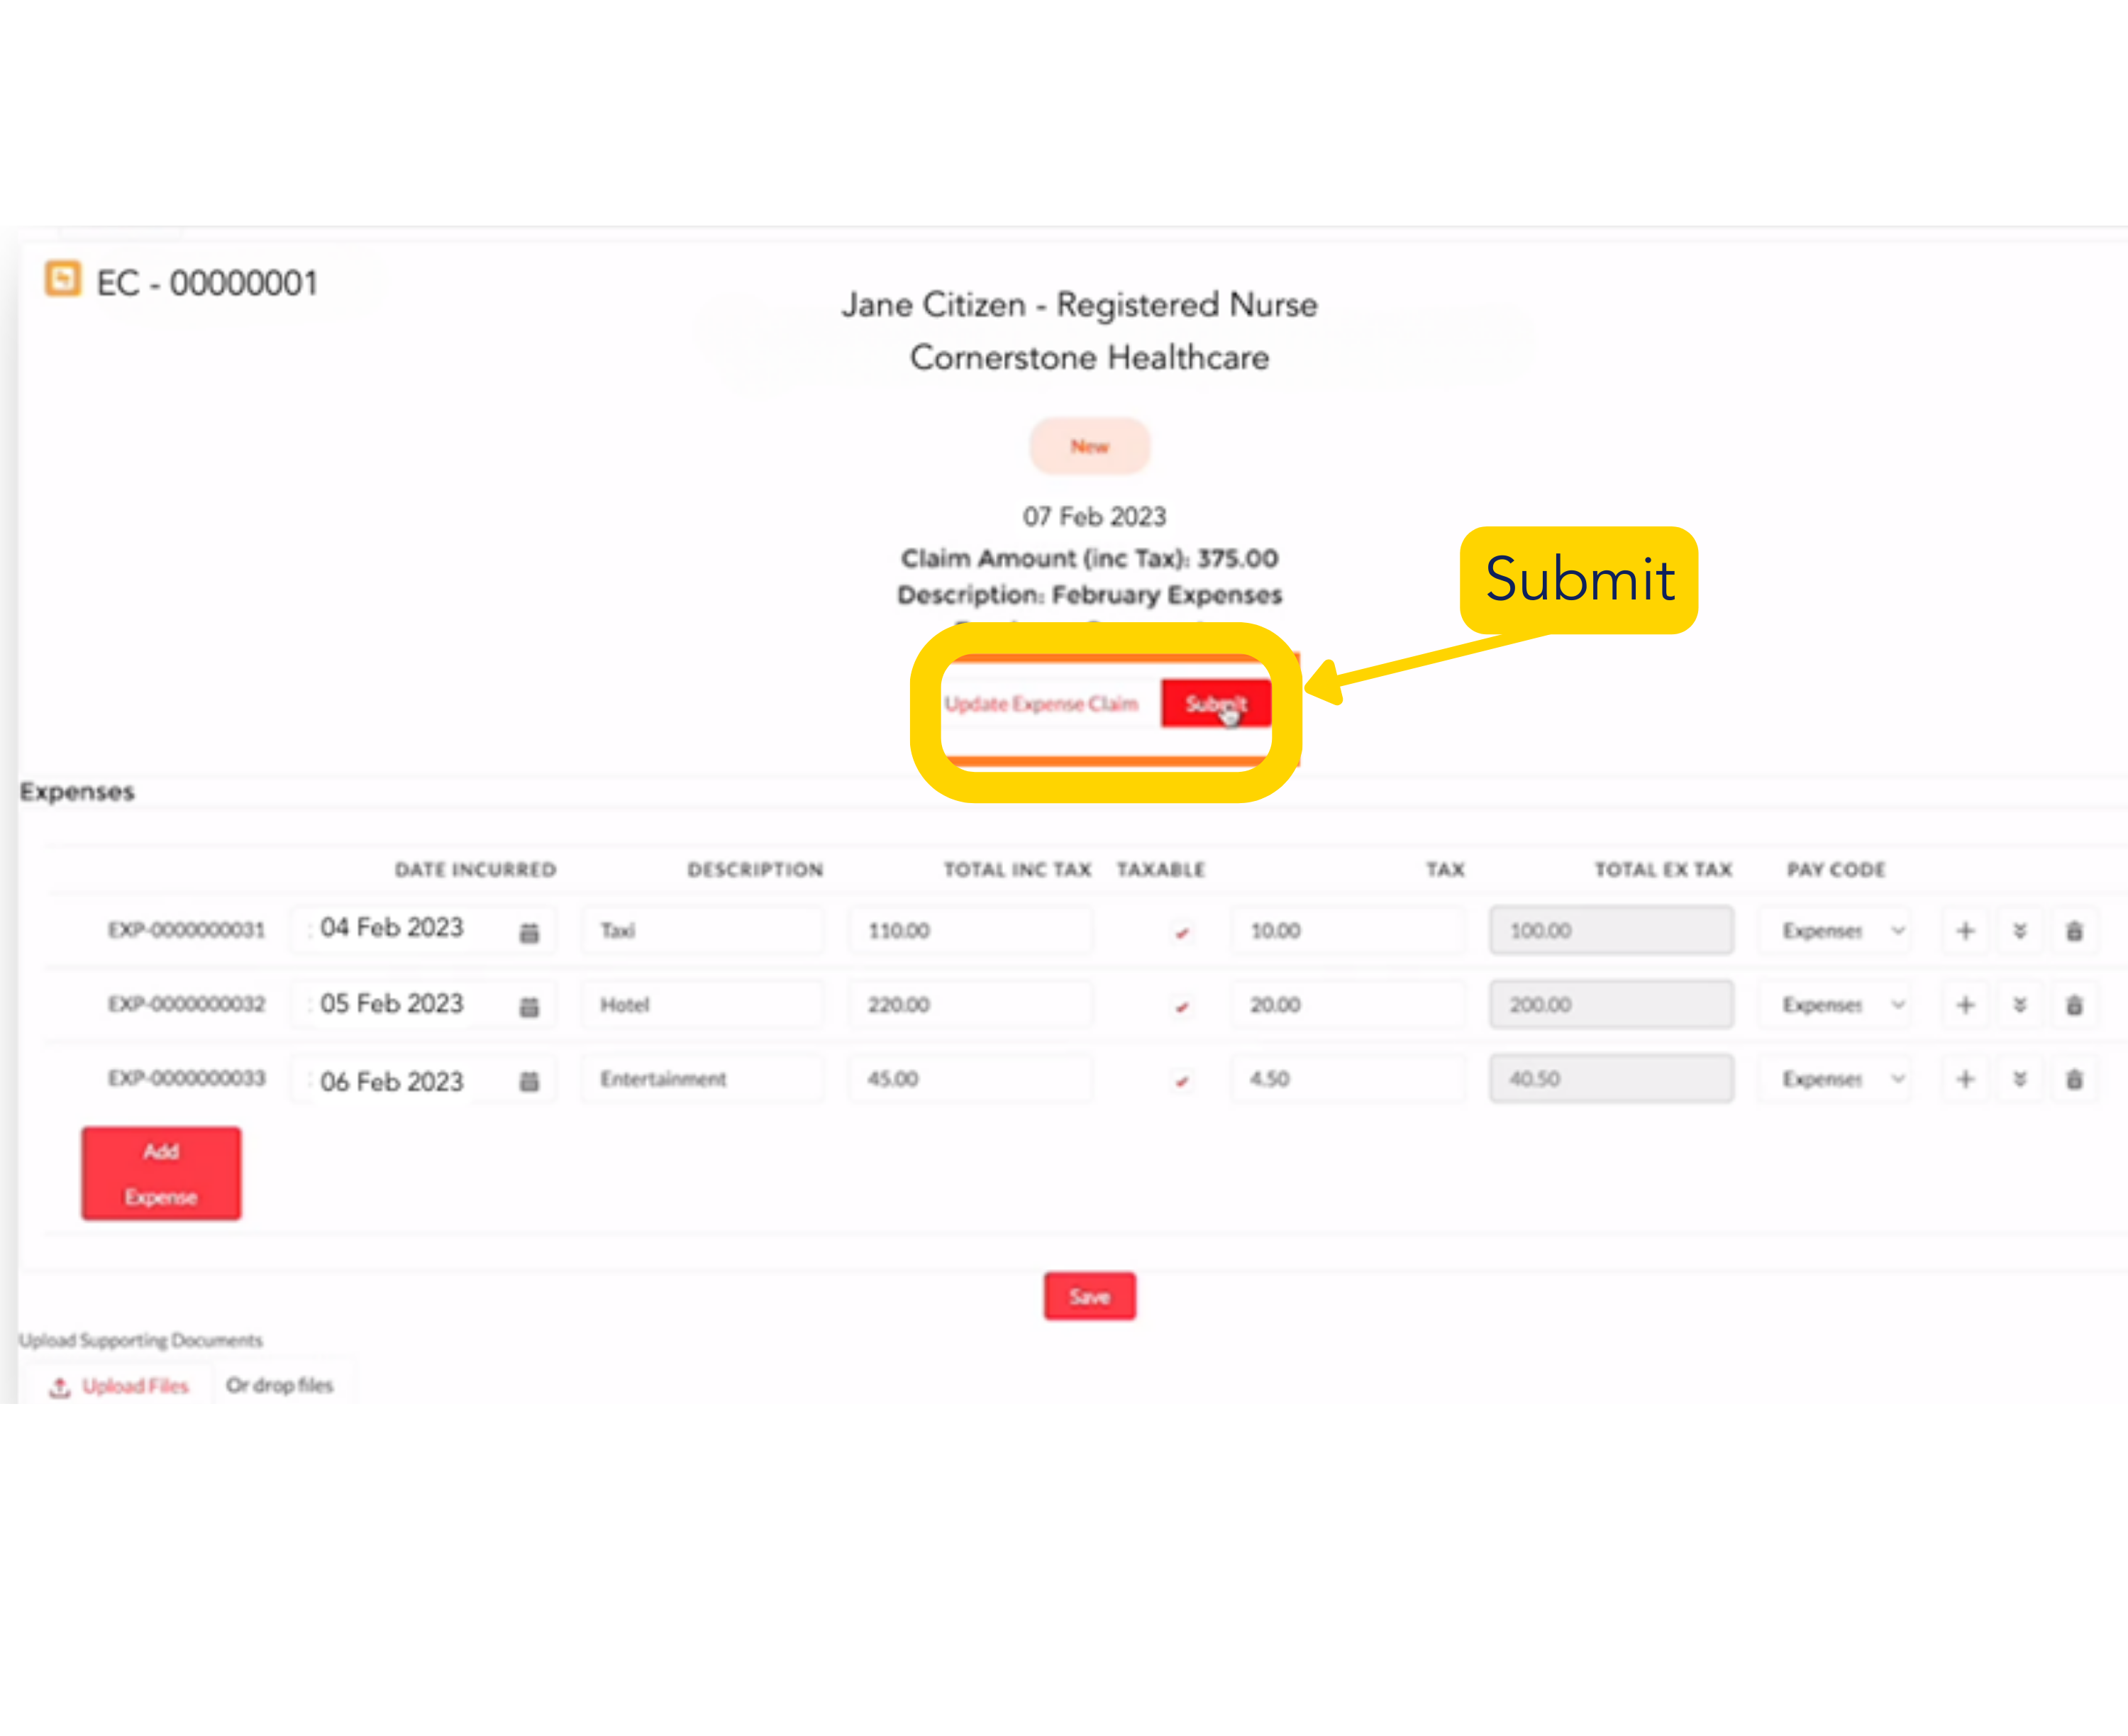
Once all expenses and corresponding receipts have been entered, click ‘Submit.’
Your expense claim will now be with the cmr team to process your reimbursement.
Back to top
Accessing Pay Advice (Payslips)
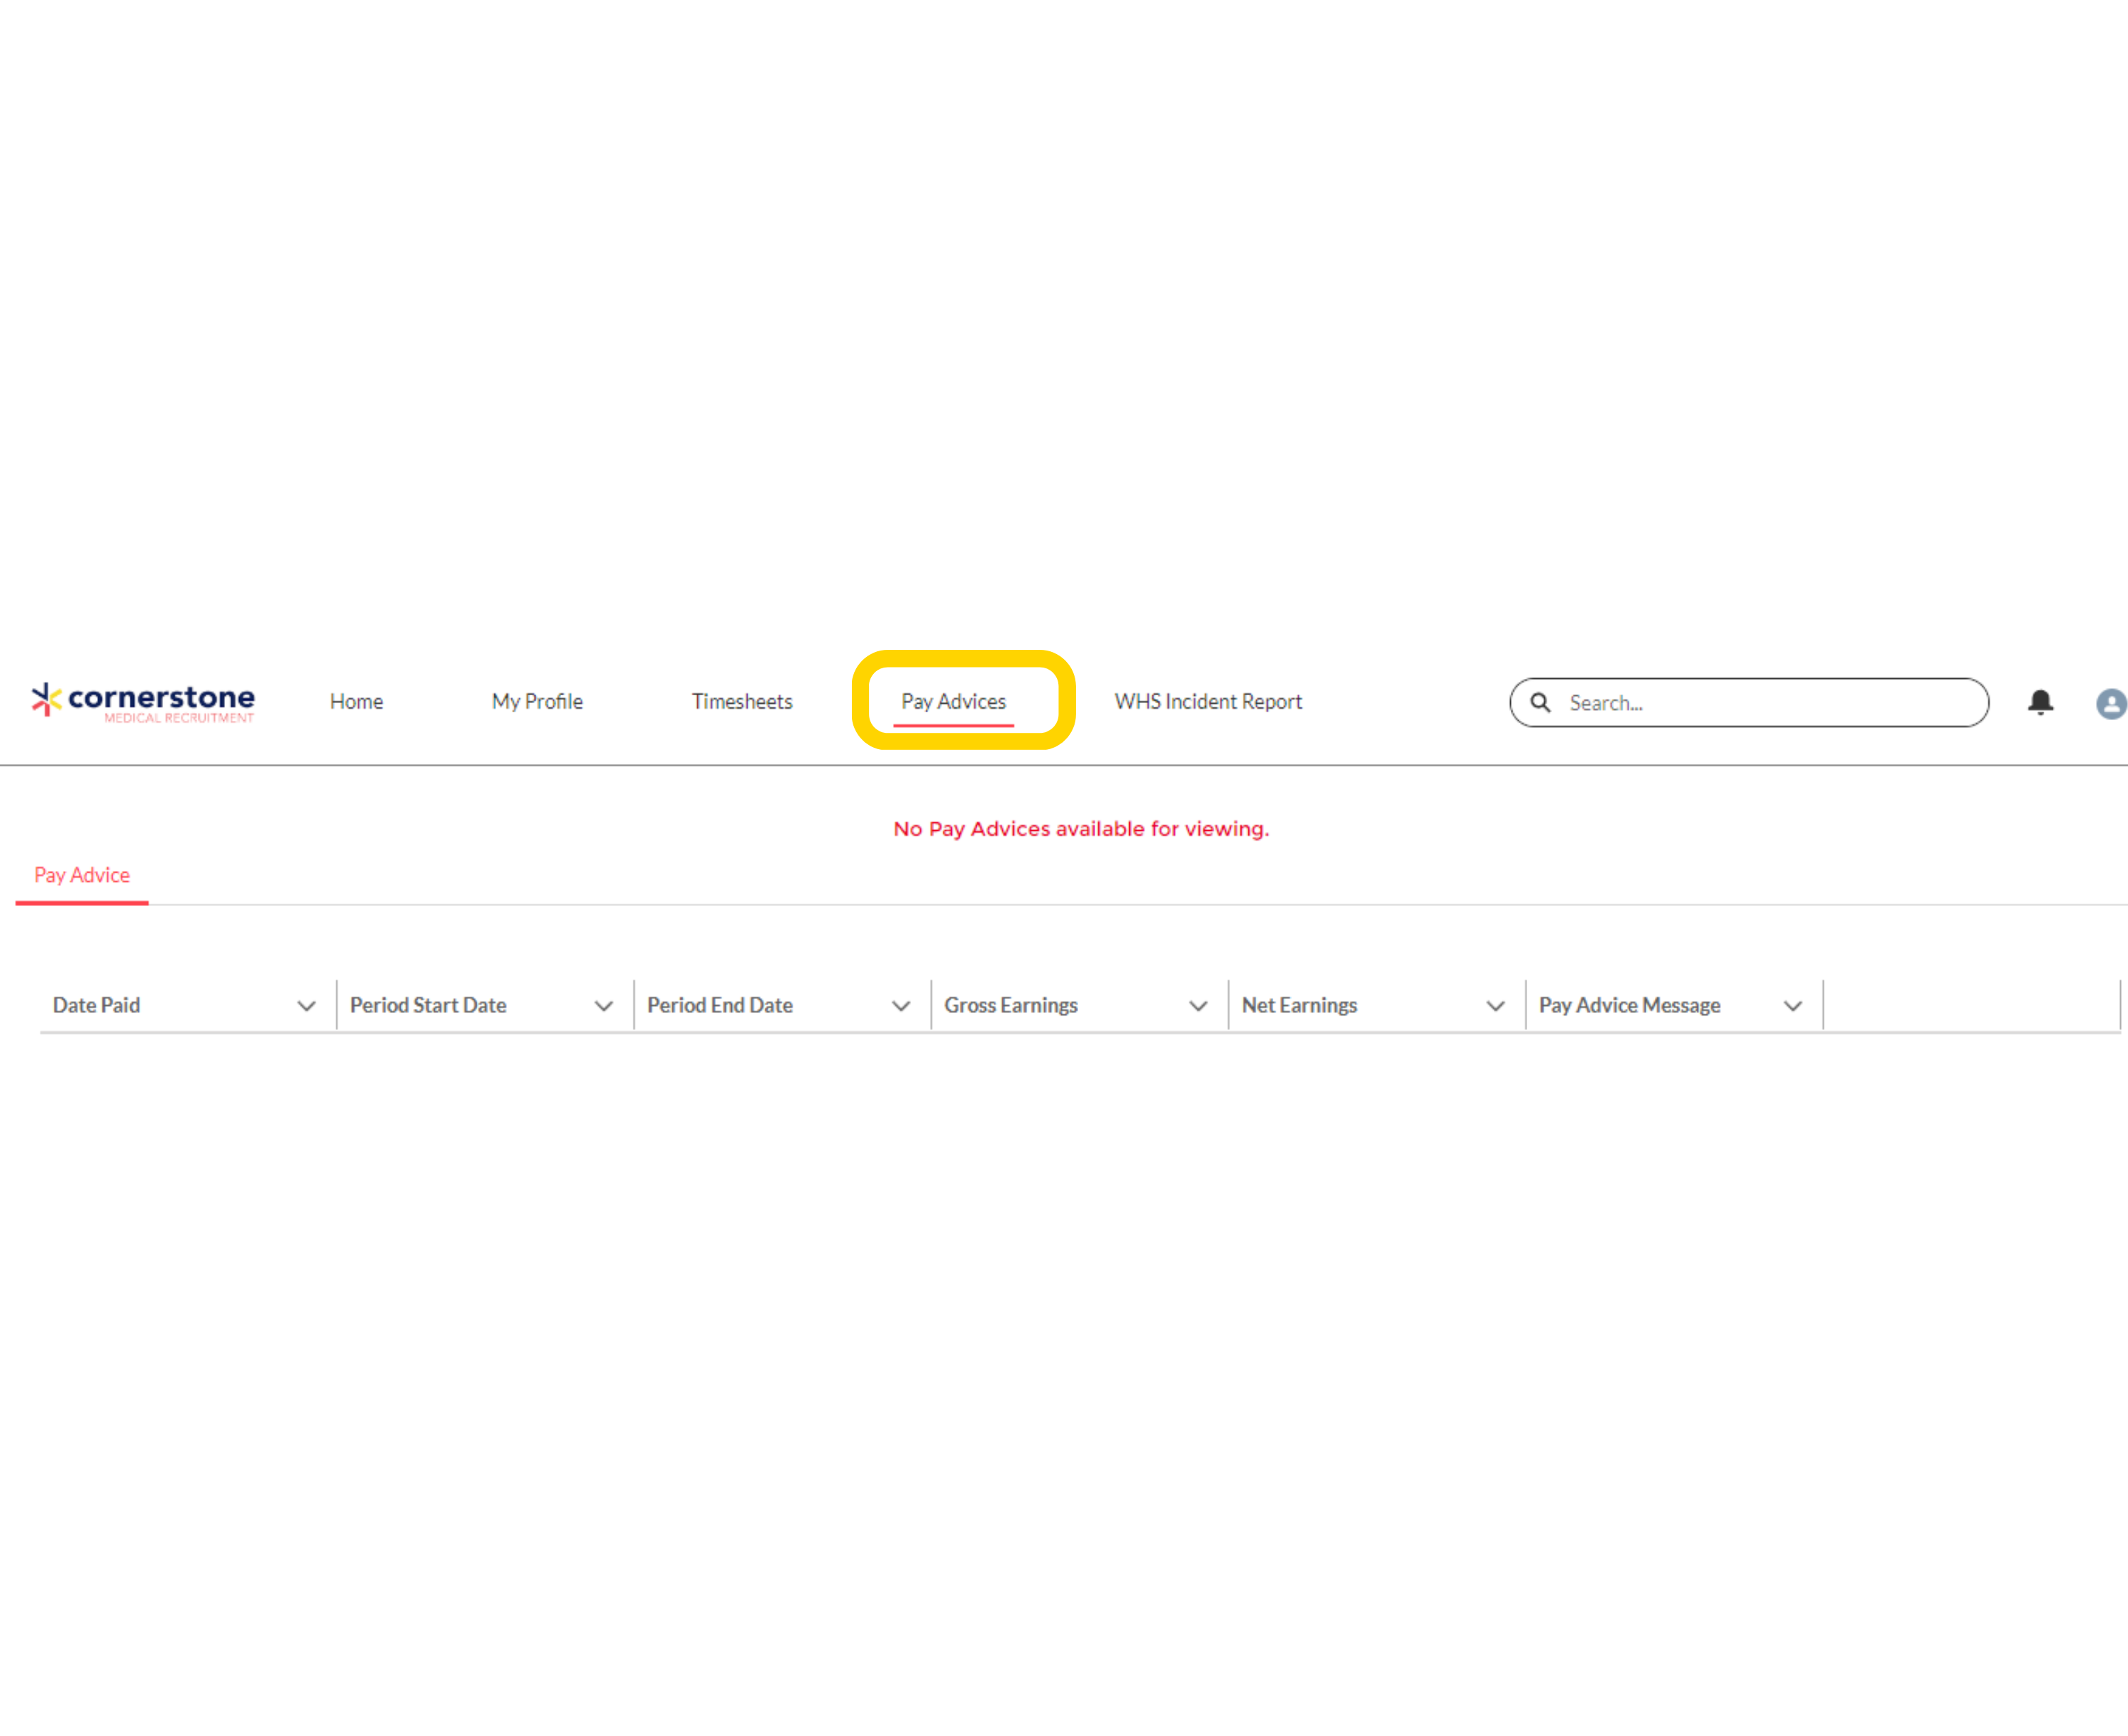
1. Select ‘Pay Advice’ from the top tab.
2. Click ‘View’ to see payslip details for that period.
Reading Your Payslip – Nursing
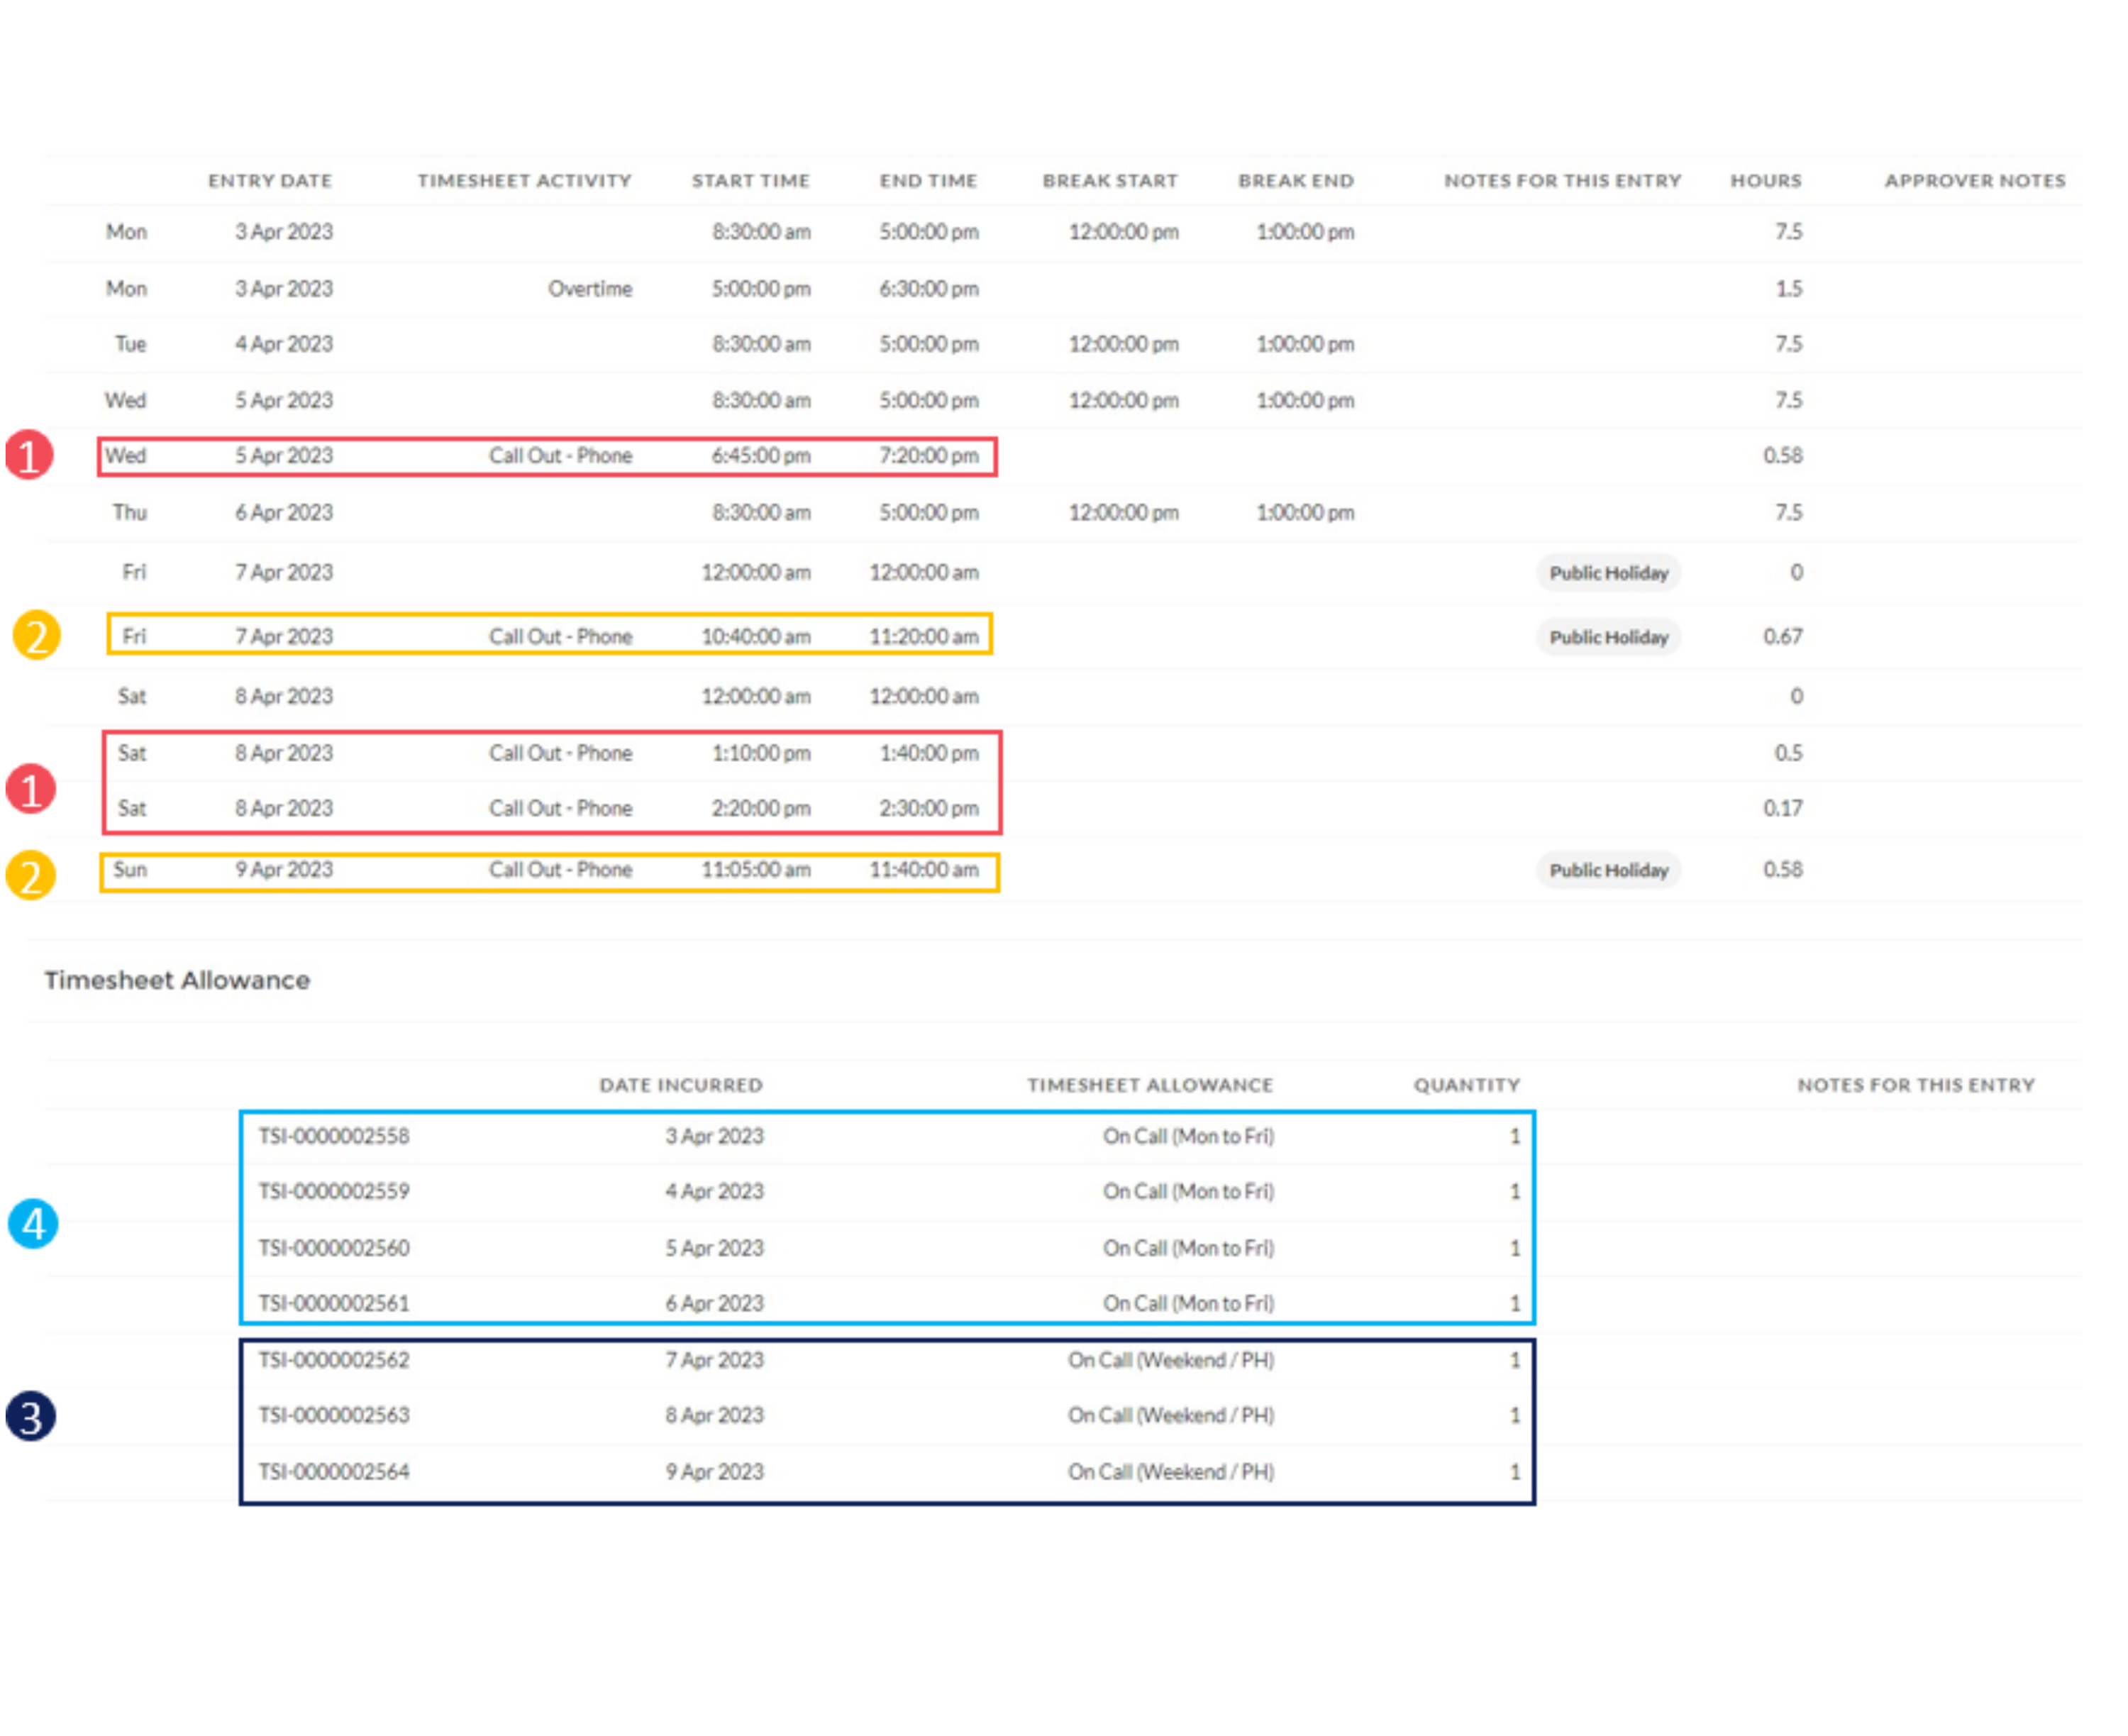
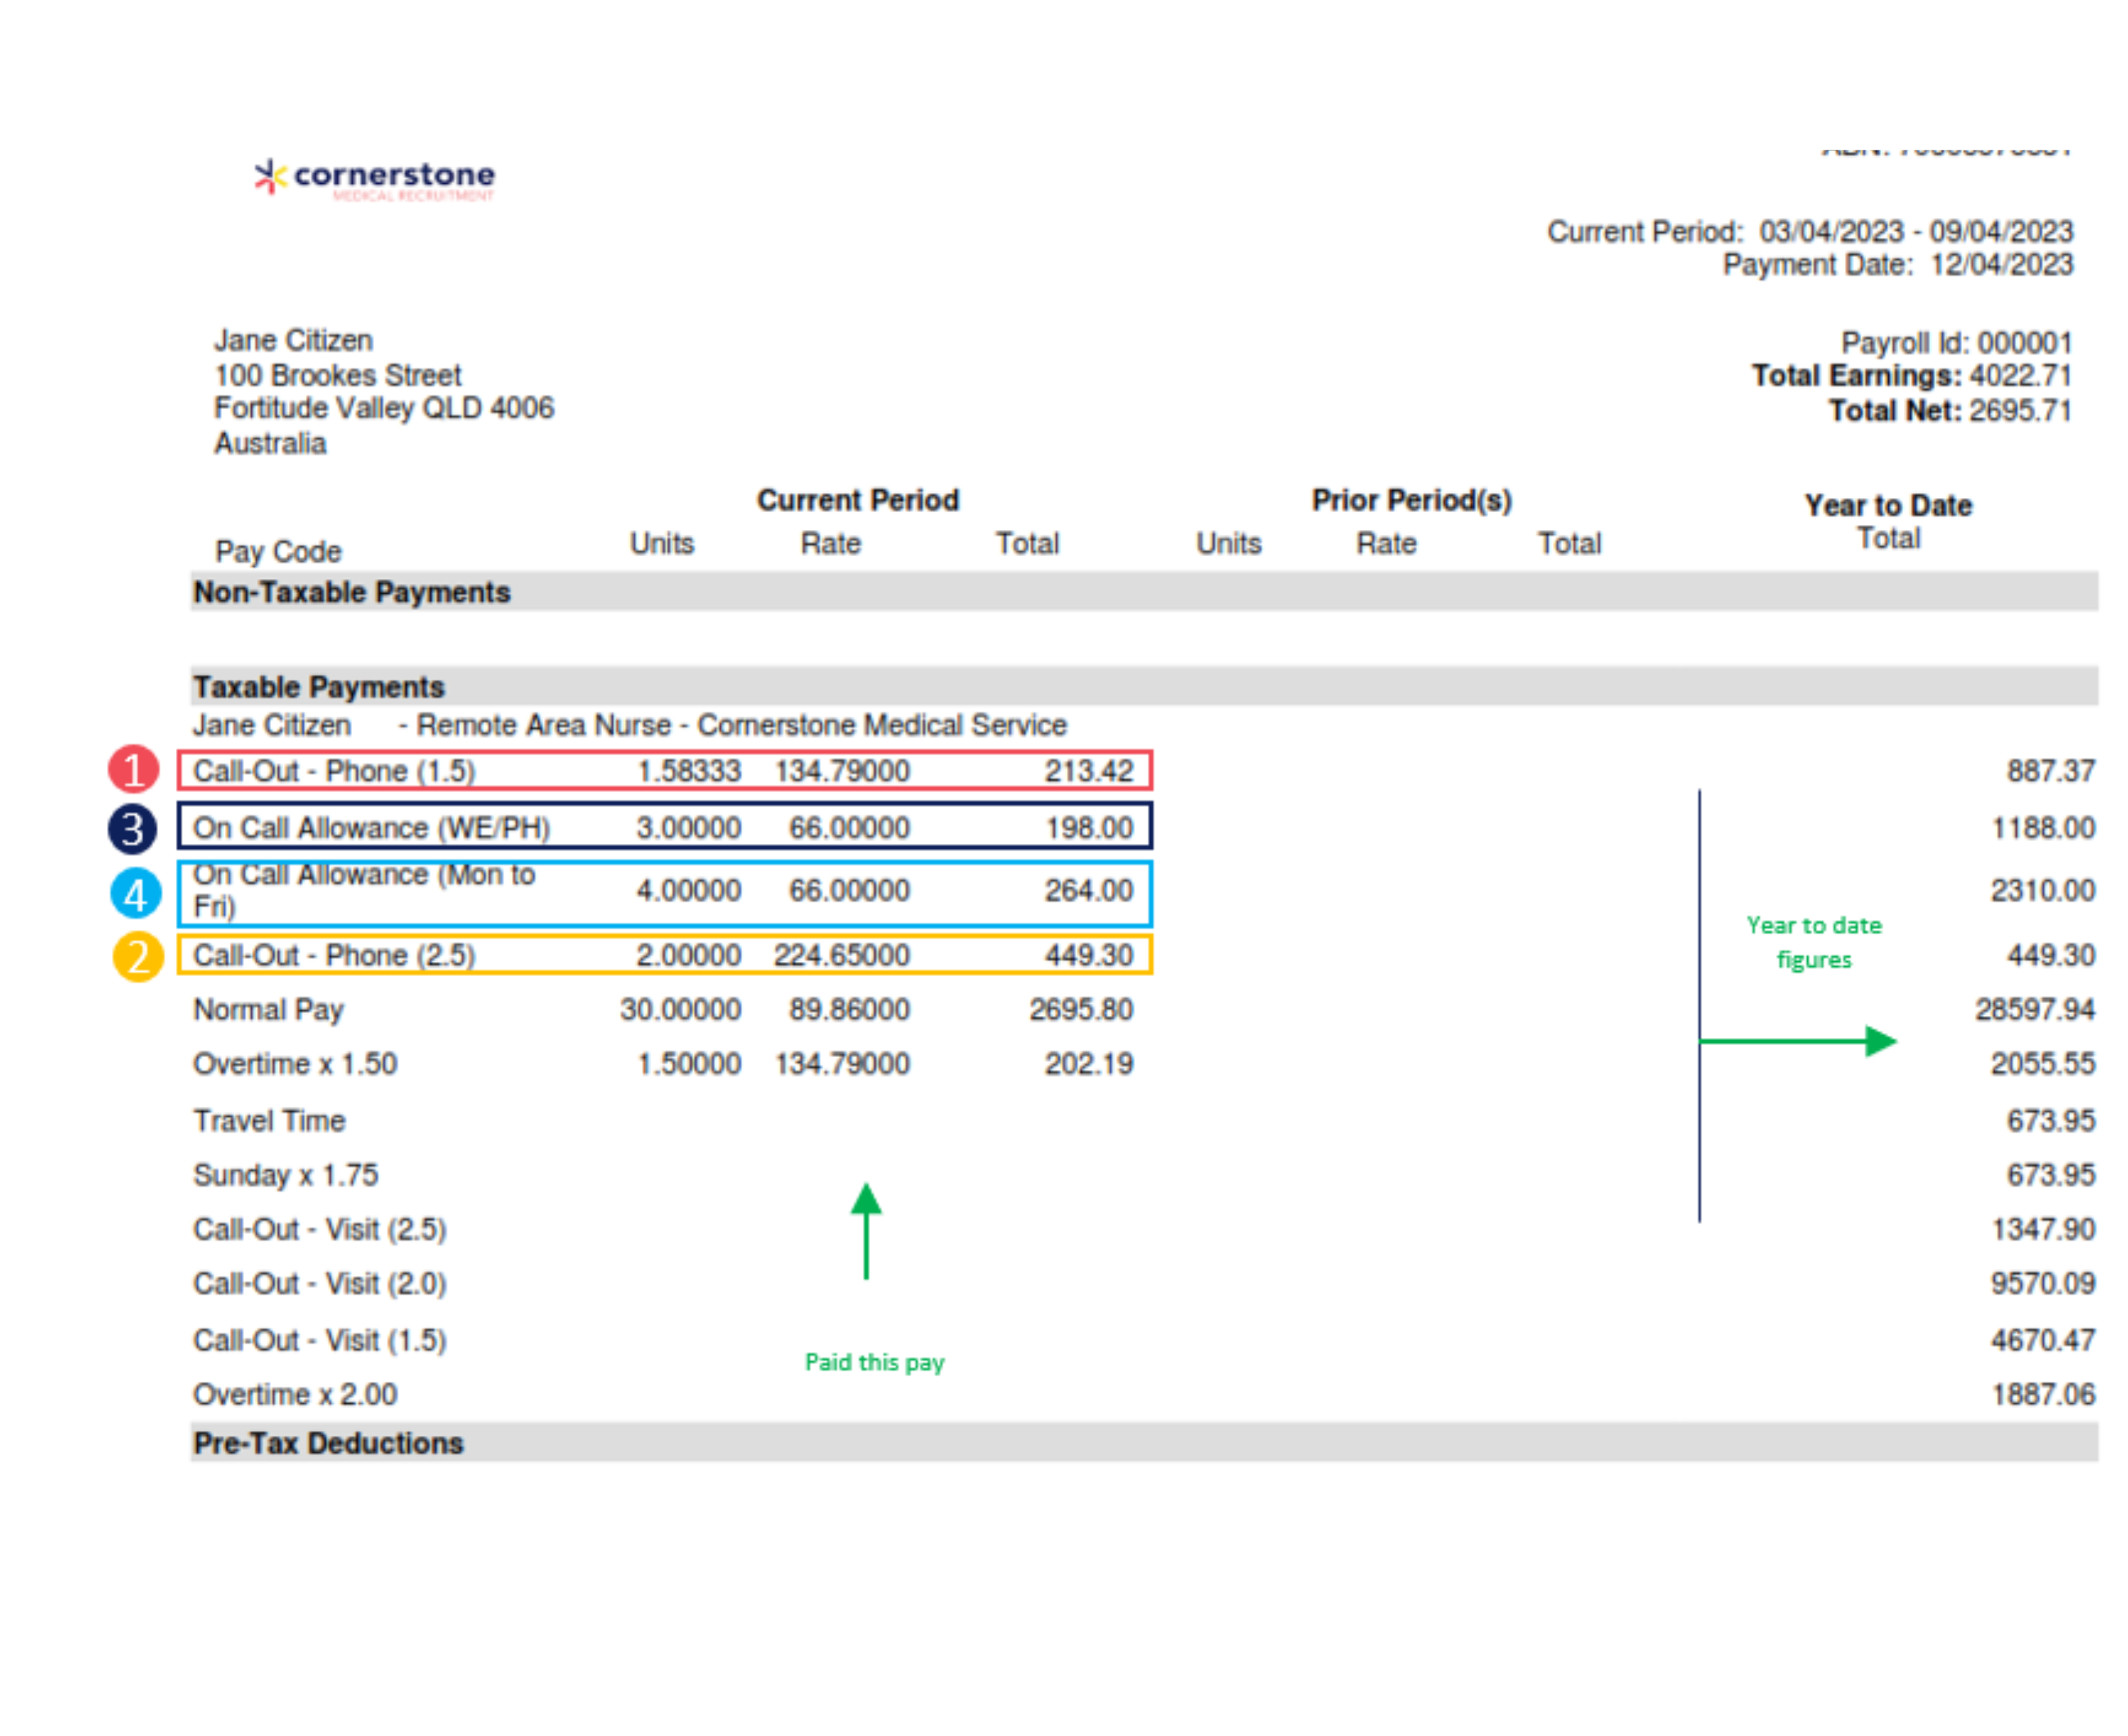
This is what your timesheet and allowances look like on mycmr. The numbers correspond with the payslip payments in the next block.
Reading Your Payslip – Nursing
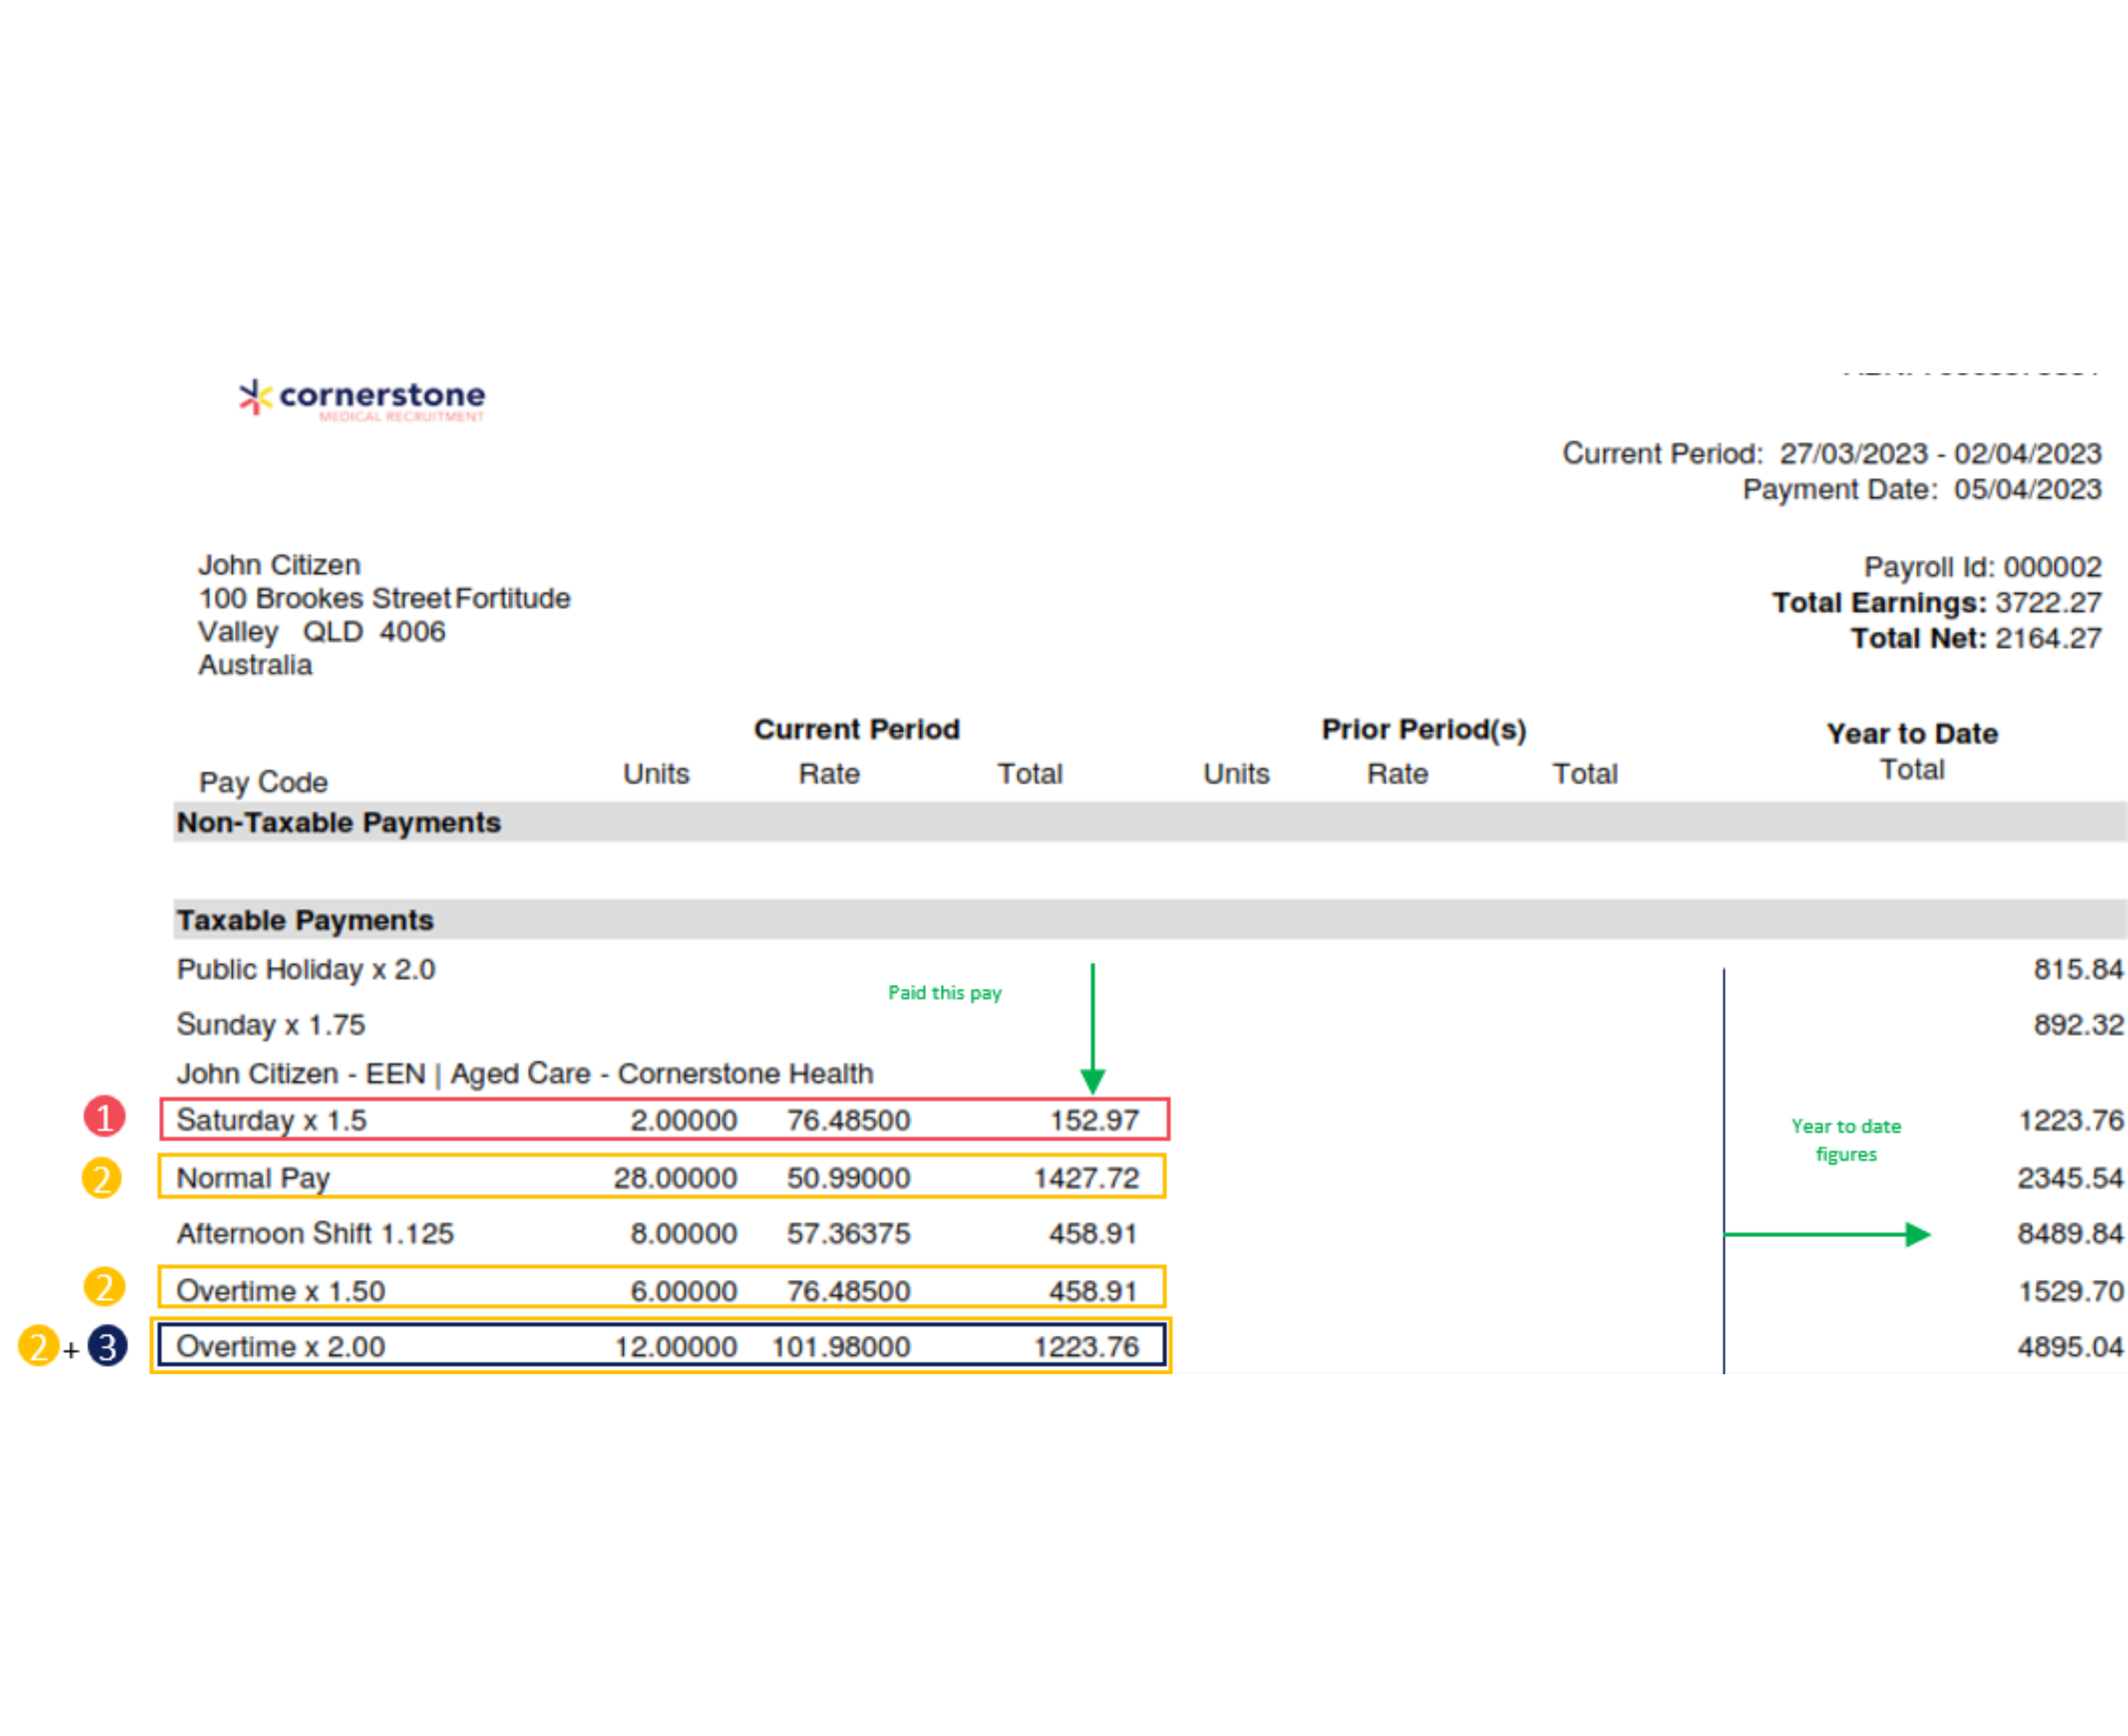
This is what your payslip will look like.
Reading Your Payslip – Aged Care
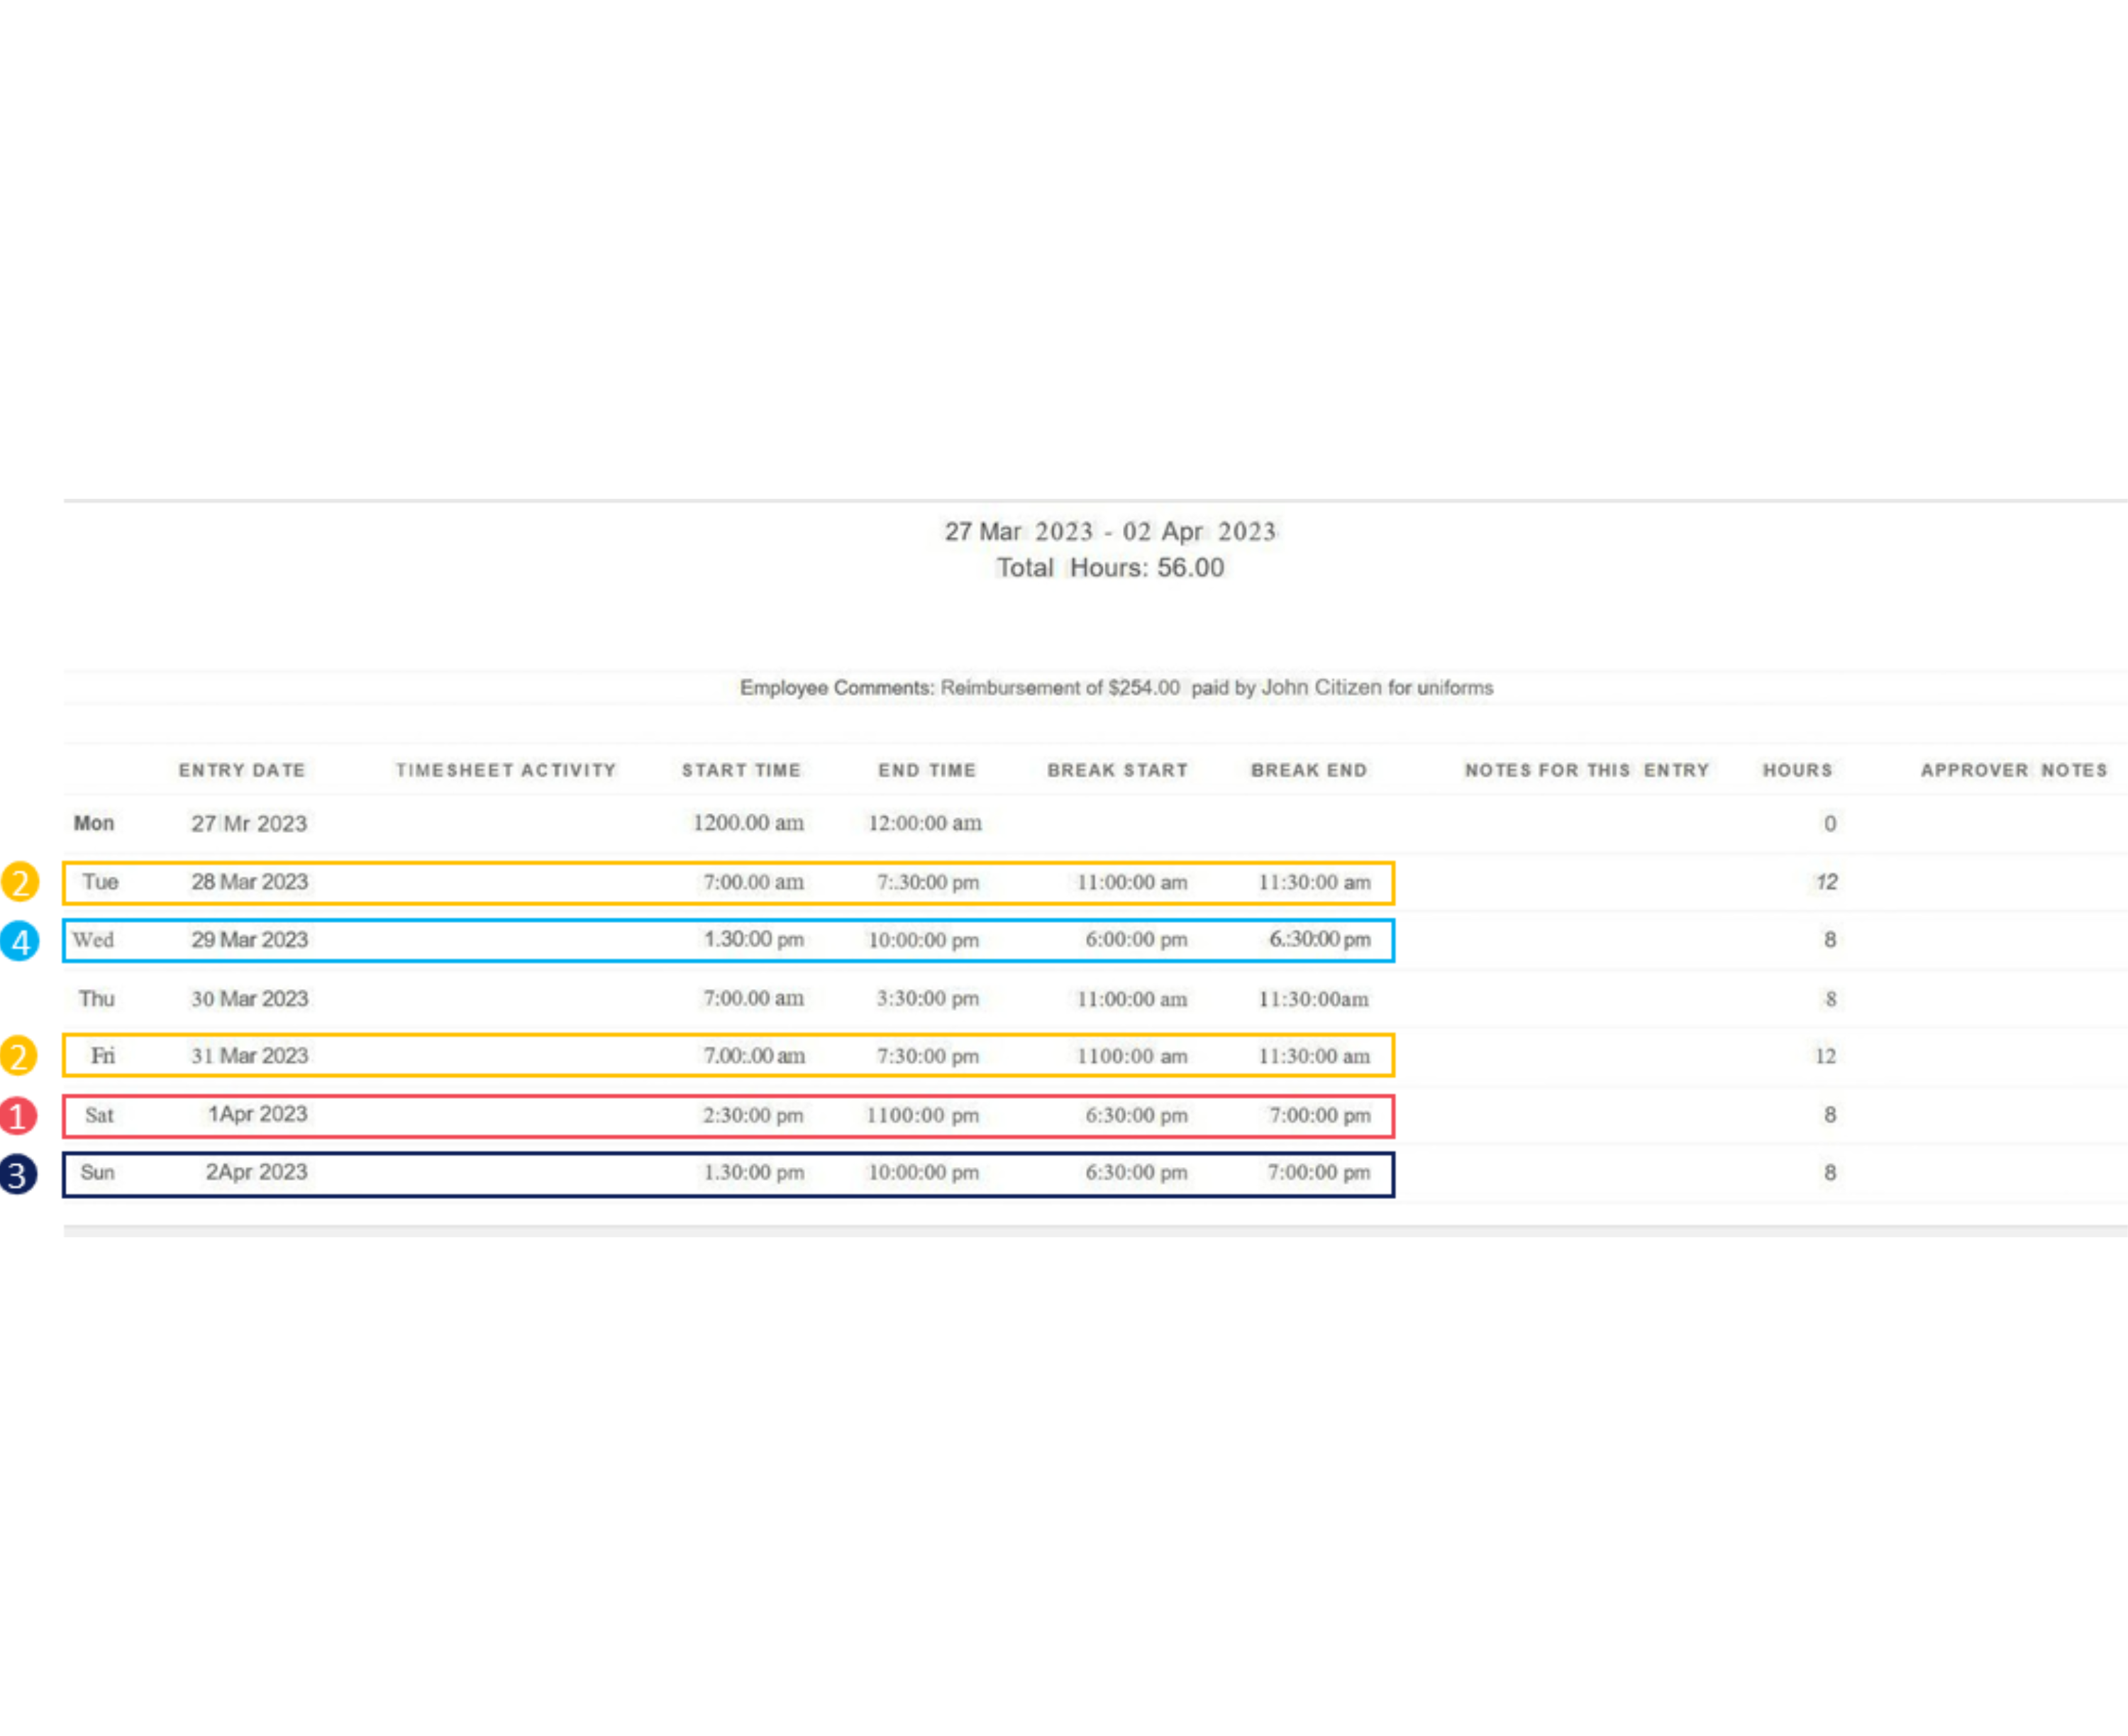
This is what your timesheet and allowances look like on mycmr. The numbers correspond with the payslip payments in the next block.
Reading Your Payslip – Aged Care
This is what your payslip will look like.
Back to top
